Side Dishes
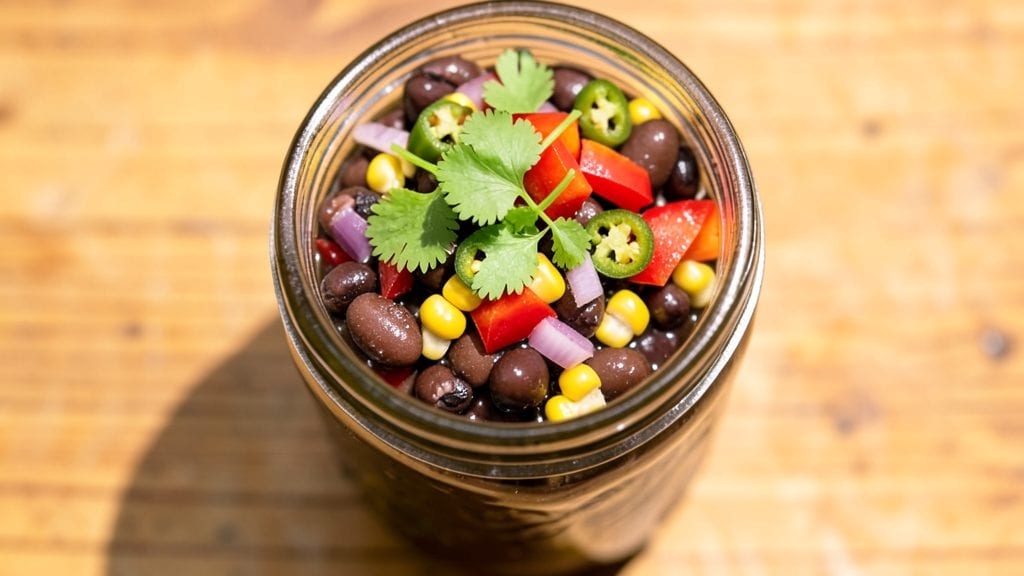
Canning black bean and corn salsa preserves the vibrant flavors of summer in every jar—perfect for extending your harvest without sacrificing freshness. This vegan-friendly recipe combines tender black beans, sweet corn, and bright vegetables into a versatile condiment that adds depth to tacos, bowls, or grilled proteins.
The key lies in proper sterilization and processing to ensure both safety and long shelf life.
What sets this recipe apart is its balance of textures and flavors—creamy beans, juicy corn, and crisp vegetables all work together in harmony. With precise ingredient ratios and step-by-step canning instructions, you’ll achieve a salsa that stays fresh for months while delivering restaurant-quality taste.
This method is ideal for those who want to stock their pantry with homemade goodness.
The process begins with sterilizing jars and lids, followed by carefully layering ingredients to maintain texture and flavor. Processing times are critical for safety, and I’ll guide you through each step to ensure your salsa is both delicious and shelf-stable.
Whether you’re a seasoned canner or a beginner, this recipe delivers foolproof results.
Once canned, your salsa can be stored in a cool, dark place for up to a year, making it perfect for gifting or meal prep. The vibrant colors and bold flavors will remind you of summer long after the season ends. Let’s get started on preserving this versatile condiment!
Ingredients for black bean and corn salsa canning
Pantry staples meet summer freshness in these jars—simple, vibrant, and packed with bold flavors.
| Ingredient | Amount | Notes |
|---|---|---|
| Black Beans 🫘 | 2 cups | Drained and rinsed thoroughly |
| Sweet Corn Kernels 🌽 | 2 cups | Fresh or frozen, thawed |
| Red Bell Pepper 🌶️ | 1 whole | Diced, seeds removed |
| Red Onion 🧅 | 1 whole | Finely diced, about 1 cup |
| Jalapeño Pepper 🌶️ | 1 whole | Seeded and finely chopped |
| Fresh Cilantro 🌿 | ½ cup | Chopped, stems removed |
| Lime Juice 🍋 | ½ cup | Freshly squeezed, about 4 limes |
| Extra-Virgin Olive Oil 🫒 | 2 tbsp | For acidity balance |
| Canned Diced Tomatoes 🍅 | 1 cup | Fire-roasted preferred |
| Garlic Cloves 🧄 | 4 cloves | Minced, for depth |
| Salt 🧂 | 1 ½ tsp | Diamond Crystal kosher |
| Cumin Seeds 🌿 | ½ tsp | Toasted for aroma |
| Pint Glass Mason Jars 🥫 | 7 whole | With new lids and rings |
The black beans are the heart of this salsa, so choose canned beans with no added salt—they hold their texture better when canned. Trader Joe's and Whole Foods carry excellent organic options, but any good-quality canned black beans work. For corn, frozen works best since it’s already prepped and consistent, but fresh corn from the cob is ideal if you're canning in peak season. The red bell pepper should be firm and vibrant—avoid any with soft spots. Jalapeños? Pick medium-hot ones for a balanced kick without overpowering. Cilantro can be divisive, so use it fresh if you love it, but dried won’t ruin the dish.
No fresh corn? Canned corn works in a pinch, but drain it well and rinse to remove excess starch. Swap the red bell pepper for roasted red peppers from a jar—just chop them finely to mimic fresh texture. Running low on lime juice? Substitute bottled lime juice, but add a pinch of salt to compensate for the lack of fresh acidity. The cumin seeds are non-negotiable for that earthy depth, but if you’re out, ground cumin at half the amount will do. For the tomatoes, fire-roasted canned tomatoes add natural sweetness, but regular diced tomatoes work fine if that’s what you’ve got. Always sterilize jars and lids—boiling water bath for 10 minutes ensures safety.
Once canned, your salsa will keep for up to 1 year in a cool, dark pantry. Store jars upright to prevent spoilage. For best flavor, let them sit for at least 24 hours before opening—this lets the flavors meld. I always label mine with the date and contents, especially if gifting. Reheat gently in a saucepan or microwave for 30 seconds before serving. The texture will soften slightly after canning, but that’s part of the charm—creamy beans and tender corn in every bite.
Why You'll Love This Recipe
- No-Fuss Assembly: I swear by this recipe because it’s the kind of thing you can throw together while chatting with a friend on the phone. Dice the onion and bell pepper, toss in the drained black beans and corn straight from the can, and—boom—you’re done. The jalapeño gets a quick chop, and if you’re feeling fancy, you can even leave the skins on for a little texture. Minimal prep, maximum flavor.
- Sweet Heat Balance: Honestly, the combo of sweet corn and smoky black beans with that bright red bell pepper is ridiculously good. The jalapeño adds just enough kick to keep things interesting without overpowering, and the red onion gives it that sharp, fresh bite. It’s the kind of salsa that makes you want to eat it straight from the jar—no apologies.
- Meal Prep MVP: This salsa keeps like a champ in the fridge, so I make a big batch on Sundays and use it all week. Spread it on toast, mix it into scrambled eggs, or serve it as a topping for grilled fish or tacos. Even better? It’s one of those rare canned goods that actually improves over time—flavors meld, and the textures get even better after a day or two.
- Budget-Friendly Staple: Between us, this recipe is my secret weapon for stretching groceries without sacrificing taste. Black beans, corn, and bell peppers are all pantry-friendly and cheap, and they last forever. Plus, you can adjust the jalapeño to your spice tolerance—no wasted ingredients here. It’s the kind of thing that makes me feel like I’m feeding my family well without breaking the bank.
Step-by-step instructions for black bean and corn salsa canning
Here's how to preserve vibrant flavors in glass while ensuring safety and texture.
Prepare All Ingredients for Even Cooking
Begin by thoroughly rinsing the 2 cups of black beans under cold water to remove any residual starch that could make your salsa gummy. Drain well and set aside. In a large mixing bowl, combine the 2 cups of sweet corn kernels, the diced red bell pepper, finely chopped red onion, seeded and chopped jalapeño pepper, and the 4 minced garlic cloves. This prep ensures even distribution of textures in your final salsa.
In a small skillet, toast the 0.5 teaspoon of cumin seeds over medium heat for 1 minute until fragrant. Immediately transfer them to your mixing bowl with the other ingredients. The toasted cumin adds depth without overpowering the natural flavors. Add the 1 cup of fire-roasted canned diced tomatoes and mix gently to distribute everything evenly.
Build Flavor with Acid and Oil
In a separate bowl, whisk together the 0.5 cup of freshly squeezed lime juice and 2 tablespoons of extra-virgin olive oil. This combination serves two purposes: the acidity helps preserve the salsa while balancing the richness of the beans and corn. Pour this mixture over the vegetable blend and stir thoroughly to coat all ingredients.
Taste the mixture and adjust seasoning with the 1.5 teaspoons of salt. You want the flavors to be vibrant but not overwhelming. This is your chance to ensure the salsa will taste fresh even after months in storage. The lime juice will also help prevent the salsa from turning color during the canning process.
Pack the Salsa into Sterilized Mason Jars
Prepare your 7 pint glass mason jars by running them through a hot water bath for 10 minutes to sterilize. While they're sterilizing, carefully pack the salsa mixture into each jar, leaving about 1 inch of headspace at the top. Use a wooden spoon to press down gently on the contents, removing any air bubbles that could cause spoilage.
Wipe the rims of the jars with a clean, damp cloth to remove any residue that could prevent proper sealing. This step is crucial for creating an airtight seal that preserves both flavor and safety. Place the lids on the jars and screw on the rings until they're fingertip tight—just until you can no longer turn them by hand.
Process the Jars for Safe Preservation
Place the filled jars into a canning pot and cover with hot water, ensuring the jars are completely submerged by at least 1 inch. Bring the water to a rolling boil and process the jars for 90 minutes. This extended processing time ensures the acidity is sufficient to prevent bacterial growth while maintaining the vibrant colors and textures.
After processing, carefully remove the jars using tongs and place them on a clean towel to cool completely. You'll hear the lids pop as they seal—this is your confirmation that the canning was successful. Let the jars cool undisturbed for 12 hours before checking the seals by pressing down on the center of each lid. If it doesn't pop back up, your salsa is properly preserved.
Pro Tips For Making Black Bean And Corn Salsa Canning
- CHAR THE ONIONS: Slice the red onion thin and cook it in a dry skillet over medium-high heat until the edges turn golden brown—about 5-7 minutes. That caramelized flavor is the thing that matters most in this salsa, and skipping it means missing the depth. (Yes, even if you're impatient like me.)
- DRAIN BEANS WELL: After cooking the black beans, give them a thorough cold-water rinse and drain them in a colander for at least 2 minutes. Canned beans hold onto too much starch, which can turn your salsa gluey when canning. I learned this the hard way—three batches of mushy salsa taught me.
- PACK CORN LAST: Hold off on adding the corn kernels until the very end of the canning process, right when you’re sealing the jars. Corn releases moisture quickly and can dilute the flavors or even cause jars to fail if packed too early. My grandmother swore by this, and she was right: the texture stays bright and the salsa holds up better during storage.
- STERILIZE JARS HOT: Place your cleaned jars and lids in a pot of boiling water for 10 minutes before filling them—no exceptions. Cold jars can cause seals to fail, and you’ll end up with spoiled salsa. I was skeptical until I tried it; now I double-check this step every time. (Your future self will thank you.)
Flavor customization for this recipe
Spicy Heat Boost
For those who love a kick, add 1-2 tablespoons of hot sauce (like Cholula or Valentina) directly to the salsa mixture before canning. For extra heat, swap the jalapeño for 2-3 serrano peppers (seeds in for maximum spice) or add 1 teaspoon of cayenne powder.
I like to include 1-2 slices of ghost pepper for a slow-building, fiery finish—just remove them before serving if you prefer a milder heat. 🌶️
Smoky Depth Addition
Infuse your salsa with smoky flavor by adding 1 tablespoon of liquid smoke (like Traeger’s) to the lime juice and olive oil mixture.
For a more authentic approach, char 1 red onion and 1 red bell pepper directly over a gas flame or under a broiler until blackened in spots, then chop and add to the mix. Toasted 1 teaspoon of smoked paprika also works beautifully.
This technique mimics the smoky char of traditional Mexican street corn salsas.
Sweet and Tangy Twist
Balance the earthiness of black beans with 1-2 tablespoons of honey or agave nectar, especially if you’re using extra lime juice for acidity. For a tropical twist, stir in ½ cup of finely diced mango or pineapple (packed in juice) before canning.
A splash of 1 tablespoon of apple cider vinegar brightens the flavors and enhances preservation. This variation works wonderfully as a topping for tacos or grilled fish.
Herbaceous Freshness
Elevate the freshness by adding ¼ cup of chopped fresh basil or cilantro stems (finely chopped) to the salsa mixture. For a Mediterranean flair, incorporate 2 tablespoons of chopped fresh oregano or thyme.
If you’re feeling adventurous, try 1 tablespoon of chopped mint for a refreshing contrast. These herbs add layers of aroma and complexity that stand up well to canning. 🌿
Creamy Texture Upgrade
For a richer mouthfeel, blend ½ cup of avocado (peeled and pitted) directly into the salsa mixture before canning. Alternatively, stir in ¼ cup of Greek yogurt or vegan coconut yogurt after processing to add creaminess.
If you prefer a smoother texture, lightly mash ½ of the black beans before mixing everything together. This variation is perfect for dipping chips or topping nachos.
Regional Fusion Ideas
Give your salsa a Southwest twist by adding ½ cup of diced roasted zucchini and 1 teaspoon of ground coriander. For a Caribbean-inspired version, swap the lime juice for orange juice and add 1 teaspoon of allspice.
A Mexican street corn adaptation includes ½ teaspoon of chili powder and 1 tablespoon of cotija cheese (or vegan feta) crumbled on top after opening. Each variation keeps the canning process intact while offering a unique flavor profile. 🗺️
Nutrition facts
Frequently asked questions
Can I use frozen corn instead of fresh?
Frozen corn works perfectly—just thaw it first and drain any excess liquid. The texture will be slightly softer after canning, but it still holds up well. For best results, squeeze out any moisture with a paper towel before mixing with other ingredients to prevent watery salsa.
How do I adjust the spice level for kids?
Remove the jalapeño seeds and membranes before chopping to reduce heat, or omit it entirely. For extra mildness, swap the jalapeño for 1 teaspoon of mild green bell pepper instead. Always taste the mixture before canning to ensure safety and flavor balance.
Why does my salsa turn dark after canning?
This happens when the acidity isn't balanced or if the jars weren't properly sealed. The lime juice and olive oil combo should prevent this, but if it occurs, add 1 extra tablespoon of lime juice per pint jar before processing. Always use tested recipes and follow processing times to maintain color and safety.
Can I reuse canning jars from last year?
Yes, but only if the lids are new. Reuse the glass jars after washing, but never reuse lids or rings—they only seal once. Sterilize jars again in boiling water for 10 minutes before refilling. This ensures a proper seal and prevents contamination.
How long can I store this salsa after opening?
Once opened, refrigerate and consume within 7 days. For longer storage, freeze in airtight containers for up to 3 months. The texture will soften further, but the flavors remain vibrant. Always check for spoilage signs (off smells, mold) before eating.