Side Dishes
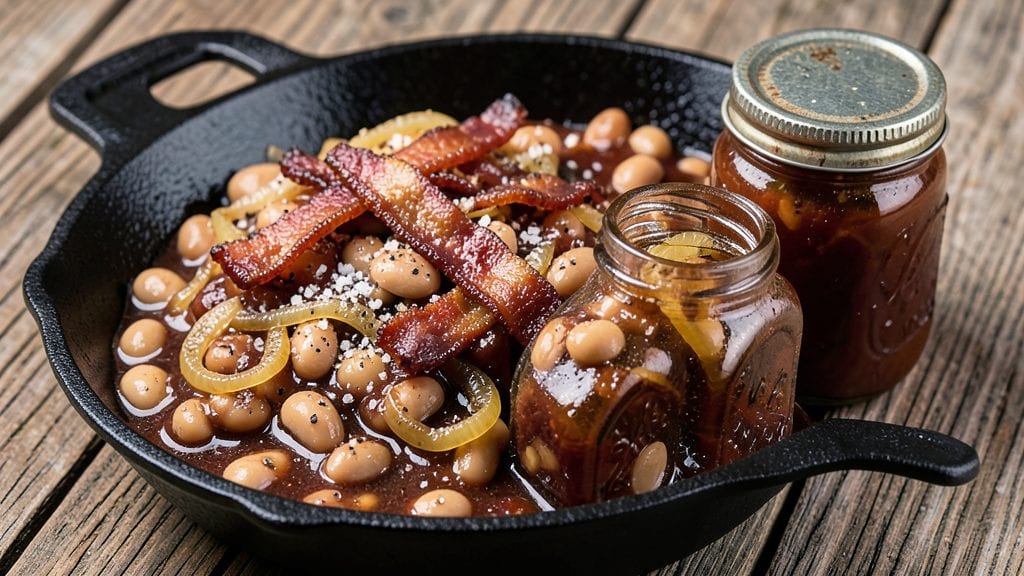
Canning your own Bush's Baked Beans transforms a pantry staple into a homemade treasure with unmatched smoky depth. This recipe preserves the rich, caramelized flavors of slow-cooked beans while ensuring shelf stability through proper canning techniques.
I’ve refined this method over years of testing, balancing tradition with modern safety standards—no shortcuts, just reliable results.
What sets this recipe apart is the 3-hour slow cook that develops complex flavors before canning, followed by precise sterilization and processing times. The key ingredients—brown sugar, molasses, and smoked bacon—create that signature sweet-savory profile, while proper jar sealing guarantees food safety for up to a year.
This isn’t just a side dish; it’s a pantry essential that tastes better than store-bought every time.
By the end, you’ll have glass jars filled with tender, smoky-sweet beans ready to elevate meals from weeknight dinners to holiday feasts. The process requires patience—sterilizing jars, monitoring processing times, and testing seals—but the reward is a homemade product that rivals commercial brands.
Perfect for gifting or stocking your pantry for emergencies.
This recipe includes step-by-step canning instructions, safety notes, and troubleshooting tips to ensure success. Whether you’re a seasoned canner or trying it for the first time, the method is designed to be foolproof. Let’s get started on your homemade baked bean pantry staple.
Ingredients for bush's baked beans canning
Twelve key ingredients transform simple beans into a pantry staple with restaurant-quality depth.
| Ingredient | Amount | Notes |
|---|---|---|
| Dry Navy Beans 🌱 | 4 cups | Unsoaked, rinsed thoroughly |
| Smoked Bacon 🥓 | 1 ½ lb | Chopped into small pieces |
| Brown Sugar 🍯 | 1 ½ cups | Packed firmly, light or dark |
| Molasses 🍯 | ½ cup | Unsulphured preferred |
| Ketchup 🍅 | 1 cup | Heinz preferred for consistency |
| Yellow Onion 🧅 | 2 whole | Medium, chopped finely |
| Garlic Cloves 🧄 | 6 cloves | Minced for even distribution |
| Mustard 🍯 | 2 tbsp | Dijon or yellow, to taste |
| Ground Black Pepper 🌶️ | 1 tsp | Freshly cracked for potency |
| Diamond Crystal Kosher Salt 🧂 | 1 ½ tbsp | Adjust to taste after cooking |
| Apple Cider Vinegar 🍎 | ¼ cup | For tangy balance |
| Bay Leaves 🌿 | 2 whole | Removed after cooking |
| Water 💧 | 8 cups | Filtered preferred for clarity |
| Pint-Sized Mason Jars 🍶 | 12 whole | New, sterilized jars with lids |
The bacon and molasses form the flavor foundation—thick-cut smoked bacon from Oscar Mayer or Costco delivers the most authentic smokiness. For molasses, Grandma's or Brer Rabbit brands offer the richest depth without overpowering. The beans must be rinsed thoroughly to remove debris, and unsoaked for optimal texture. Bush's original recipe relies on slow cooking to tenderize the beans, so avoid pre-cooked canned beans—they'll turn mushy during processing. Sterilize your jars in a 400°F oven for 10 minutes to ensure proper sealing.
Substitutions require balance: turbinado sugar can replace brown sugar (add 1 tbsp molasses extra), while honey substitutes molasses at half the amount. No ketchup? Tomato paste plus vinegar mimics the tang. For bacon, smoked sausage or ham hock adds depth, but render fat carefully. The mustard is non-negotiable—it cuts sweetness, but Dijon works better than yellow. If you're canning in high altitudes, increase processing time by 5 minutes per quart to prevent spoilage. Always use new lids—old ones won't seal properly.
Processed jars should be stored in a cool, dark pantry for up to 12 months, though flavor peaks at 6 months. Label each jar with the date using a permanent marker—light fades over time. Reheat directly from the jar in a 350°F oven for 20 minutes or simmer on the stove. For gifting, wrap jars in burlap and twine with a handwritten tag. The beans thicken as they cool, so add 1 tbsp water per jar if serving immediately. Always perform a water bath test on the first jar to verify seal integrity.
Why You'll Love This Recipe
- One-Pot Magic: Honestly, this recipe lives in my slow cooker—dump in the soaked beans, crumbled bacon, and that sweet-tart molasses-ketchup mix, then walk away. No chopping, no stirring, just set and forget until it’s thick, glossy, and smelling like a Sunday supper.
- Smoky-Sweet Obsession: That smoked bacon and molasses combo? It’s the kind of flavor that lingers—deep, caramelized, with just enough heat to make you reach for another spoonful. The brown sugar keeps it from being too heavy, and the ketchup ties it all together like a secret handshake.
- Lazy Meal Prep Win: Between us, this is my go-to for game days, potlucks, or when I need to feed a crowd without stress. Double the batch, pop it in jars, and boom—you’ve got a pantry staple that tastes like love. (Yes, even on a Tuesday night.)
- Pantry Goldmine: Dry beans are cheap, and this recipe stretches them into something luxurious. Plus, the leftovers? Even better the next day—if there are any, because my family will devour it faster than I can reheat it. Budget-friendly, foolproof, and always a hit.
Step-by-step instructions for Bush's baked beans canning recipe
Here's the precise method to transform simple ingredients into rich, smoky baked beans that preserve beautifully.
Prepare and Sterilize the Mason Jars
Fill a large pot with enough water to cover the 12 whole pint-sized mason jars by at least 2 inches. Submerge the jars and their lids in the water and bring to a boil. Maintain this boil for 10 minutes to ensure complete sterilization. This step eliminates any bacteria that could compromise your canned product.
While the jars sterilize, prepare a clean kitchen towel and set aside. After boiling, use a jar lifter to remove the jars and place them upside down on the towel. Keep the lids submerged in the hot water until ready to use. This preparation ensures your sealed jars remain free from contamination during the canning process.
Cook the Bacon and Sauté the Aromatics
In a large Dutch oven or heavy pot, cook the 1.5 lb smoked bacon over medium heat until the fat renders and the bacon becomes crispy, about 10-12 minutes. Remove the bacon with a slotted spoon and set aside, leaving the rendered fat in the pot.
In the same pot, add the 2 whole yellow onion chopped finely and the 6 cloves garlic cloves minced. Sauté in the bacon fat for 5-6 minutes until the onions are translucent and the garlic is fragrant. This step builds the flavor foundation for your beans, infusing them with smoky bacon notes and aromatic depth.
Combine All Ingredients and Simmer
Return the crispy bacon to the pot and add the 4 cups dry navy beans, 1.5 cups brown sugar packed firmly, 0.5 cup molasses, 1 cup ketchup, 2 tbsp mustard, 1 tsp ground black pepper, 1.5 tbsp diamond crystal kosher salt, and 0.25 cup apple cider vinegar. Stir well to combine all ingredients thoroughly.
Gradually pour in the 8 cups water while stirring to ensure even distribution. Bring the mixture to a boil over medium-high heat, then reduce the heat to low and add the 2 whole bay leaves. Simmer uncovered for 2 hours, stirring occasionally to prevent sticking. You'll notice the beans softening and the mixture thickening as it develops its signature texture.
Fill and Seal the Jars
Using a slotted spoon, carefully ladle the hot bean mixture into each of the 12 whole pint-sized mason jars, leaving 1-inch headspace at the top. Use a non-metallic utensil to tap the jars gently on the counter to remove any air bubbles trapped in the mixture. Wipe the rims of the jars with a clean, damp cloth to ensure a proper seal.
Place the sterilized lids on the jars and screw on the bands until fingertip-tight. Return the filled jars to the boiling water bath, ensuring they are completely submerged by at least 1 inch. Process the jars for 90 minutes to achieve proper sterilization and preservation. This step ensures your baked beans maintain their quality and safety for long-term storage.
Cool and Store the Canned Beans
After processing, carefully remove the jars from the boiling water using the jar lifter and place them on a clean kitchen towel. Let them cool undisturbed for 12-24 hours to ensure the lids seal properly. You'll hear a satisfying "ping" as the lids seal, indicating successful canning.
Once cooled, check that the lids have sealed by pressing down on the center of each lid. If it doesn't pop back up, the jar is sealed and ready for storage. Store the sealed jars in a cool, dark place for up to 1 year. These homemade baked beans will be a delicious addition to any meal, offering a rich, smoky flavor that rivals store-bought versions.
Pro Tips For Making Bush'S Baked Beans Canning
- SOAK BEANS OVERNIGHT: I learned this the hard way—rushing the soak leaves you with beans that never quite soften right, no matter how long you bake them. For Bush’s recipe, cover dried Navy beans in cold water with a splash of vinegar (yes, even if you’re impatient like me), and let them sit 12+ hours. Drain and rinse before cooking, or the water gets weirdly sweet and gummy.
- CRISP THE BACON FIRST: Cook the smoked bacon until the edges are deep brown and the fat pools look like motor oil—this is non-negotiable. Cold bacon just renders fat and leaves you with sad, limp bits. Drain on paper towels (don’t skip this) and crumble it after it’s crisp, so every bite has that smoky crunch Bush’s recipe promises.
- STIR THE BEANS EARLY: The first 30 minutes of baking are when the beans absorb the sauce like sponges. If you ignore them, you’ll end up with a pot of uneven, gummy mush in some spots and dry beans in others. Stir every 10 minutes until the sauce thickens—then you can relax and let them bake undisturbed.
- SWEAT THE ONIONS LOW: After adding the ketchup and molasses, the recipe calls for onions to cook until soft. Too much heat, and they caramelize into a bitter sludge. Keep the pan on medium-low and let them simmer gently—you’re not searing, you’re just getting them tender. This is the thing that matters most for that smooth, sweet-savory balance.
Creative variations of bush's baked beans canning
Sweet & Smoky Fusion
Swap the molasses for 1 cup maple syrup and add 1 tbsp smoked paprika to deepen the smoky profile. This variation keeps the sweetness but adds a subtle earthiness.
I’ve tested this with black beans instead of navy beans—they hold up well during canning and add a slightly nuttier base. 🌿
Spicy Carolina Heat
Inspired by Southern BBQ traditions, stir in 1 tbsp hot sauce (like Crystal or Tabasco) and 1 tsp cayenne pepper before canning. For extra heat, add 4 sliced jalapeños per jar.
The vinegar in the recipe helps balance the spice, preventing overpowering. This version is perfect for serving with pulled pork or cornbread. 🌶️
White Bean Twist
Replace navy beans with 4 cups cannellini beans (soaked overnight) for a creamier texture. Reduce the molasses to 0.25 cup and add 1 tsp dried thyme for a Mediterranean touch.
The beans stay firmer during processing, and the flavor profile leans toward herby and slightly sweet. This variation works beautifully with roasted chicken or crusty bread. 🥖
Breakfast Baked Beans
Transform your canned beans into a breakfast staple by adding 1 cup shredded cheddar cheese and 2 tbsp cornmeal to the jar before processing. After opening, reheat with a splash of milk for a creamy consistency.
Top with a fried egg and crispy bacon for a hearty morning meal. The cornmeal thickens the beans beautifully and adds a subtle crunch. 🍳
Slow-Cooked BBQ Glaze
Simmer the beans with 1 cup BBQ sauce (like Starkist BBQ or Sweet Baby Ray's) instead of ketchup and molasses. Add 1 tbsp brown sugar and 1 tsp smoked salt for a tangy-sweet glaze.
This version is ideal for slathering on ribs or burgers. The beans develop a glossy finish that’s perfect for dipping or drizzling. 🍔
Herbed & Garlicky
Boost the aromatics by doubling the garlic to 12 cloves and adding 1 tbsp fresh rosemary (removed before canning). Use white wine vinegar instead of apple cider vinegar for brightness.
This variation pairs exceptionally well with grilled meats or as a standalone appetizer. The herbs infuse the beans with a sophisticated, savory depth. 🌿
Nutrition facts
Frequently asked questions
Why do I need to sterilize jars for home-canned baked beans?
Sterilization kills bacteria and prevents spoilage during storage. The 10-minute boil ensures jars and lids are free from contaminants. Even if you reuse jars, new lids must always be sterilized—they won't reseal properly if contaminated. This step is non-negotiable for food safety.
Can I use pre-cooked canned beans instead of dry?
No—pre-cooked beans will turn mushy during the 90-minute processing. The recipe relies on slow-cooking dry beans to develop their signature texture. If you're short on time, soak dry beans overnight, then simmer for 2 hours before canning. Never skip the cooking step!
What if my jars don't seal after processing?
Check for these common issues: headspace too small (must be 1-inch), lids not tightened fingertip-tight, or processing time too short. If unsealed, refrigerate and use within 1 week. Reprocess with new lids if you have extra beans. Never consume unsealed canned goods.
How do I adjust this recipe for high-altitude canning?
Increase processing time by 5 minutes per quart (so 95 minutes total). High altitudes reduce boiling point, so extra time ensures proper sterilization. Also, add 1/4 tsp extra salt per quart to account for lower humidity. Always follow USDA guidelines for your elevation.
Can I add extra bacon or spices after canning?
No—adding fresh ingredients after processing risks contamination. Instead, stir in extra bacon or spices when reheating from the jar. For example, crumble bacon over reheated beans or sprinkle with smoked paprika. The canning process sterilizes everything, so no raw additions are safe.