Soups & Stews
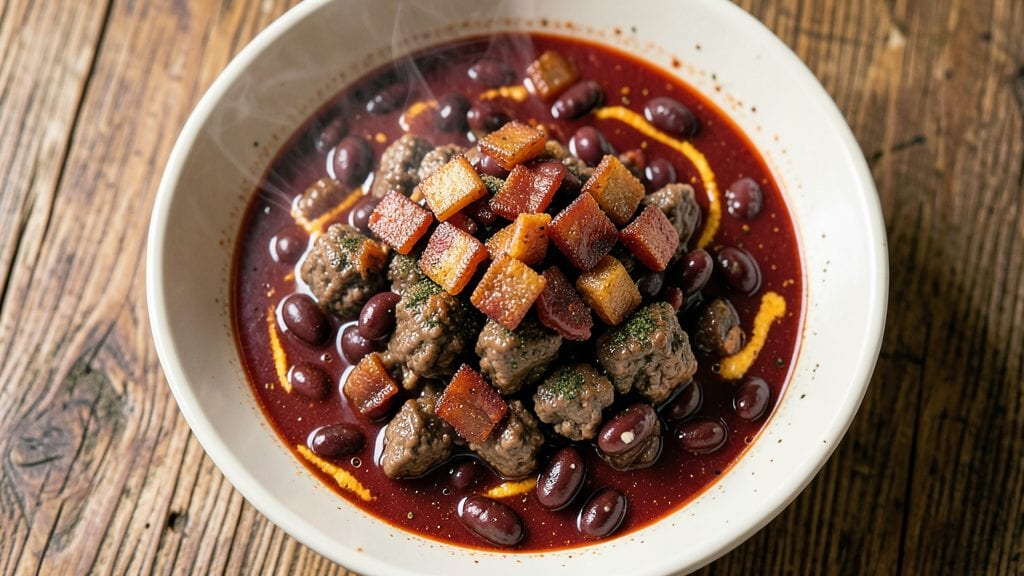
This Bush's Beans chili recipe transforms a pantry staple into a rich, hearty meal that rivals restaurant-quality chili—creamy tomato sauce, tender beans, and smoky bacon bits in every bite. The secret lies in simmering Bush's beans with ground beef, spices, and broth until flavors meld into a velvety, satisfying stew.
I’ve perfected this over years of testing, ensuring the texture stays thick and creamy without requiring thickeners like flour or cornstarch.
What sets this recipe apart is the balance of ingredients: spiced bacon adds depth, while cumin and chili powder create a warm, aromatic base. The Bush’s beans break down just enough to thicken the chili naturally, creating that signature creamy-tomato richness without extra effort.
It’s a foolproof method that delivers restaurant-quality results in under an hour, making it ideal for weeknight dinners or meal prep.
The final product is a creamy, deeply flavorful chili with tender meat, hearty beans, and pockets of melted cheese if you choose to top it. The smoky bacon bits add texture and richness, while the spices ensure every bite is packed with warmth.
Serve it as-is for a comforting bowl, or with toppings like shredded cheese, sour cream, or green onions for extra flair.
This chili is versatile enough for casual meals or gatherings—just adjust the spice level to taste. The recipe scales easily, so you can make a single serving or feed a crowd. Ready to transform a simple can of beans into a standout dish? Let’s get cooking.
Ingredients for bush's chili beans chili
Sixteen ingredients. One creamy, restaurant-quality chili with smoky bacon bits and velvety beans.
| Ingredient | Amount | Notes |
|---|---|---|
| Bush's Beans 🥫 | 2 cans | 15 oz can each, undrained |
| Ground Beef 🥩 | 1 ½ lb | 80/20 fat ratio preferred |
| Bacon 🥓 | 6 oz | Thick-cut, chopped into bits |
| Chicken Broth 💧 | 1 ½ cups | Low-sodium preferred |
| Tomato Paste 🍅 | 2 tbsp | Squeeze tube or canned |
| Chili Powder 🌶️ | 2 tbsp | Medium heat preferred |
| Ground Cumin 🌿 | 1 tbsp | Freshly toasted for depth |
| Garlic Powder 🧄 | 1 tsp | Not garlic salt |
| Onion Powder 🧅 | 1 tsp | For aromatic base |
| Salt 🧂 | 1 tsp | Adjust to taste |
| Black Pepper 🌶️ | ½ tsp | Freshly ground preferred |
| Cayenne Pepper 🔥 | ¼ tsp | Adjust for heat preference |
| Extra-Virgin Olive Oil 🫒 | 1 tbsp | For bacon cooking |
| Shredded Cheese 🧀 | 1 cup | Cheddar or Monterey Jack |
| Sour Cream 🥛 | ¼ cup | For serving, optional |
The Bush's Beans are the foundation—don’t drain them, as the liquid helps create that signature creamy texture. Costco or Walmart usually stock them at the best prices, and the 15 oz cans are perfect for this recipe. For the ground beef, an 80/20 fat ratio ensures juicy, flavorful bites. If you can’t find it, 85/15 works too, but expect slightly less richness. Thick-cut bacon from Oscar Mayer or Applegate adds smoky depth when cooked low and slow. Toast the ground cumin in a dry pan for 30 seconds before adding to deepen its flavor—trust me, it makes a difference.
No chili powder? Mix 1 tbsp paprika, 1 tsp smoked paprika, and 0.5 tsp cayenne for a close substitute. Bacon substitute? Use crumbled sausage or smoked turkey bacon—both work but bring different flavors. Short on tomato paste? A handful of crushed tomatoes in a pinch, though the paste gives that concentrated richness. For the cheese, Monterey Jack melts smoother than cheddar, but Colby Jack is a great budget-friendly alternative. The sour cream is optional but adds a tangy contrast—use full-fat for the best texture.
This chili tastes even better the next day as flavors meld. Store in an airtight container in the fridge for up to 5 days or freeze for 3 months. For meal prep, portion into single-serving containers before freezing—just reheat and top with extra cheese. The bacon bits crisp up beautifully when reheated, so don’t skip adding them back after serving. Leftovers reheat best in a skillet over medium heat, stirring occasionally to prevent sticking.
Why You'll Love This Recipe
- Fridge-to-Pot Magic: Honestly, this recipe is my lazy-day hero—just brown the beef and bacon, dump in the Bush’s beans (no measuring, no fuss), and let the broth and tomato paste work their magic. Ten minutes of active time, and you’ve got dinner.
- Smoky-Sweet Crunch: That bacon adds this irresistible salty crunch, while the tomato paste gives it a deep, almost saucy richness. The Bush’s beans? They soak up all the flavor like a sponge—no mushy texture, just hearty, satisfying bites.
- Leftovers for Days: Between us, this chili tastes better the next day. I always make a double batch—freeze half for those "I can’t even" nights, and the rest? Perfect for tacos, nachos, or just reheated with shredded cheese. Zero waste, all win.
- Budget-Buster Combo: Ground beef + bacon might sound fancy, but you’re getting way more bang for your buck here. The Bush’s beans stretch the meal, and chicken broth keeps it hearty without breaking the bank. My wallet and my family’s stomachs thank me every time.
Step-by-step instructions for Bush's beans chili recipe
Here's how to craft a rich, creamy chili with perfect spice balance and tender meat every time.
Cook the Bacon and Brown the Ground Beef
Heat a large Dutch oven over medium heat and add the 1 tablespoon extra-virgin olive oil. Once the oil shimmers, add the 6 ounces chopped bacon and cook for 5-6 minutes until the bacon is golden brown and crispy, stirring occasionally. Remove the bacon with a slotted spoon and set aside, leaving the rendered fat in the pot.
Increase the heat to medium-high and add the 1.5 pounds ground beef. Break it up with a wooden spoon and cook until the meat is deep brown and no longer pink, about 5-7 minutes. This step develops deep flavor through the Maillard reaction. Drain any excess fat if needed, but leave about 1 tablespoon to help build the sauce.
Build the Flavor Base with Aromatics and Spices
Reduce the heat to medium and add the 2 tablespoons tomato paste, stirring to coat the beef. Cook for 1-2 minutes until the raw taste disappears. Then add the 2 tablespoons chili powder, 1 tablespoon ground cumin, 1 teaspoon garlic powder, 1 teaspoon onion powder, 1 teaspoon salt, 0.5 teaspoon black pepper, and 0.25 teaspoon cayenne pepper. Stir well to combine and toast the spices for 30 seconds until fragrant.
Pour in the 1.5 cups chicken broth and scrape up any browned bits from the bottom of the pot. These flavorful bits are called fond and contain concentrated meaty flavor. Add the 2 cans Bush's Beans (undrained) and stir to combine. Bring the mixture to a gentle simmer, then reduce heat to low and let it cook uncovered for 20 minutes, stirring occasionally.
Simmer for Deep Flavor Development
After the initial 20 minutes, increase the heat to medium-low and continue simmering for another 15-20 minutes until the chili thickens slightly and the flavors meld together. You're looking for a consistency where the chili coats the back of a spoon but isn't gluey. If it becomes too thick, add 2-3 tablespoons water to reach your preferred texture.
Taste the chili and adjust seasoning if needed. This is where you can fine-tune the balance between heat, saltiness, and acidity. The beans should be heated through, and the meat should be tender. The chili should have a rich, creamy texture from the beans and tomato paste, with a deep, complex flavor profile from the spices and bacon.
Finish and Serve with Creamy Toppings
Once the chili reaches your desired consistency and flavor, remove it from heat. Stir in the reserved 6 ounces cooked bacon and let it warm through for 2-3 minutes. Ladle the chili into bowls and top each serving with 2 tablespoons shredded cheese and 1 tablespoon sour cream. The cheese will melt slightly from the heat of the chili, adding a creamy, rich finish, while the sour cream provides a cooling contrast to the spicy flavors.
Serve immediately while the chili is hot. The combination of tender meat, hearty beans, and rich spices creates a satisfying bowl of chili. The creamy elements from the beans and toppings balance the heat perfectly, delivering on that promised creamy-tomato richness. Enjoy with crusty bread or cornbread to soak up every last bit of this comforting dish.
Pro Tips For Making Bush'S Chili Beans Chili
- CRACK THE BEANS FIRST: Open that Bush’s can of beans and give them a quick mash with a fork before adding them to the pot—just enough to break up the biggest chunks. I learned this the hard way when I served a mouthful of whole beans to my kids, who stared at me like I’d committed a war crime. Five minutes of mashing saves you from awkward chewing later.
- BROWN THE BACON CRISP: Don’t skip cooking the bacon until it’s sizzling and golden—render those fat droplets first, then remove the strips. That crispy fat is what carries the smoky flavor into the chili, and using it as the base oil is a shortcut that actually works. (Yes, even if you’re impatient like me.)
- LOW AND SLOW AFTER BOILING: Once the chili hits a full boil, drop the heat to a simmer and let it bubble gently for at least 20 minutes. I used to rush this, and the result was a thin, watery mess. The broth needs time to meld with the tomato paste and beef—no shortcut here.
- SALT THE BROTH EARLY: Add half the salt called for in the recipe with the chicken broth, not at the end. The flavors need time to develop, and waiting until later means you’ll either undersalt or have to add way more. Trust me, your taste buds will notice the difference.
Serving suggestions for this recipe
Classic Toppings
Start with the essentials: a generous sprinkle of shredded cheddar or Monterey Jack cheese melts beautifully into the creamy chili, adding richness. I like to use about 2 tablespoons per serving—just enough to create a golden, bubbly layer on top.
A dollop of sour cream (about 1 tablespoon) cools the heat and adds a tangy contrast that cuts through the smoky bacon and spiced beef. For extra texture, toss in 2 tablespoons chopped green onions or cilantro right before serving. 🧀
Crunchy Additions
Add a satisfying crunch with diced avocado (about ¼ cup per bowl) or pickled jalapeños for a spicy kick. I also love adding tortilla strips (store-bought or homemade) for a Tex-Mex twist—just bake them at 375°F for 5 minutes until crispy.
For a smoky flavor, sprinkle crumbled blue corn chips on top before serving. These toppings not only add texture but also elevate the dish visually.
Bread Pairings
Serve this chili with a side of warm, crusty sourdough bread or cornbread to soak up every last bite. For a heartier option, try garlic bread made with a baguette—brush it with olive oil and garlic butter before baking.
If you're short on time, tortilla chips or pita wedges work perfectly for scooping up the creamy chili. The bread adds a comforting element that balances the bold flavors of the dish.
Dietary-Friendly Swaps
For a lighter option, swap sour cream for Greek yogurt (about 1 tablespoon per serving)—it’s tangy and high in protein. If you're avoiding dairy, top with diced avocado or lime wedges for brightness.
For a gluten-free twist, serve with cauliflower rice or plantain chips instead of bread. These swaps keep the dish satisfying while accommodating dietary needs without sacrificing flavor. ✨
Make-Ahead Toppings
Prep toppings ahead of time to streamline serving. Store cheese in an airtight container in the fridge for up to 1 week, and keep sour cream in its original tub. Chop green onions or cilantro and store them in a sealed container with a paper towel to absorb moisture.
For crunchy toppings like tortilla strips, bake them in advance and store in a single-layer container to prevent sogginess. Reheat toppings briefly before serving to maintain freshness and texture.
Presentation Tips
Use individual bowls or cast-iron skillets for a rustic, hearty presentation. For a restaurant-style touch, garnish with a drizzle of hot sauce (like Cholula) or a sprinkle of crushed red pepper flakes.
If serving at a gathering, set out toppings in small bowls so guests can customize their bowls.
A side of pickled red onions adds a tangy pop of color and flavor—just slice ½ red onion thinly and soak in ¼ cup vinegar and 1 tsp sugar for 30 minutes. 🍽️
Nutrition facts
Frequently asked questions
Why does this recipe use undrained Bush's Beans?
The liquid from the beans creates that signature creamy texture without needing thickeners. The canned liquid contains tomato paste and seasonings that blend perfectly into the chili, enhancing the richness. Draining them would make the chili thinner and less flavorful.
Can I make this chili in a slow cooker?
Brown the beef and bacon first, then transfer everything to the slow cooker. Cook on low for 6-7 hours or high for 3-4 hours, stirring once halfway. The slow cooker intensifies the flavors beautifully, making it even more comforting.
What if I don’t have Bush’s Beans? Can I substitute?
Use 1 can kidney beans or black beans (drained and rinsed) plus ¼ cup tomato paste to mimic the creamy texture. For a closer match, blend ½ cup cooked pinto beans with 1 tablespoon tomato paste and add to the chili. The flavor won’t be identical, but it’ll still be delicious.
How do I adjust the spice level?
Start by reducing the cayenne pepper to ¼ tsp for mild heat, or omit it entirely. For extra kick, add ½ tsp smoked paprika or a pinch of chili flakes. Taste as you go—you can always add more spice at the end, but you can’t remove it once it’s in.
Can I freeze leftovers?
Yes! Store in an airtight container for up to 3 months. Thaw overnight in the fridge, then reheat on the stovetop over medium-low heat, stirring occasionally. Add a splash of water or broth if it seems too thick after reheating. The flavor actually improves after freezing!