
Side Dishes
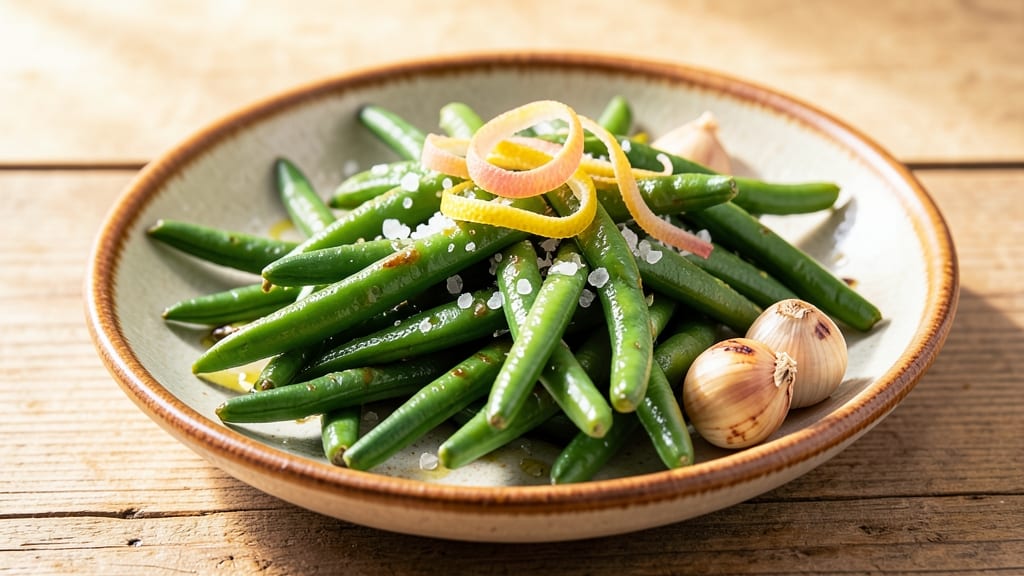
Nana's green beans recipe is the one that always brings the table to life—crisp-tender beans kissed with garlic and brightened by lemon zest, just like I remember from Sunday dinners growing up.
The secret lies in high-heat sautéing that preserves that satisfying crunch while letting the garlic infuse deeply, never overpowering the beans' natural sweetness. This isn't just a side dish; it's a taste of home that transforms any meal into something special.
What makes this recipe work is the balance of simplicity and technique—just six ingredients, but each plays a crucial role. Fresh green beans get blanched to lock in their vibrant color and crisp texture, while minced garlic and lemon zest add layers of flavor that elevate even the simplest dinner.
The key is timing: cook the beans just until tender-crisp, about 8-10 minutes, so they hold their shape and bite. This method ensures every bite delivers that perfect harmony of textures and flavors.
By the time you're done, you'll have a platter of garlicky, lemon-kissed green beans that look as good as they taste—bright green with golden edges, fragrant with garlic, and zesty from the lemon.
The aroma alone will have everyone at the table anticipating that first bite, and the contrast of crisp beans with tender garlic and tangy lemon creates a side dish that's impossible to resist. It's the kind of recipe that turns a simple weeknight dinner into something memorable.
Serve these alongside roasted chicken, grilled steak, or even as a vegetarian main with crusty bread. The bright flavors cut through rich dishes while standing up to them, making this a versatile addition to any meal.
Here's how to make Nana's green beans exactly as they should be—crisp, flavorful, and full of that nostalgic warmth.
Ingredients for nana's green beans
Six simple ingredients transform into Nana's legendary green beans—crisp, garlicky, and bright with lemon zest.
| Ingredient | Amount | Notes |
|---|---|---|
| Fresh Green Beans 🥦 | 1 ½ lb | Trimmed, ends snapped off |
| Extra-Virgin Olive Oil 🫒 | 2 tbsp | High quality, fruity variety |
| Garlic Cloves 🧄 | 4 cloves | Fresh, minced finely |
| Lemon Zest 🍋 | 1 tbsp | Fresh, from organic lemon |
| Salt 🧂 | ¾ tsp | Kosher or sea salt |
| Black Pepper 🌶️ | ¼ tsp | Freshly ground preferred |
The green beans are the foundation, so choose fresh, vibrant ones—avoid those with yellowing ends or limp spots. Local farmers markets or the produce section at Whole Foods usually have the best quality, but any grocery store's fresh green beans will work if they're crisp and bright. For garlic, fresh is non-negotiable—the flavor is completely different from powdered. I always grab organic garlic from the store because it tends to have fewer sprouts. The lemon zest should come from a bright, fragrant lemon—if it smells dull, it won't add the zing you want. Store your green beans in the fridge, unwashed, in a paper towel-lined container to keep them crisp for up to 5 days before using.
No fresh garlic? Garlic powder at half the amount works, but it won't have the same depth of flavor. Short on lemon zest? Fresh lemon juice at 1 tablespoon can substitute, though it won't give that same aromatic brightness. For olive oil, avoid the cheap stuff—look for extra-virgin labeled with a harvest date. If you can't find kosher salt, fine sea salt works perfectly. The black pepper should be freshly ground for the best flavor, but pre-ground is fine if you're in a pinch. Trader Joe's always has a great selection of all these ingredients at reasonable prices, so it's my go-to for a quick grocery run.
These green beans hold up beautifully for 3-4 days in the fridge if stored properly—keep them in an airtight container with a paper towel to absorb any moisture. They also freeze well for up to 6 months if blanched first, making them perfect for meal prep. Portion into individual containers before freezing for easy reheating—just toss them in a skillet with a little olive oil to revive the crispness. The lemon zest and garlic can be prepped ahead and stored in the fridge for up to 3 days, saving you time on cooking day. Reheat gently to preserve that perfect tender-crisp texture.
Why You'll Love This Recipe
- No-Chop Nightmare: Honestly, I used to dread trimming green beans—until I realized Nana’s method just calls for a quick snap. No knife skills needed, just a bowl and a steady hand. Ten minutes later, you’re done.
- Garlic-Lemon Magic: That bright lemon zest and raw garlic? It’s the secret weapon—crisp, tangy, and just salty enough to make your taste buds wake up. The olive oil ties it all together like a hug from your favorite cook.
- Potluck Hero: Between us, this is the side dish I always bring to gatherings. It’s light enough for summer picnics but hearty enough for holiday tables. Plus, it reheats like a dream—no sad, soggy sides here.
- Budget Sidekick: Fresh green beans are cheap, and this recipe stretches them further than store-bought mixes. A single batch feeds four, and leftovers? They last in the fridge for days, saving me from takeout nights. Nana’s genius, really.
Step-by-step instructions for Nana's garlicky green beans
Here's how to achieve Nana's signature balance of crisp-tender green beans with bold garlic and bright lemon zest.
Prepare the Green Beans
Begin by trimming the ends of the 1.5 lb fresh green beans, snapping them off with a quick downward motion at the stem end. You'll hear a satisfying crack as you work your way through the bunch. This ensures even cooking and prevents the tough ends from ruining the texture. Spread the trimmed beans on a clean kitchen towel and pat them completely dry with another towel. Removing excess moisture helps the beans develop a better sear in the olive oil.
While the beans dry, take a moment to examine their quality. Look for bright green beans with crisp, snappy stems—these will hold their texture best. If any beans appear wilted or yellowed, set them aside for another use. The goal is vibrant, crisp-tender green beans that maintain their bright color after cooking.
Sauté the Garlic in Olive Oil
Heat the 2 tbsp extra-virgin olive oil in a large skillet over medium heat. You want the oil to shimmer gently but not smoke—this ensures the garlic cooks without burning. Add the 4 minced garlic cloves and sauté for 1-2 minutes, stirring constantly. The garlic should turn golden and become fragrant, filling your kitchen with its aroma. This is where the foundation of flavor begins.
Watch the garlic carefully—it burns quickly. If it starts to darken too much, reduce the heat slightly. The goal is to infuse the oil with garlic flavor without creating bitterness. Once the garlic is golden and smells heavenly, remove the skillet from heat for just a moment. You'll return to it shortly, but this brief pause prevents the garlic from cooking further while you prepare the remaining ingredients.
Cook the Green Beans
Return the skillet to medium heat and add the trimmed green beans in a single layer. Spread them out evenly so they have room to crisp slightly. Sprinkle with the 0.75 tsp salt and 0.25 tsp black pepper, tossing gently to coat. Cook for 5-7 minutes, stirring occasionally, until the beans begin to soften slightly but still retain their bright green color and crisp texture. You're aiming for a tender-crisp finish, not mushy.
During this time, you'll notice the beans release some moisture. This is normal and helps create steam, which keeps them tender. If the beans appear to be releasing too much liquid, you can reduce the heat slightly to control the cooking process. The beans are ready when they yield slightly to gentle pressure but still have a satisfying crunch.
Finish with Lemon Zest
Remove the skillet from heat and immediately stir in the 1 tbsp lemon zest. The bright citrus flavor will cut through the richness of the garlic and olive oil, creating a balanced taste. Toss the beans gently to distribute the zest evenly. Let the mixture sit off the heat for 1-2 minutes, allowing the lemon zest to infuse with the beans and release its essential oils.
For the best results, serve the green beans immediately. The lemon zest adds a fresh, bright note that complements the garlicky flavor. If you need to hold them for a short time, cover the skillet loosely with a lid to retain some of the steam and prevent the beans from drying out. Each bite should deliver a perfect balance of crisp-tender texture, garlicky depth, and citrus brightness.
Pro Tips For Making Nana'S Green Beans
- TRIM BEANS LIKE A PRO: Snap off the ends at a 45-degree angle—this isn’t just for looks. It guarantees even cooking and prevents the tough ends from turning mushy while the rest stays crisp. (I used to cut them straight across, and half the batch would always feel underdone.)
- SALT THE OIL FIRST: Toss a generous pinch of salt into the olive oil before adding garlic—it seasons the oil itself, not just the beans. This makes a real difference when you’re drizzling that fragrant oil over the finished dish. (Yes, even if the recipe doesn’t say it.)
- DON’T CROWD THE PAN: Cook the beans in a single layer at first, then stir and add more oil if needed. Overcrowding steams them instead of searing, and you’ll end up with soggy, flavorless beans. (I learned this after making a sad, limp pile of green beans—twice.)
- ZEST THE LEMON LAST: Add the lemon zest after the beans are tender-crisp, not at the start. The acid will soften them faster if it’s in too early, and you’ll lose that bright, fresh finish. (Sounds weird, but it works—trust the timing.)
Dietary considerations for nana's green beans
Gluten-Free Adaptation
This recipe is naturally gluten-free, but I always double-check ingredients to ensure no cross-contamination. The 1.5 lb fresh green beans, extra-virgin olive oil, garlic, lemon zest, salt, and black pepper are all inherently safe for gluten-free diets.
If you're using pre-minced garlic from a jar, verify the label—some brands process garlic in shared facilities with gluten-containing products. Store-bought lemon zest is typically safe, but I prefer fresh zest from organic lemons to avoid any potential additives. 🌱
Low-Carb & Keto
For a low-carb version, keep the recipe exactly as written—green beans are naturally low in carbs, with only about 10 grams of net carbs per serving. The 2 tbsp olive oil adds healthy fats, making this a great side for keto diets.
If you're tracking macros closely, note that the lemon zest adds negligible carbs. This dish pairs perfectly with grilled meats or cauliflower rice for a complete low-carb meal. The garlic and lemon keep it flavorful without relying on high-carb ingredients.
Vegetarian & Vegan
This recipe is already vegetarian-friendly, and it's vegan if you use vegan-certified olive oil (some brands process with animal products). For extra protein, toss the beans with ¼ cup chopped walnuts or toasted pumpkin seeds after cooking.
I also love adding 1 tbsp nutritional yeast for a cheesy, umami boost that vegans will appreciate. The lemon zest and garlic remain the star flavors, making this a satisfying plant-based side dish. 🌿
Allergen-Friendly
If you're avoiding common allergens, this recipe is safe from the top eight: it contains no dairy, eggs, fish, shellfish, tree nuts, peanuts, soy, or wheat. For soy-sensitive individuals, ensure your olive oil isn't processed in soy facilities (some brands do).
If you're cooking for someone with a sulfite sensitivity, use fresh lemon zest instead of bottled, as some commercial zest products contain sulfites. Always check labels on pre-minced garlic or zest if using store-bought.
Meal Prep Adjustments
For meal prep, this recipe holds up well if you modify the cooking method slightly. Blanch the green beans first by boiling for 3 minutes, then shock in ice water to stop cooking. Store them in an airtight container with a paper towel to absorb moisture.
When reheating, sauté in 1 tsp olive oil over medium heat for 3-4 minutes to revive crispness, then add garlic and lemon zest fresh. This keeps the dish bright and flavorful even after storage. The lemon zest can be added just before serving to preserve its freshness. ⏰
Nutrition facts
Frequently asked questions
Can I use frozen green beans instead of fresh?
Fresh green beans give the best texture, but frozen works in a pinch! Use 1 lb frozen beans (thawed and drained well) and add them to the skillet 2 minutes earlier than fresh to account for their higher moisture content. Pat them completely dry first to prevent steaming instead of crisping.
What's the secret to keeping the green beans crisp?
The key is high heat and minimal cooking time. Use a large skillet to spread beans in a single layer, and cook them over medium-high heat for no more than 7-8 minutes. Crowding the pan or low heat turns them mushy. Also, never overcrowd the pan—work in batches if needed.
Can I make this ahead of time?
Freshly made is best, but you can prep components ahead. Store lemon zest and minced garlic separately in the fridge for up to 3 days. Blanch green beans for 2 minutes, shock in ice water, then store in an airtight container with a paper towel. Reheat by sautéing in 1 tsp olive oil for 3-4 minutes, then add garlic and zest fresh.
How do I adjust the garlic flavor for picky eaters?
Start with just 2 cloves of minced garlic instead of 4, and taste before adding lemon zest. For milder flavor, remove the garlic after 30 seconds of cooking (when it's just fragrant) and finish cooking the beans without it. The lemon zest will still brighten the dish while keeping the garlic presence subtle.
What other proteins pair well with these green beans?
This dish is incredibly versatile! It complements grilled chicken, pork chops, or salmon perfectly. For vegetarian meals, serve with tofu, chickpeas, or a crispy halloumi cheese. The bright lemon and garlicky flavors cut through rich meats while standing up to plant-based proteins.