Side Dishes
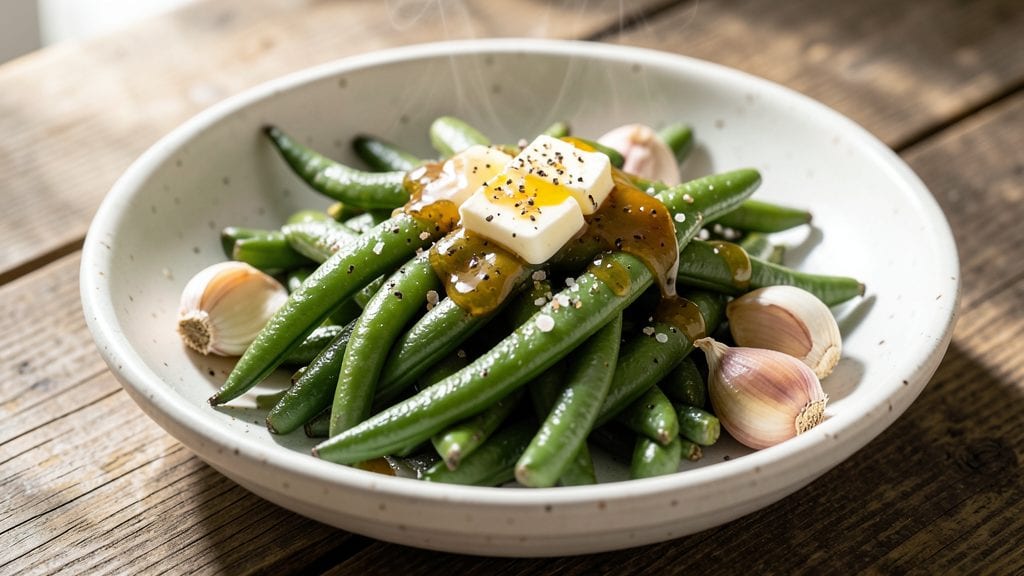
This old-fashioned green beans recipe brings back the comforting flavors of home-cooked meals with its signature buttery garlic finish. The secret lies in blanching the beans just right—crisp-tender, never mushy—before finishing them in a rich garlic butter sauce that elevates simple vegetables into a standout side dish.
I developed this method after years of testing, ensuring every bite delivers that perfect balance of texture and flavor that makes this recipe a staple at family gatherings.
The process is straightforward yet precise: blanching the beans in boiling water for exactly 3 minutes, then shocking them in ice water to lock in their vibrant green color and crisp texture.
From there, a quick sauté in garlic-infused butter transforms them into a dish that’s both nostalgic and refined. The result is a side that pairs beautifully with roasted meats, fried chicken, or even as a standalone vegetable course at dinner.
What you’ll achieve is a plate of green beans that’s crisp-tender on the outside, with a perfectly seasoned interior—bright, garlicky, and rich with butter. The aroma alone will have everyone at the table asking for seconds, while the texture ensures each bite is satisfying.
This is the kind of recipe that feels like a hug on a plate, bringing back the warmth of traditional home cooking.
For those who love customization, you can add crispy bacon, toasted almonds, or fresh herbs like parsley for extra depth. The beauty of this recipe lies in its adaptability—whether you stick to the classic version or experiment with variations, the foundation of buttery garlic remains the star. Let’s get cooking!
Ingredients for old fashioned green bean
Nine simple ingredients transform into nostalgic, buttery garlic green beans that bring warmth to any table.
| Ingredient | Amount | Notes |
|---|---|---|
| Fresh Green Beans 🌱 | 1 ½ lb | Trimmed, ends cut off |
| Unsalted Butter 🧈 | ½ cup | Cold, cut into small cubes |
| Garlic Cloves 🧄 | 6 cloves | Minced, fresh preferred |
| Kosher Salt 🧂 | 1 ½ tsp | Fine grain preferred |
| Black Pepper 🌶️ | ½ tsp | Freshly ground preferred |
| Lemon Juice 🍋 | 1 tbsp | Freshly squeezed |
| Fresh Parsley 🌿 | ¼ cup | Chopped, for garnish |
| Ice Cubes ❄️ | 2 cups | For shocking beans |
| Water 💧 | 4 cups | For blanching |
The green beans are the star—look for bright green, crisp ones with no blemishes at your local grocery store or farmers market. Trader Joe's and Whole Foods carry excellent options, but the regular produce section works fine too. Avoid beans that are yellowing or soft, as they’ll turn mushy during blanching. For the garlic, fresh is non-negotiable—it makes all the difference in flavor. If you’re short on time, pre-minced garlic works, but it lacks that fresh punch. The kosher salt is key here; its coarse texture dissolves perfectly into the butter sauce without overpowering.
No fresh parsley? Dried parsley at half the amount works in a pinch, though fresh adds that bright, vibrant finish. Out of lemon juice? A splash of white wine vinegar gives a similar tang. For the butter, substitute ghee if you’re avoiding dairy, though the flavor will be slightly different. The ice cubes are crucial for shocking the beans—never skip this step, as it locks in that vibrant green color and crisp texture. If you don’t have ice, fill a bowl with cold water and add the beans to cool them quickly. The blanching water should be boiling vigorously when you add the beans for that perfect 3-minute cook time.
This dish reheats beautifully—store in an airtight container in the fridge for up to 4 days. For longer storage, freeze the blanched beans before adding the butter sauce; they’ll keep for 3 months. To reheat, warm gently in a skillet with a splash of water to restore crispness. The garlic butter sauce can be made ahead and stored separately—just toss it with the beans when ready to serve. Portion into individual containers for easy lunches or side dishes throughout the week.
Why You'll Love This Recipe
- No-Fuss Freshness: I swear by this recipe because it turns those sad limp green beans from the back of the fridge into something crisp and vibrant—just a quick blanch and a toss. Honestly, the hardest part is waiting for the water to boil.
- Garlic Butter Magic: That simple combo of butter and garlic? It’s what makes these green beans ridiculously good. The butter melts into a golden crust while the garlic infuses just enough to make every bite feel like a little flavor explosion—no fancy herbs needed.
- Weeknight & Holiday: Between us, this is my go-to for both Tuesday dinners and Thanksgiving sides. The same method works whether I’m serving two or eight—just scale the beans and butter. (Yes, even on a Tuesday night.)
- Budget-Friendly Pantry: Fresh green beans are cheap, butter lasts forever, and garlic? You always have it. This recipe costs me pennies but tastes like I spent hours in the kitchen. Leftovers? They reheat perfectly for lunch the next day.
Step-by-step instructions for buttery garlic blanched green beans
Here's the classic method for achieving that signature crisp-tender texture and rich garlic flavor.
Trim and Blanch the Green Beans
Start by trimming the ends from the 1.5 lb fresh green beans using a sharp knife. Cut off about ½ inch from each end to remove any tough or fibrous parts. This ensures even cooking and a cleaner bite.
Bring the 4 cups water to a rolling boil in a large pot. Add the 1.5 tsp kosher salt and stir to dissolve. Once boiling, carefully add the trimmed green beans in batches to avoid overcrowding. Cook for exactly 3 minutes - they should be bright green but still slightly crisp. Immediately drain them in a colander and prepare an ice bath with the 2 cups ice cubes to stop the cooking process.
Shock and Prepare for Butter Sauté
Transfer the blanched green beans to the ice water bath for 1 minute. This shocking process halts the cooking and helps maintain their vibrant color and crisp texture. Drain thoroughly in a colander, shaking gently to remove excess water.
While the beans cool, heat the 0.5 cup unsalted butter in a large skillet over medium heat. Watch closely as the butter melts and begins to foam - you want it hot but not browned. Add the 6 cloves minced garlic and cook for 30 seconds until fragrant but not colored. Remove the pan from heat at this point to prevent burning.
Sauté with Garlic Butter
Return the skillet to medium heat and add the drained green beans. Toss gently to coat them evenly in the garlic butter mixture. Cook for 2-3 minutes, stirring occasionally, until the beans are heated through and the butter has melted completely into a glossy coating.
Season immediately with the 0.5 tsp black pepper and stir to distribute evenly. The beans should be tender yet still maintain their crisp texture - if they feel too soft, they were overcooked during blanching. Taste and adjust seasoning if needed, adding a splash of the 1 tbsp lemon juice if you prefer a brighter flavor profile.
Finish and Garnish
Transfer the green beans to a serving platter and sprinkle generously with the 0.25 cup chopped fresh parsley. The parsley adds freshness and visual appeal while complementing the rich garlic butter flavor.
Serve immediately while hot. The beans should be bright green with a crisp-tender texture, coated in a golden garlic butter sauce. Each bite should deliver that perfect balance of buttery richness and fresh vegetable flavor that makes this classic preparation so beloved.
Pro Tips For Making Old Fashioned Green Bean
- TRIM BEANS LENGTHWISE: I learned this the hard way—cutting green beans crosswise always leaves them mushy. A quick lengthwise slice (about 1/3 down) keeps them crisp while cooking. Use a sharp knife and work fast; beans oxidize faster than you’d think.
- SWEAT GARLIC LOW AND SLOW: After burning three batches of garlic, I finally figured out: cook it on low heat in butter until just golden, not brown. High heat torches it into bitterness. Add the beans when garlic smells sweet but still looks pale—this keeps the flavor pure.
- SALT BEANS BEFORE TOSSING: More salt than you think, especially if using unsalted butter. Toss the trimmed beans with a generous pinch of kosher salt (about 1/2 tsp per pound) before adding butter. This seasons the fibers properly and prevents blandness later.
- USE COLD BUTTER: Sounds weird, but it works: cut unsalted butter into small cubes and toss it with the beans after they’ve wilted. Cold butter melts slower, coating each bean evenly without steaming them into sogginess. (Yes, even if you’re impatient like me.)
Perfect pairings for this recipe
Classic Protein Pairings
These buttery garlic green beans shine alongside roasted chicken thighs—the crispy skin contrasts beautifully with their tender texture. I love serving them with herb-roasted chicken where the thyme and rosemary in the marinade complement the garlic notes in the beans.
For a heartier meal, pair with pan-seared pork chops—the salty crust balances the buttery richness. 🍗
Meatless Main Dishes
Vegetarians will adore this side with creamy polenta topped with sautéed mushrooms and Parmesan cheese. The earthy mushrooms and nutty polenta create a satisfying base that lets the green beans take center stage.
Another favorite is grilled halloumi cheese—its salty, caramelized exterior pairs perfectly with the buttery garlic sauce. 🧀
Perfect Potato Partners
For a classic Southern-style meal, serve alongside creamy mashed potatoes—the smooth texture contrasts with the crisp-tender beans. I like adding roasted garlic to the potatoes to amplify the garlic flavor connection. Another great match is brown butter roasted potatoes—their nutty depth complements the buttery green beans beautifully. 🥔
Bread and Starch Sides
Warm crusty dinner rolls or buttermilk biscuits are perfect for soaking up any extra garlic butter sauce. For a gluten-free option, serve with garlic herb quinoa—the nutty grains add another layer of texture.
The quinoa also helps balance the richness of the butter, making it a well-rounded side dish. 🍞
Seasonal Vegetable Additions
In summer, add grilled zucchini or asparagus to the plate—their smoky char contrasts with the bright green beans. For fall, roasted Brussels sprouts with balsamic glaze create a stunning visual and flavor contrast. The caramelized Brussels sprouts add sweetness that pairs wonderfully with the savory garlic butter. 🌿
Dessert Pairing Surprise
End the meal with vanilla bean ice cream—the cool creaminess cuts through the richness of the garlic butter. For a lighter option, lemon sorbet provides a bright, tangy finish that echoes the lemon juice in the green beans.
The contrast of temperatures and flavors makes this an unexpected but delightful pairing. 🍦
Nutrition facts
Frequently asked questions
Why do I need to shock the green beans in ice water?
The ice water bath stops the cooking process instantly, locking in their vibrant green color and crisp texture. Without shocking, the beans would continue cooking and turn mushy. This step is what gives them that perfect crisp-tender bite that makes this recipe so special.
Can I use frozen green beans instead of fresh?
Fresh beans are ideal for this recipe, but if you must use frozen, thaw and drain them completely first. Then, skip the blanching step and sauté them directly in the garlic butter for about 5-6 minutes until heated through. The texture won't be quite as crisp, but it still works in a pinch.
How do I prevent the garlic from burning?
Cook the garlic over medium heat for just 30 seconds until fragrant, then remove the pan from heat immediately. The butter should be hot but not browned. If you see the garlic starting to color, it's time to take it off the heat to avoid bitterness.
Can I make this ahead of time?
Yes! Blanch and shock the beans up to 2 days ahead and store them in an airtight container in the fridge. Reheat gently in a skillet with a splash of water, then finish with the garlic butter sauce. For longer storage, freeze the blanched beans (without sauce) for up to 3 months.
What if my green beans turn out too mushy?
Overcooking during blanching is the most likely cause. Stick to exactly 3 minutes in boiling water, and always shock them immediately. If they're still too soft, try roasting them at 425°F for 15-20 minutes with olive oil, salt, and pepper for a different texture.