
Side Dishes
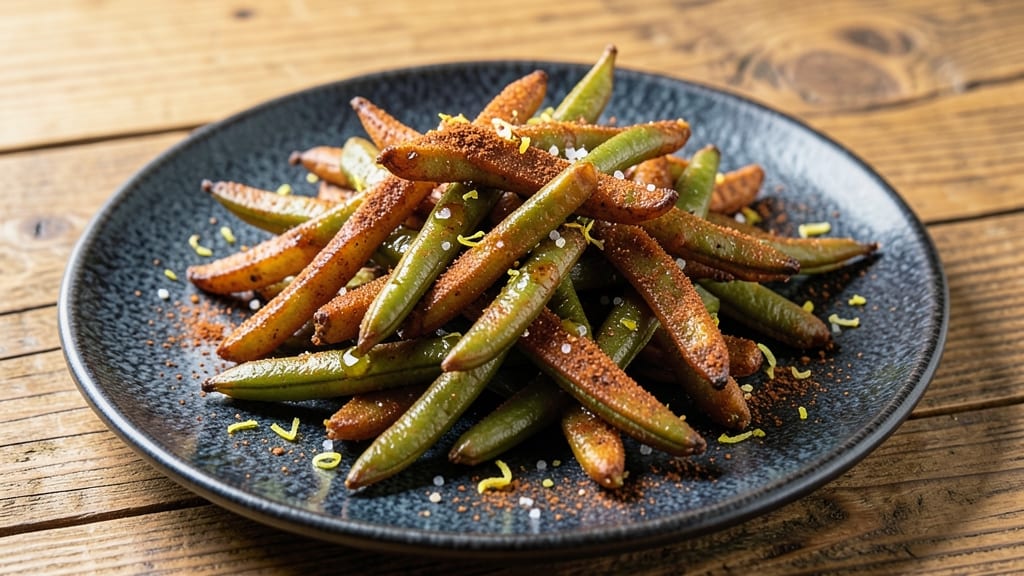
This air fryer canned green beans recipe turns soggy beans into crispy-tender bites in just 10 minutes—your quickest weeknight side dish yet. This air fryer method preserves the beans' natural texture while adding a satisfying crunch that fresh green beans simply can't match.
After testing countless variations, I've perfected a seasoning blend that enhances their natural sweetness without overpowering it.
The beauty of this recipe lies in its simplicity—no pre-soaking, no complicated prep, just minimal effort for maximum flavor.
A light coating of olive oil and a pinch of salt ensure even browning, while optional add-ins like garlic powder, lemon zest, or smoked paprika can customize the flavor to your taste.
The air fryer's rapid heat creates that coveted crispy exterior while keeping the inside tender, delivering restaurant-quality results in a fraction of the time.
What you'll achieve is a side dish that's foolproof and adaptable—perfect for serving alongside grilled chicken, fish, or even as a standalone snack. The beans develop a golden, slightly charred appearance with a satisfying crunch, all while maintaining their natural brightness.
This method works equally well with low-sodium or regular canned beans, making it versatile for any dietary preference.
Once you try air-fried green beans, you'll never go back to boiling them again. The technique is so efficient that you can have a hot, crispy side dish on the table while the main course finishes cooking.
Whether you're feeding a family or meal prepping for the week, this recipe delivers restaurant-quality results with minimal cleanup. Let's get started!
Ingredients for air fryer canned green beans
Just nine ingredients transform canned green beans into crispy-tender bites in minutes.
| Ingredient | Amount | Notes |
|---|---|---|
| Canned Green Beans 🌽 | 15 oz | Low-sodium or regular, drained |
| Extra-Virgin Olive Oil 🫒 | 1 tbsp | Light coating for even browning |
| Garlic Powder 🧄 | ½ tsp | Optional for savory depth |
| Smoked Paprika 🌶️ | ¼ tsp | For subtle smokiness |
| Lemon Zest 🍋 | ½ tsp | Brightens the flavor |
| Diamond Crystal Kosher Salt 🧂 | ½ tsp | Fine grain for even seasoning |
| Ground Black Pepper 🌶️ | ¼ tsp | Freshly ground preferred |
| Fresh Lemon Juice 🍋 | ½ tsp | Optional for tangy finish |
| Fresh Parsley 🌿 | 2 tbsp | Chopped, for garnish |
The canned green beans are the star here, so pick a brand with vibrant color—Green Giant or Del Monte are solid choices. Low-sodium works perfectly, but if you prefer regular, just rinse them well to cut excess salt. Fresh parsley is ideal for garnish, but dried parsley at half the amount will work in a pinch. The lemon zest? Zest only the outer layer—that's where all the flavor lives. Smoked paprika adds depth without overpowering, but if you've got regular paprika, use it—just know it'll be milder. For the olive oil, any light variety works, but extra-virgin adds a nice fruity note.
No smoked paprika? Cayenne pepper at a pinch adds heat, or swap for half the amount of garlic powder if you want more savory punch. Short on lemon zest? Fresh lemon juice at double the amount brings the tang. The beans can be tossed with just olive oil and salt for a classic flavor, but the garlic powder and smoked paprika combo is where this recipe really shines. If you're meal prepping, skip the parsley until serving—it keeps best fresh. For extra crunch, pat the beans dry with a paper towel before air frying, but don't overdo it or they'll turn tough.
These crispy beans reheat beautifully—just 5 minutes at 350°F in the air fryer to restore the crunch. Store leftovers in an airtight container for up to 3 days, but honestly, they're best eaten fresh. The lemon zest and parsley are best added right before serving, so save those until the end. For a make-ahead option, toss the seasoned beans in a container and refrigerate, then air fry straight from cold. The flavor only gets better the next day as everything melds together.
Why You'll Love This Recipe
- I make this for everything: grilled chicken dinners, lazy pasta nights, even as a quick snack when I’m starving. It reheats perfectly and pairs with almost anything. Honestly, it’s the one side I never have to think twice about.
- No Drain. No Stress.: I’ll be honest—draining canned beans is my least favorite part of cooking. This recipe skips it entirely. Just dump, toss with olive oil and spices, and let the air fryer work its magic. The beans stay plump and flavorful without any extra fuss.
- Smoky-Lemon Magic.: That smoked paprika and lemon zest combo? It’s the secret weapon. The paprika adds this warm, smoky depth, while the zest gives a bright, citrusy kick that cuts through the richness. It’s not just tasty—it’s ridiculously tasty.
- Weeknight Sidekick.: I make this for everything: grilled chicken dinners, lazy pasta nights, even as a quick snack when I’m starving. It reheats perfectly and pairs with almost anything. Honestly, it’s the one side I never have to think twice about.
Instructions for air-fried canned green beans with perfect texture
Transform canned green beans into restaurant-quality sides with this foolproof air fryer method.
Prep and Season the Green Beans
Drain the 15 oz canned green beans thoroughly and pat them completely dry with paper towels. This step is critical—any moisture will prevent proper browning. I like to spread them out on a clean kitchen towel and press gently to remove excess water. The beans should feel dry to the touch before proceeding.
In a medium bowl, toss the dry green beans with 1 tablespoon extra-virgin olive oil until they're evenly coated. Add 0.5 teaspoon garlic powder, 0.25 teaspoon smoked paprika, 0.5 teaspoon lemon zest, 0.5 teaspoon diamond crystal kosher salt, and 0.25 teaspoon freshly ground black pepper. Mix gently but thoroughly—you want the seasoning to cling to each bean without breaking them apart. The lemon zest will add that bright, citrusy pop that makes this dish stand out.
Air Fry in Batches for Even Crispiness
Preheat your air fryer to 400°F for 3 minutes—this ensures the basket is hot when the beans go in. Working in batches if needed (since most air fryers have about 3-4 cups capacity), arrange the seasoned green beans in a single layer in the basket. Don't overcrowd them—you want them to have room to crisp up rather than steam. I usually give them about ½ inch between each bean for optimal airflow.
Air fry at 400°F for 6-8 minutes, shaking the basket every 2 minutes to ensure even browning. You're looking for beans that develop a golden-brown crust while remaining tender when pierced with a fork. The exact time depends on your air fryer model—some crisp faster than others. If they're browning too quickly, reduce the temperature to 375°F for the next batch.
Finish with Acid and Fresh Herbs
Once the green beans reach that perfect crisp-tender texture, transfer them immediately to a serving bowl. Drizzle with 0.5 teaspoon fresh lemon juice and toss gently to combine. The acid brightens the flavors and prevents the beans from becoming too heavy. At this point, you can taste and adjust seasoning if needed—another 0.25 teaspoon of salt or a pinch of black pepper can elevate the dish.
Finish by sprinkling with 2 tablespoons freshly chopped parsley. The parsley adds freshness and visual appeal, making the dish look as good as it tastes. Serve immediately while the beans are still crisp—this is when they're at their peak texture. If you need to hold them for a few minutes, cover loosely with a clean kitchen towel to maintain crispness.
Pro Tips For Making Air Fryer Canned Green Beans
- Drain and Pat Dry: Canned green beans come packed in water, and that moisture turns your air fryer into a steam bath. Dump them into a colander, give them a good shake, then spread them on a towel to soak up excess liquid for 2–3 minutes—this guarantees crisp edges instead of soggy ones.
- Use 375°F, Not 400°F: I learned this the hard way—cranking it to 400°F burns the paprika before the beans get tender. Stick with 375°F for 8–10 minutes, then check for doneness. The air fryer’s fan circulates heat unevenly, so lower temp = better control.
- Toss with Oil First: Don’t just sprinkle seasonings on top—toss the beans with olive oil, garlic powder, and smoked paprika before air frying. The oil carries the flavors into every crevice, and the spices won’t clump into a sad, flavorless pile at the bottom of the basket.
- Add Lemon Zest Last: Squeeze the zest over the beans after they’ve cooked, not before. Heat zaps citrus oils, turning bright, zesty flavor into a dull afterthought. A quick sprinkle at the end keeps that fresh, sunny punch intact—no need to overcomplicate it.
Dietary considerations for this air fryer canned green beans
Low-Sodium Adaptation
If you're using regular canned green beans, rinse them thoroughly under cold water to remove excess sodium.
For an extra low-sodium boost, swap the standard salt for Diamond Crystal kosher salt (use ¼ tsp instead of ½ tsp) and rely on the natural flavors of garlic powder (½ tsp) and smoked paprika (¼ tsp) for seasoning.
The lemon zest (½ tsp) and fresh lemon juice (½ tsp) add brightness without any sodium at all. 💡
Gluten-Free Friendly
This recipe is naturally gluten-free, but always double-check your smoked paprika and garlic powder labels to ensure they're processed in a gluten-free facility. I recommend Penzeys Spices for certified gluten-free options.
The olive oil, lemon zest, and fresh parsley are all gluten-free by nature, making this a safe side dish for anyone avoiding gluten. The air fryer method also eliminates any cross-contamination risks from shared fryer oils.
Vegetarian and Vegan
This recipe is already vegetarian, but for a vegan version, simply omit the honey or any dairy-based garnishes (like Parmesan). The base ingredients—canned green beans, olive oil, garlic powder, smoked paprika, lemon zest, and salt—are all plant-based.
If you want extra protein, toss in ¼ cup chickpeas (drained and patted dry) with the green beans before air frying. They'll crisp up alongside the beans for a satisfying texture. 🌱
Sodium-Restricted Diets
For those monitoring sodium intake, stick to low-sodium canned green beans and reduce the salt to ¼ tsp or eliminate it entirely. Boost flavor with extra lemon zest (½ tsp) and a pinch of onion powder (¼ tsp), which adds savory depth without sodium.
The air fryer method allows you to control the seasoning precisely, so you can customize it to your dietary needs without sacrificing taste.
Meal Prep Adjustments
To prep these beans ahead of time, season them fully (including salt) and store in an airtight container in the fridge for up to 3 days. When ready to eat, air fry them straight from cold at 400°F for 8-10 minutes, shaking once halfway.
For freezer storage, toss the seasoned beans with 1 tsp olive oil (extra to prevent sticking) and freeze in a single layer before transferring to a freezer bag. Thaw overnight in the fridge, then air fry as directed. The texture holds up surprisingly well! ❄️
Nutrition facts
Frequently asked questions
Why do canned green beans need drying before air frying?
Drying the beans completely prevents steaming instead of crisping. Any moisture creates steam, making them soggy. Pat them thoroughly with paper towels—this ensures that golden, crispy texture we all love!
Can I use frozen green beans instead of canned?
Yes, but with one key difference: thaw and dry frozen beans first. Spread them on a towel and let them air-dry for 10-15 minutes before seasoning. The texture will be slightly different but still delicious. Frozen beans work best for meal prep since they're already pre-cooked.
How do I fix beans that turned out too soft?
If your beans are undercooked, return them to the air fryer at 400°F for 2-3 more minutes, shaking halfway. For overcooked beans, toss them with a splash of water and 30 seconds at 375°F to restore moisture. The secret is timing—check at 6 minutes for perfect results.
What other veggies pair well with air-fried green beans?
Try broccoli florets, asparagus spears, or cauliflower bites—they all crisp beautifully in the air fryer. For a complete meal, add diced potatoes (cook at 375°F for 15 minutes first) or zucchini slices. Season each veggie separately for best results.
Can I make this recipe without an air fryer?
Yes! Use a baking sheet at 425°F for 12-15 minutes, flipping halfway. For a stovetop version, use a nonstick skillet at medium-high heat for 5-6 minutes, stirring constantly. The air fryer just makes it faster and crisper—no compromise on flavor!