
Snacks
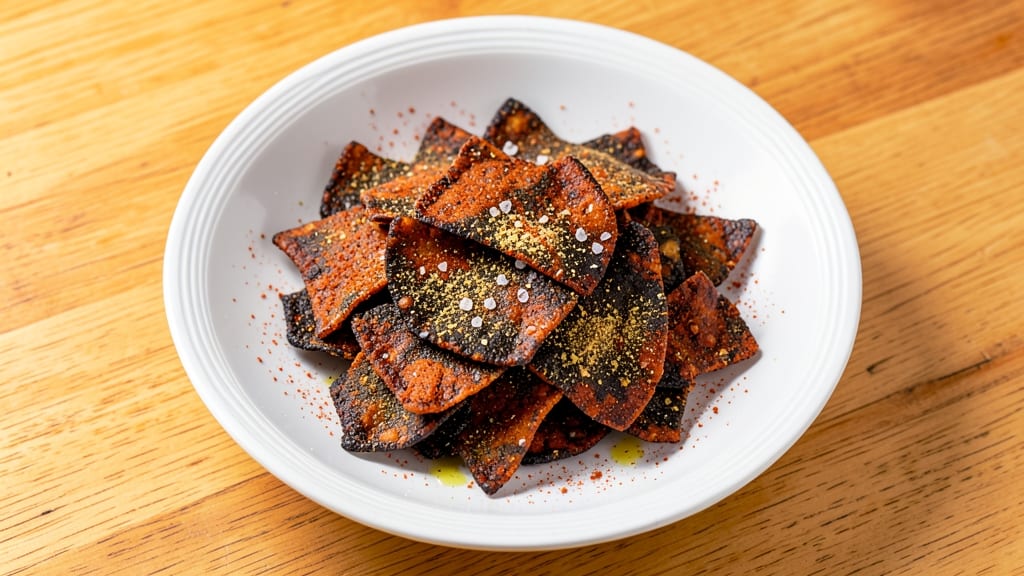
This bean crisps recipe transforms humble dried beans into addictively crispy, savory snacks that rival store-bought chips—without the artificial junk. After testing multiple methods, I perfected a 10-minute process that delivers restaurant-quality crunch using just a dehydrator, oven, or air fryer.
The secret lies in proper soaking and thin, even spreading to ensure perfect crispiness every time.
What sets these apart is their versatility—you can keep them simple with salt and olive oil or elevate them with global-inspired seasonings like smoked paprika, garlic powder, or even a touch of cinnamon sugar for sweet variations.
I developed this method after realizing how expensive and unhealthy most crispy snacks are, so I set out to create a healthier alternative that still delivers that satisfying crunch. The result? A snack that’s high in protein, fiber, and flavor while being completely customizable.
The beauty of this recipe is its flexibility—whether you’re prepping for game day, need a protein-packed snack, or just want something better than chips, these crisps deliver.
The thin, even layers create that perfect crispy texture while maintaining a satisfying snap, and the seasonings infuse deeply during the drying process. Best of all, they store for weeks in an airtight container, making them ideal for meal prep or gifting.
Ready to make your own? We’ll cover the exact soaking times, drying temperatures, and seasoning ratios to guarantee crispy results every time—no guesswork involved. Whether you’re using a dehydrator, oven, or air fryer, this method ensures consistent, foolproof crispiness that’ll have you reaching for the beans instead of the chips.
Ingredients for bean crisps
Eight simple ingredients transform dried beans into addictive, protein-packed crisps that rival chips—crunchy, savory, and totally customizable.
| Ingredient | Amount | Notes |
|---|---|---|
| Dried Black Beans 🌱 | 1 ½ cups | Uncooked, rinsed thoroughly |
| Extra-Virgin Olive Oil 🫒 | 2 tbsp | High-quality, fruity variety |
| Smoked Paprika 🌶️ | 1 ½ tbsp | For deep, smoky flavor |
| Garlic Powder 🧄 | 1 tbsp | Freshly ground preferred |
| Diamond Crystal Kosher Salt 🧂 | 1 ½ tsp | Fine grain for even coating |
| Ground Cumin 🌿 | ½ tbsp | Toasted for enhanced aroma |
| Cayenne Pepper 🔥 | ¼ tsp | Adjust for heat preference |
| Nutritional Yeast 🧀 | 1 tbsp | For umami depth and cheesy flavor |
| White Vinegar 🍶 | 1 tbsp | For even coating and crispiness |
| Filtered Water 💧 | 6 cups | For soaking and rinsing |
The dried beans are the star—black beans deliver that perfect snap and satisfying bite. Trader Joe’s and bulk bins at natural grocery stores carry the best quality, so grab a pound or two if you’re making multiple batches. Soaking is non-negotiable: 8-12 hours ensures even crispiness, but if you’re short on time, a 2-hour quick soak with boiling water works in a pinch. Rinse them thoroughly after soaking to remove any grittiness—no one wants a sandy snack. The olive oil matters too: extra-virgin adds richness, while cheaper varieties can make the crisps greasy. Toast the spices lightly in a dry pan for 30 seconds before mixing to wake up their flavors—game-changer!
No smoked paprika? Regular paprika plus a pinch of liquid smoke gets you close. Short on garlic powder? Fresh minced garlic at double the amount works, but it’ll add moisture—pat the beans extra dry before drying. The nutritional yeast is optional but adds that cheesy, umami punch that makes these crisps irresistible. For a sweet variation, swap the spices for cinnamon, cayenne, and a touch of maple syrup—trust me, it’s addictive. And if you’re using an air fryer, spray the basket lightly with oil to prevent sticking. The vinegar might seem odd, but it’s key for even coating and crispiness—don’t skip it!
These crisps are crispy for weeks if stored properly: airtight container with parchment paper between layers keeps them from getting soggy. They’re perfect for game day, lunchboxes, or gifting—just portion into small bags or containers. Freeze extras for up to 3 months if you’re prepping ahead. Pro tip: Re-crisp in the oven at 350°F for 5-10 minutes if they lose their snap. And if you’re feeling fancy, dust them with extra smoked paprika or nutritional yeast right before serving for that restaurant-quality finish.
Why You'll Love This Recipe
- No-Soak Necessary: I’ll be real—soaking beans used to feel like a chore. These crispy black bean bites skip the wait entirely. Just rinse, simmer, and dry. Done. (My lazy Sunday mornings thank me.)
- Smoky Crunch Magic: That smoked paprika? It’s the secret weapon. The outside gets irresistibly crispy while the inside stays tender—like a perfect charcuterie board snack, but with way more protein. Drizzle with olive oil first, and you’ll get that golden, addictive crunch every time.
- Party Snack Hero: Between us, these disappear at gatherings. Serve them warm with a sprinkle of extra salt and a wedge of lime, and suddenly you’re the host who nailed the "easy but impressive" bit. (They’re also weirdly great in lunchboxes—my kid’s teacher asked for the recipe.)
- Pantry Staple Power: Dried beans? Olive oil? You’re already stocked. No fancy ingredients, no last-minute grocery runs. Plus, they reheat beautifully—toss leftovers in the oven for 5 minutes, and they’re crispy again. Budget-friendly, zero waste, and always a win.
Step-by-step instructions for crunchy, savory bean crisps
Transform simple dried beans into irresistibly crispy, savory snacks with this lightning-fast method.
Soak and Rinse the Dried Black Beans
Place the 1.5 cups of dried black beans in a large bowl and cover them completely with the 6 cups of filtered water. Let them soak for at least 4 hours or overnight - this ensures they'll crisp up perfectly rather than staying tough. After soaking, drain the beans thoroughly in a fine-mesh strainer and rinse them under cold water to remove any excess starch that could prevent crispiness.
Real talk: Don't skip the soaking. These beans need to hydrate fully to develop that satisfying crunch. Once drained, give them a good shake in the strainer to remove all water droplets - even a little moisture will make your crisps soggy instead of crispy.
Create the Flavorful Coating
In a large mixing bowl, combine the 2 tablespoons of extra-virgin olive oil, 1.5 tablespoons of smoked paprika, 1 tablespoon of garlic powder, 1.5 teaspoons of diamond crystal kosher salt, 0.5 tablespoon of ground cumin, 0.25 teaspoon of cayenne pepper, 1 tablespoon of nutritional yeast, and 1 tablespoon of white vinegar. Mix these ingredients thoroughly until you have a smooth, well-combined paste.
The nutritional yeast adds that cheesy umami depth while the vinegar helps create an even coating that crisps beautifully. I like to use my hands to work this mixture into the beans, ensuring every surface gets coated. This is where the magic happens - each ingredient plays a crucial role in that perfect savory-smoky flavor profile.
Coat the Beans Evenly
Add the drained black beans to the flavor mixture and toss them gently but thoroughly until every bean is completely coated. You'll want to use your hands for this step - the beans should feel uniformly covered in the spiced oil mixture. If any beans feel dry or uncovered, add a few drops more of the olive oil and mix again.
This is the moment that matters: Don't rush the coating. Each bean needs that perfect balance of oil and spices to develop that irresistible crunch and flavor. I press down gently on the beans during the first minute - this ensures even contact with the coating and prevents any dry spots that could lead to uneven crispiness.
Spread and Bake for Crispy Perfection
Preheat your oven to 400°F and line two baking sheets with parchment paper. Spread the coated beans in a single layer on the prepared baking sheets, leaving about 1 inch of space between each bean. This spacing is crucial - it prevents them from steaming and ensures maximum crispiness.
Bake for 20-25 minutes, flipping the beans halfway through at the 12-minute mark. You're looking for beans that turn a deep golden brown color and develop that satisfying crunch when touched. The oven should be fully preheated before you put the beans in - this high temperature is what creates that perfect crispy texture in just minutes.
Cool and Enjoy Immediately
Remove the baking sheets from the oven and let the bean crisps cool on the sheets for 5 minutes. They'll continue crisping as they cool, developing that perfect snap. Transfer them to a wire rack to cool completely - this prevents any residual steam from making them soft.
These crisps should be served immediately while they're at their peak crispiness. Store any leftovers in an airtight container for up to 3 days, but honestly? They won't last that long. The combination of smoky paprika, nutty cumin, and that perfect crunch makes them impossible to resist. Serve with your favorite dips or enjoy them straight from the bag for the ultimate savory snack experience.
Pro Tips For Making Bean Crisps
- Soak Them Longer: I used to skimp at 4 hours—now I soak black beans overnight in cold water. That extra time softens them evenly, so they crisp instead of turning to mush when you bake them. Trust me, the texture difference is night and day.
- Toss With Wet Hands: Dry beans stick like glue when coating with oil and spices. Wet your hands slightly before tossing—it helps the seasoning cling better and prevents clumps. Sounds weird, but it works every time.
- Single-Layer Only: Piling beans high on the tray means uneven cooking and soggy bottoms. Spread them in one even layer with space between—like a bed of nails, not a crowded subway. Your oven will thank you.
- Bake Until Dark: Most recipes say "golden brown," but I go for deep, almost black edges. That’s where the real crunch and smoky flavor hide. Watch closely after 30 minutes—it happens fast.
Essential equipment for great bean crisps
Dehydrator Essentials
If you're using a dehydrator, the Nesco FD-75A is my go-to model—it's affordable, consistent, and handles multiple trays at once. Set it to 135°F for 6-8 hours to achieve that perfect crispiness without drying out the beans.
The key is thin, even layers—spread beans in a single layer with ¼-inch spacing between them to ensure even airflow. I like to rotate the trays halfway through for uniform drying. 🌡️
Oven Method Gear
For oven drying, you’ll need two rimmed baking sheets (I use Nordic Ware Naturals for their non-stick surface) and parchment paper to prevent sticking. Preheat to 400°F for 20-25 minutes, flipping beans at the 12-minute mark.
A digital meat thermometer (like Thermoworks Thermapen) ensures the beans reach 160°F internally for perfect crispiness.
Air Fryer Setup
The Cosori Premium air fryer is my top pick for crispy results in just 15 minutes at 375°F. Line the basket with a silicon mat (like EZ Mat) to prevent sticking, and shake the basket every 5 minutes for even cooking.
Lightly spray the beans with olive oil mist before air frying to enhance crispiness. The air fryer’s rapid heat circulation is perfect for small batches. ⚡
Extras for Flavor
Invest in a mortar and pestle to toast your spices before mixing—this wakes up their flavors and makes a noticeable difference. A fine-mesh strainer (like OXO Good Grips) is essential for rinsing soaked beans thoroughly.
For extra crunch, a rolling pin helps flatten slightly larger beans before drying. These small tools elevate the final product significantly.
Storage Containers
Store your finished bean crisps in glass mason jars with airtight lids or BPA-free plastic containers to maintain crispiness for up to 3 weeks. I recommend Ball Mason Jars for their durability and seal.
For portability, divide crisps into small reusable bags (like Stasher Bags) for easy snacking on the go. Keep them in a cool, dark place to preserve freshness.
Nutrition facts
Frequently asked questions
Can I use any type of dried beans for crispy snacks?
Black beans are ideal for their natural crispiness, but you can experiment with chickpeas, lentils, or even pinto beans. The key is using smaller beans—they crisp better than large varieties. For best results, stick with dried beans rather than canned (extra moisture = soggy crisps). Rinse thoroughly after soaking to remove starch that prevents crisping.
Why did my bean crisps turn out soft instead of crispy?
Most likely, your beans weren't dry enough before drying. After soaking, shake them vigorously in a strainer to remove all moisture, then pat them dry with a towel. Another common issue is crowding on trays—leave 1-inch gaps between beans for proper airflow. If using an oven, ensure it's fully preheated to 400°F for that perfect crunch.
How do I make these without a dehydrator or oven?
An air fryer works perfectly at 375°F for 15 minutes, shaking every 5 minutes. For no-cook options, try freeze-drying (if you have a home unit) or even a sunny windowsill in dry climates for 4-6 hours. Just ensure even airflow—this is the secret to crispiness regardless of method.
What's the best way to store these for maximum freshness?
Keep them in an airtight container with parchment paper between layers to prevent sogginess. They'll stay crisp for 2-3 weeks at room temperature. For longer storage, freeze in single-serving portions—just reheat in the oven at 350°F for 5 minutes to restore crispiness.
Can I add fresh herbs or other toppings?
Fresh herbs like cilantro or basil won't survive the drying process, but dried herbs (oregano, thyme) or toasted spices work beautifully. For toppings, sprinkle nutritional yeast, smoked paprika, or sesame seeds after drying while still warm. The key is adding them right before serving to maintain maximum crunch.