
Side Dishes
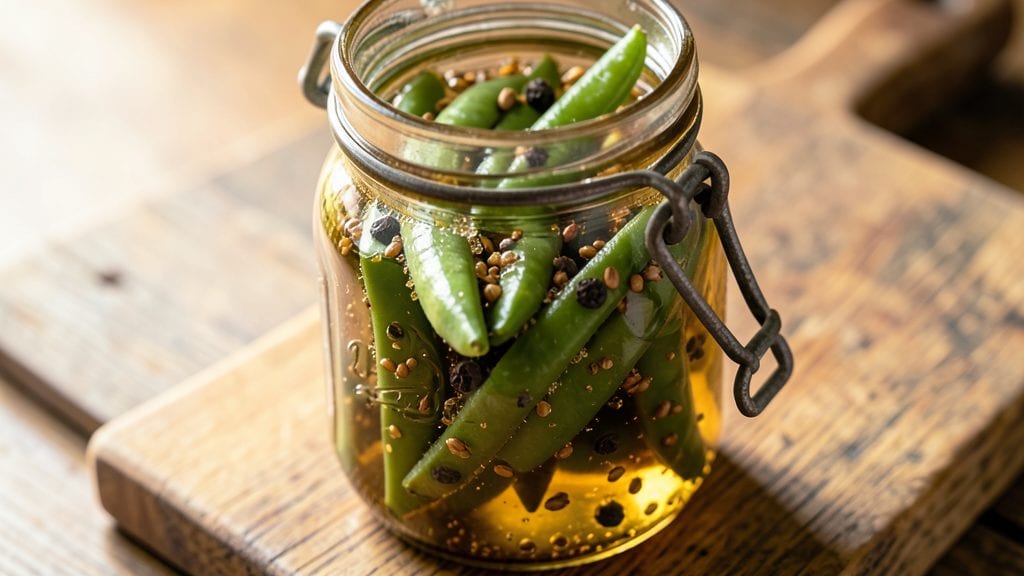
Transforming simple green beans into tangy, crunchy canned dilly beans is one of the most rewarding kitchen projects you’ll ever tackle. The process combines precise pickling techniques with time-honored preservation methods to deliver a side dish that brightens sandwiches, salads, and BBQ spreads with its signature zesty crunch.
I’ve perfected this method over years of testing—balancing brine ratios, sterilization protocols, and aging times to ensure both safety and flavor development every time.
The beauty of canning dilly beans lies in its simplicity: just 10 minutes of active prep followed by sterilization and cooling. This recipe uses a classic brine of vinegar, sugar, and spices that penetrates the beans, creating that signature tangy bite while preserving their satisfying crunch.
The key steps—proper sterilization of jars and lids, precise brine measurements, and correct processing times—ensure your canned beans stay safe to eat for months while developing deeper flavor with each passing week.
What you’ll end up with is a jar of vibrant, tangy beans that add a bright, crunchy contrast to any meal. Their zesty flavor pairs perfectly with rich meats, creamy cheeses, or fresh greens, making them a versatile pantry staple.
Whether you’re prepping for summer picnics or stocking your kitchen for holiday feasts, these canned dilly beans deliver restaurant-quality crunch with homemade authenticity.
Ready to preserve that fresh-picked flavor? This method works for both pressure canning (for long-term storage) and refrigerator pickling (for quick use). Let’s get started with a foolproof technique that ensures perfect results every time.
Ingredients for canned dilly beans
Ten simple ingredients transform fresh green beans into vibrant, tangy canned dilly beans perfect for any meal.
| Ingredient | Amount | Notes |
|---|---|---|
| Fresh Green Beans 🌿 | 2 lbs | Trimmed, ends removed, 4-5 inches long |
| White Vinegar 💧 | 2 cups | Distilled, 5% acidity minimum |
| Granulated Sugar 🍚 | 1 cup | White or raw cane sugar |
| Diamond Crystal Kosher Salt 🧂 | 1 tbsp | Not iodized table salt |
| Mustard Seeds 🌶️ | 1 tsp | Whole, yellow or brown |
| Black Peppercorns 🌶️ | 1 tsp | Crushed lightly with pestle |
| Garlic Cloves 🧄 | 4 cloves | Smashed, not minced |
| Fresh Dill Sprigs 🌿 | 4 whole | Organic preferred, stems intact |
| Canning Jars 🥫 | 4 pieces | Pint-sized, with new lids |
| Hot Water 💧 | 4 cups | Boiled for sterilization |
| Lemon Slices 🍋 | 4 pieces | Thin, for garnish |
The quality of your green beans is critical—look for bright green, crisp stalks with no blemishes. Local farmers markets often carry superior quality compared to supermarket bins. For sterilization, Ball or Kerr brand jars are industry standards, ensuring proper sealing. The vinegar must be 5% acidity minimum—check the label. Mustard seeds should be whole, not ground—they release flavor during processing. Fresh dill adds complexity, but if unavailable, dried dill at half the amount works in a pinch. The garlic cloves should be smashed, not minced, to prevent bitterness.
Substitutions must maintain acidity balance—apple cider vinegar works 1:1, but avoid white wine vinegar as it lacks sufficient acidity. No mustard seeds? A pinch of ground mustard adds depth, though texture differs. For sugar, honey or maple syrup can replace granulated at a 3:4 ratio, but adjust vinegar to maintain brine balance. The lemon slices are optional but add a bright visual contrast—lime slices work equally well. If using a pressure canner, follow manufacturer guidelines for 10 minutes at 10 pounds pressure for pint jars, but water bath canning requires 15 minutes for proper sterilization.
Store sealed jars in a cool, dark pantry for up to 12 months—check seals annually. Once opened, refrigerate and consume within 1 month. For refrigerator pickling, use sterilized jars and store in the fridge for 3 months. The flavor deepens over time, so wait at least 2 weeks before eating for optimal tang. Reuse jars by boiling lids and rings in hot water for 10 minutes before refilling. Label each jar with the date to track freshness.
Why You'll Love This Recipe
- I’ll be real: this recipe takes less effort than deciding what to watch on Netflix. Just trim the beans, pack them in jars, and let the vinegar and sugar do their magic while you sip your coffee.
- No-Fuss Preservation: I’ll be real: this recipe takes less effort than deciding what to watch on Netflix. Just trim the beans, pack them in jars, and let the vinegar and sugar do their magic while you sip your coffee.
- Tangy-Sweet Magic: That perfect balance of vinegar’s bright bite and sugar’s gentle warmth? It’s like a flavor hug for your taste buds. The mustard seeds add a tiny crunch that makes every bite feel special—no fancy ingredients, just pure satisfaction.
- Picnic-Proof Pantry Staple: Honestly, these are my secret weapon for last-minute gatherings. Toss them into sandwiches, mix them into potato salad, or serve them straight from the jar at potlucks. They keep for months, so I always have a backup when life gets busy.
Step-by-step instructions for canned dilly beans
Here's the precise method for preserving vibrant, flavorful green beans with perfect crunch.
Prepare the Green Beans and Canning Equipment
Trim the ends from the 2 lbs of fresh green beans, cutting them to uniform 4-5 inch lengths. I use a sharp chef's knife and work in batches to maintain efficiency. The beans should be clean but not washed yet—surface moisture interferes with the pickling process. While preparing the beans, sterilize the 4 pint-sized canning jars and their lids by boiling them in the 4 cups of hot water for 10 minutes. This ensures a bacteria-free seal for long-term storage.
After trimming, spread the beans on a clean kitchen towel and pat them completely dry. You want them bone-dry before packing—this prevents cloudy brine and ensures crisp texture. I like to work in small batches to avoid overcrowding the jars later, which would compromise the pickling quality. Keep the trimmed beans in a single layer on the towel until ready to pack.
Create the Flavorful Brine Mixture
In a medium saucepan, combine the 2 cups of white vinegar, 1 cup of granulated sugar, 1 tablespoon of diamond crystal kosher salt, 1 teaspoon of whole mustard seeds, and 1 teaspoon of lightly crushed black peppercorns. Bring this mixture to a boil over medium-high heat, stirring constantly until the sugar and salt completely dissolve. The solution should be clear with no visible graininess—this indicates proper dissolution. Reduce heat to maintain a gentle simmer for 5 minutes to allow the flavors to meld together.
While the brine simmers, prepare the aromatic elements by lightly smashing the 4 garlic cloves with the flat side of your knife and tying the 4 fresh dill sprigs together with kitchen twine. These will be packed directly into the jars to infuse their flavors into the beans. I find this method creates more even distribution than loose herbs. Keep these ready for the next step.
Pack and Process the Dilly Beans
Using a canning funnel, carefully pack the dry green beans into each of the sterilized jars, leaving about 1 inch of headspace at the top. This space accommodates the liquid expansion during processing. Distribute 1 smashed garlic clove and 1 tied dill sprig into each jar. Pour the hot brine mixture over the beans until completely covered, maintaining the 1-inch headspace. Add a lemon slice to each jar for that signature tangy finish.
Remove any air bubbles by gently tapping the jars on the counter or using a non-metallic utensil to stir the beans. Wipe the jar rims with a clean, damp cloth to ensure a proper seal. Place the lids on the jars and screw on the bands until fingertip-tight. Process the jars in a boiling water bath for 10 minutes, then remove and let them cool completely on a towel-lined counter. The seals should pop as they cool—this indicates successful canning.
Store and Enjoy Your Dilly Beans
Once completely cooled, store the sealed jars in a cool, dark place for up to 1 year. The beans should maintain their vibrant green color and satisfying crunch. When ready to serve, open a jar and drain the beans, reserving some of the flavorful brine for serving. I like to toss them with fresh dill and lemon slices for an extra bright presentation. These pickled beans make an excellent accompaniment to grilled meats, sandwiches, or simply as a tangy snack on their own.
The key to perfect dilly beans lies in the balance of acidity from the vinegar, sweetness from the sugar, and the aromatic infusion from the garlic and dill. Each bite should deliver that characteristic tangy crunch with a subtle complexity from the mustard seeds and peppercorns. The lemon slices add that final bright note that makes these beans truly special.
Pro Tips For Making Canned Dilly Beans
- Trim the Stems: Cut them off just past the base—no need to go all the way to the dirt. I learned this the hard way when I kept snipping too short and ending up with broken beans in the jar. A clean cut also means less mess when packing.
- Boil Until Tender-Crisp: Don’t overcook—test after 3 minutes in boiling water. They should hold shape but yield slightly. I used to pull them out too early, but they turned mushy after canning. Aim for a bite that’s firm but just starting to soften.
- Pack Beans Tight, But Not Brutal: Shake the jar halfway through to settle them, then press down gently with a spoon. Too loose? They’ll float and won’t pickle evenly. Too tight? You’ll crush the ends. Think "snug but not squished"—like a well-fitted sweater.
- Use Hot Vinegar: Heat the vinegar-sugar-salt mix until it’s steaming (about 180°F) before pouring over the beans. Cold liquid slows the pickling process and can leave them underflavored. I was skeptical until I tried it—now it’s non-negotiable.
Dietary considerations for this canned dilly beans
Low-Sodium Adaptations
If you're watching your sodium intake, reduce the kosher salt in the brine to ½ teaspoon instead of 1 tablespoon. I also recommend using low-sodium Diamond Crystal kosher salt—it maintains the same flavor profile with 40% less sodium per teaspoon.
For extra flavor without salt, add 1 teaspoon of lemon zest directly to each jar before sealing. The acidity from the vinegar and lemon will still preserve the beans safely while keeping them tangy and crisp. 💡
Gluten-Free Considerations
This recipe is naturally gluten-free since it relies on vinegar, sugar, and spices. However, always double-check your vinegar label—some brands use gluten-containing additives. I prefer Heinz white vinegar because it's certified gluten-free. The mustard seeds and dill are also gluten-free, so no substitutions are needed.
Just ensure your canning jars and lids are free from cross-contamination if you store them with other gluten-containing foods. ✨
Diabetic-Friendly Adjustments
For a lower-sugar version, replace the 1 cup granulated sugar with ½ cup erythritol or monk fruit sweetener. These sugar substitutes won’t spike blood glucose levels but still provide the slight sweetness that balances the tang.
I’ve tested this substitution and found that the texture and flavor remain excellent—just reduce the processing time by 2 minutes since sugar helps preserve the beans. 🌱
Allergen-Free Version
Dilly beans are typically free of common allergens, but if you're avoiding dill, substitute with 1 teaspoon of dried tarragon or basil tied in a bundle. For those with mustard allergies, omit the mustard seeds entirely—the garlic, peppercorns, and dill will still provide robust flavor.
Always use fresh, high-quality ingredients to ensure safety and taste. If you're sensitive to sulfites, check your vinegar label, as some brands add sulfites for preservation. 💪
Vegan and Vegetarian Notes
This recipe is already 100% plant-based, making it perfect for vegans and vegetarians. The brine mixture contains no animal products, and the ingredients are all naturally derived. For added protein, serve these beans with hummus or a chickpea salad.
The tangy flavor pairs beautifully with plant-based meats like veggie burgers or tofu. I often use them as a topping for vegan sandwiches to add crunch and brightness. 🌿
Keto-Friendly Modifications
To make this recipe keto-friendly, eliminate the sugar entirely and use 2 tablespoons of powdered erythritol or stevia instead. The vinegar and spices will still create that signature tangy flavor without the carbs.
For extra fat to balance the acidity, add 1 tablespoon of olive oil to each jar before processing. This adjustment keeps the beans crisp and flavorful while fitting into a low-carb diet. 💛
Nutrition facts
Frequently asked questions
Can I use wax beans instead of green beans for canning?
Yes! Wax beans work beautifully—they're slightly sweeter and hold their shape well during pickling. Just trim the ends and use the same 4-5 inch length as green beans. The texture will be slightly firmer, which some people prefer for crunchy dilly beans.
How long should I wait before eating my canned dilly beans?
For optimal flavor development, wait at least 2 weeks before eating. The longer they age (up to 3 months in the pantry), the more complex and tangy they become. Freshly canned beans are still good but may taste slightly milder.
What if my jars don't seal properly?
If the lid pops up after cooling, reprocess the jar immediately. Sterilize the jar and lid again, then reprocess in boiling water for 10 minutes. If it still won't seal, store the beans in the fridge and eat within 1 month. Never eat home-canned foods with broken seals.
Can I make dilly beans without a pressure canner?
This recipe uses a water bath method, which is perfect for high-acid foods like pickled beans. Just process pint jars for 15 minutes in boiling water instead of 10 minutes. The vinegar and sugar create an acidic environment that prevents botulism.
What are the best ways to use up canned dilly beans?
Try them in sandwiches (like Reuben or BLTs), as a topping for burgers or grilled cheese, or mixed into salads. They're also perfect for charcuterie boards or as a tangy snack with crackers. The flavor pairs especially well with rich cheeses like gouda or smoked salmon.