
Side Dishes
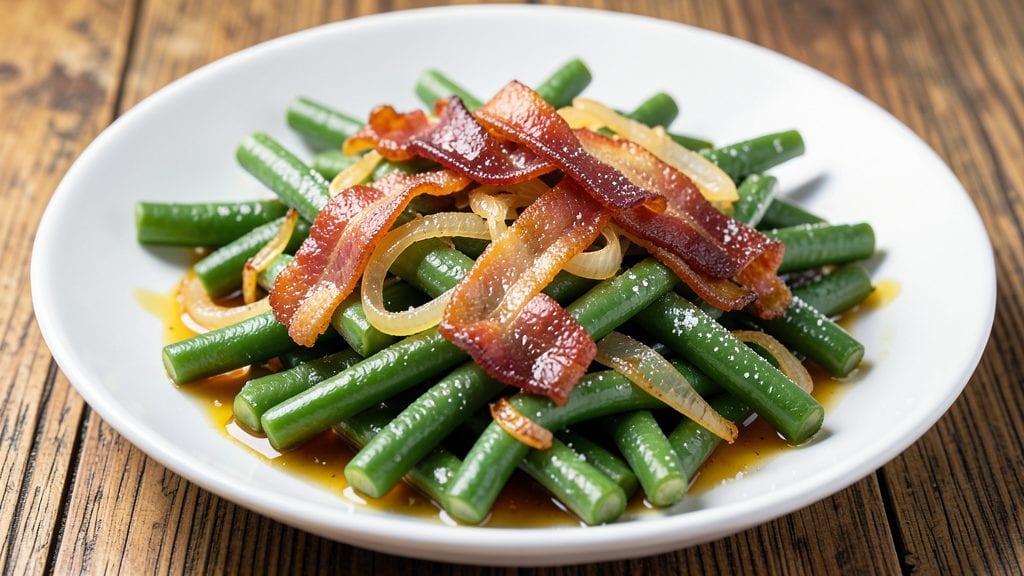
This canned green beans with bacon and onions recipe transforms pantry staples into a side dish that tastes like it simmered all day—smoky, sweet, and packed with crunch in just one pan.
After years of testing shortcuts, I perfected a method that delivers restaurant-quality flavor without requiring fresh ingredients or complicated steps. The key lies in rendering the bacon until crispy, caramelizing the onions until deep golden, and letting everything meld together in a single skillet.
The beauty of this recipe is its foolproof simplicity: no chopping, no draining, and no fuss. You'll start with canned green beans for convenience, but the bacon and onions add depth that turns this into something special—rich, savory, and satisfying.
The onions develop a natural sweetness as they cook down, while the bacon adds a salty, smoky contrast that balances everything perfectly. It's the kind of dish that elevates a simple weeknight meal into something memorable.
By the time you're done, you'll have a crispy-edged, caramelized side dish that's ready in under 25 minutes. The green beans stay tender-crisp, the onions are soft yet sweet, and the bacon adds texture with every bite.
This recipe works as a standalone appetizer, a hearty side for grilled meats, or even a quick protein boost for salads. The best part? It comes together while you're cooking the main course, so dinner is ready faster than you'd expect.
Whether you're feeding a family or prepping for a potluck, this dish delivers restaurant-quality results with minimal effort. The flavors develop as they cook, so the longer you let it simmer, the richer it becomes.
Serve it warm alongside roasted chicken, steak, or even as a topping for baked potatoes. Here's how to make it—simple, smoky, and satisfying every time.
Ingredients for canned green beans with bacon and onion
Pantry staples that taste like they simmered all day—just one pan, big flavor.
| Ingredient | Amount | Notes |
|---|---|---|
| Canned Green Beans 🌿 | 15 oz | Drained, no salt added preferred |
| Bacon 🥓 | 6 oz | Thick-cut, chopped into 1/2-inch pieces |
| Yellow Onion 🧅 | 1 whole | Medium, thinly sliced |
| Butter 🧈 | 2 tbsp | Unsalted, for cooking onions |
| Granulated Sugar 🍯 | 1 tsp | Enhances onion sweetness |
| Apple Cider Vinegar 🍎 | 1 tbsp | Brightens flavors |
| Salt 🧂 | ½ tsp | Kosher or sea salt |
| Black Pepper 🌶️ | ¼ tsp | Freshly ground |
| Garlic Powder 🧄 | ½ tsp | For subtle depth |
| Fresh Parsley 🌿 | 2 tbsp | Chopped, for garnish |
The bacon makes this dish. Thick-cut is worth hunting down—it renders slower and stays crispier. Costco or Trader Joe's usually have it pre-chopped for convenience, but if you're chopping yourself, go for 1/2-inch pieces. The onions? Yellow is classic, but red or sweet onions add a nice twist. Look for firm, dry onions with no soft spots. Don't skip the sugar—it helps caramelize the onions faster and brings out their natural sweetness. (Pro tip: if you're using pre-sliced onions from the store, rinse them first to remove any excess moisture.)
No thick-cut bacon? Regular bacon works fine, just chop it smaller. Ran out of apple cider vinegar? White vinegar or lemon juice does the trick. If you're avoiding sugar, skip it entirely—the onions will still caramelize, just slower. Fresh parsley is ideal, but dried parsley at one-third the amount works in a pinch. No parsley? Fresh chives or basil add a nice pop of color. The canned green beans should be 'no salt added' if possible—low-sodium versions are fine too, but avoid regular canned beans unless you adjust the salt later.
This dish tastes even better the next day. Store leftovers in an airtight container in the fridge for up to 3 days. It reheats beautifully—just warm in a skillet over medium heat with a splash of water to keep it moist. For make-ahead prep, cook everything except the parsley, then store in the fridge. Toss with fresh parsley when serving. The bacon will stay crispy if you reheat it gently, so don't rush it. Portion into containers for easy grab-and-go lunches—it's perfect cold too.
Why You'll Love This Recipe
- Five-Minute Prep: I swear, this dish is the kind of recipe where you open the can, chop one onion, and you’re basically done. The bacon cooks while you drain the beans—no standing around waiting for water to boil or chopping mountains of fresh veggies.
- Crispy-Sweet Magic: That caramelized onion and crispy bacon edge? It’s like a little flavor party in your mouth, and the touch of sugar just makes the whole thing sing. Honestly, the first time I tasted it, I thought, “Why haven’t I done this before?”
- Potluck Star: Bring this to a gathering, and you’ll be the hero. It’s hearty enough for a side but light enough to eat straight from the bowl. My in-laws always ask for the recipe—though I keep it close.
- Budget Leftovers: A can of beans, a pack of bacon, and a few pantry staples? This feeds four for under $8. And the best part? It tastes just as good reheated the next day—perfect for busy mornings or lunchboxes.
Step-by-step instructions for canned green beans with bacon and onions
This one-pan wonder delivers smoky, sweet flavors with minimal effort—perfect for weeknight dinners.
Cook the Bacon Until Crispy
Place the 6 oz bacon in a large skillet over medium heat. Let it cook undisturbed for 5-7 minutes until the edges start to crisp and the fat begins to render. You'll know it's ready when the bacon releases easily from the pan—this ensures maximum crispiness. Once crispy, use a slotted spoon to transfer the bacon to a paper towel-lined plate, leaving the rendered fat in the skillet. Don't drain the fat; it's the secret to flavorful onions and beans.
While the bacon cooks, give it a gentle shake every few minutes to help the fat render evenly. If the fat starts smoking too aggressively, reduce the heat slightly. This step builds the foundation for all the rich, smoky flavors in your dish.
Sauté the Onions Until Caramelized
Add the 2 tbsp butter to the skillet with the bacon fat and melt it over medium heat. Toss in the 1 whole yellow onion, sliced thinly, and sprinkle with the 1 tsp granulated sugar. Cook for 8-10 minutes, stirring occasionally, until the onions soften and turn a beautiful golden brown. The sugar helps caramelize the onions, adding a subtle sweetness that balances the smokiness of the bacon.
You'll notice the onions release their moisture at first, but as they cook, they'll shrink down and develop those gorgeous caramelized edges. This is where the magic happens—don't rush this step. If the onions start to stick, give them a quick stir to loosen them. The goal is tender, sweet onions that'll melt into the beans.
Add the Green Beans and Seasonings
Drain and rinse the 15 oz canned green beans to remove any excess sodium, then add them to the skillet with the onions. Stir everything together and sprinkle with the 0.5 tsp salt, 0.25 tsp black pepper, and 0.5 tsp garlic powder. Pour in the 1 tbsp apple cider vinegar and toss gently to combine. The vinegar brightens the flavors and cuts through the richness of the bacon fat.
Let the green beans cook for 4-5 minutes over medium heat, stirring occasionally. You want them heated through but still vibrant green—overcooking will turn them mushy. If the mixture looks dry, add 1-2 tablespoons of water to help steam the beans gently. The beans should be tender but still hold their shape, with a slight crunch.
Finish with Crispy Bacon and Fresh Parsley
Return the crispy bacon to the skillet and toss everything together for 1-2 minutes until the bacon is warmed through and the flavors meld. The bacon will release its remaining fat, creating a luscious sauce that coats the green beans. Taste and adjust the seasoning if needed—you might want a touch more salt or vinegar to balance the flavors.
Remove the skillet from heat and stir in the 2 tbsp chopped fresh parsley. The parsley adds a fresh, bright finish that cuts through the richness. Let the dish sit for 2-3 minutes off the heat so the flavors continue to develop. Serve immediately while the bacon is still crispy and the beans are warm.
This dish is perfect as a side for grilled meats, fried chicken, or even on its own as a light main course. The combination of smoky bacon, sweet onions, and tangy vinegar creates a flavor profile that's both comforting and exciting.
Pro Tips For Making Canned Green Beans With Bacon And Onion
- Cook Bacon Low and Slow: I learned this the hard way—crispy bacon is great, but for this dish, you want it tender and flavorful, not burnt. Cook it on medium-low heat until just crisp enough to crumble (about 8-10 minutes), then pull it off the pan and set aside. That way, you won’t end up with a greasy, overcooked mess when you toss it back in later.
- Drain and Rinse Beans: Canned green beans come packed in salty brine, and if you skip rinsing, your dish will taste like a swim in the ocean. Drain them well, then give them a quick cold-water rinse to cut the salt—especially if you’re using reduced-sodium bacon or butter. Trust me, your taste buds will notice the difference.
- Sweat Onions Until Soft: Don’t just chop onions and toss them in—take the time to sweat them in butter until they’re translucent and just starting to caramelize (about 5 minutes). This builds flavor that’ll make the whole dish taste richer, not just like raw onion. If you’re impatient, at least get them soft before adding the beans.
- Add Sugar Last: Sugar burns faster than you think, and if you add it too early, you’ll end up with a bitter, caramelized mess. Stir it in right at the end, right when the beans are heated through—just enough to balance the smokiness of the bacon. A teaspoon is plenty; you’re not making candy here.
Regional styles of canned green beans with bacon and onion
Southern Comfort Style
The South takes this dish to heart by adding a touch of heat and depth. After cooking the bacon and onions as directed, stir in ½ teaspoon smoked paprika and ¼ teaspoon cayenne pepper with the green beans.
For extra richness, fold in ½ cup cooked collard greens (chopped) during the final 2 minutes of cooking. This version pairs perfectly with fried chicken or smothered pork chops. Serve with a side of cornbread for a true Southern feast. 🌶️
Midwest Heartland Twist
In the Midwest, they love their brown sugar and mustard—this variation swaps the granulated sugar for 1 teaspoon light brown sugar and adds 1 teaspoon Dijon mustard when tossing with the green beans. The mustard adds a subtle tang that cuts through the bacon fat beautifully.
Top with crumbled blue cheese (about 2 tablespoons) before serving for a bold, creamy contrast. This version is a crowd-pleaser at potlucks and family gatherings. 🧀
New England Crisp
New Englanders prefer their green beans extra crisp and their bacon extra crispy. After draining the green beans, toss them with 1 teaspoon lemon zest and 1 tablespoon fresh dill (chopped) before adding to the skillet.
For the bacon, use applewood-smoked bacon (like Oscar Mayer) and cook it until deep golden and ultra-crisp. Finish with a sprinkle of toasted breadcrumbs (about 1 tablespoon) for texture. This version shines as a holiday side dish or alongside roasted turkey. 🍂
Texas BBQ Side
In Texas, this dish gets a smoky, spicy kick with 1 teaspoon chipotle powder and ½ teaspoon ground cumin added to the onions while caramelizing. Swap the apple cider vinegar for 1 tablespoon lime juice and finish with crumbled cotija cheese (about 2 tablespoons).
Serve as a taco salad topping or alongside brisket and cornbread. The bold flavors stand up to grilled meats and spicy salsas. 🌵
Pacific Northwest Freshness
The Pacific Northwest leans into fresh herbs and light acidity. After cooking the bacon and onions, stir in 1 tablespoon fresh thyme leaves and 1 teaspoon honey with the green beans. Finish with microgreens (like pea shoots) for a pop of color and freshness.
This version works beautifully as a salad topping or alongside grilled salmon. The bright, herbal notes balance the richness perfectly. 🌿
Italian-Inspired Variation
For an Italian twist, replace the apple cider vinegar with 1 tablespoon balsamic vinegar and add ½ teaspoon dried oregano with the green beans. Finish with grated Parmesan cheese (about 2 tablespoons) and fresh basil (chopped).
This version pairs wonderfully with pasta dishes or grilled sausages. The balsamic adds a sweet-tangy depth that elevates the dish to new heights. 🍷
Nutrition facts
Frequently asked questions
Can I use fresh green beans instead of canned?
Fresh green beans work beautifully—just blanch them for 2-3 minutes in boiling water before adding to the skillet. This preserves their texture and ensures they cook evenly with the bacon and onions. For extra flavor, toss the blanched beans with a pinch of salt before adding them to the pan.
What if my bacon isn't crispy enough?
Crispy bacon is key! If yours isn't quite there, transfer it to a baking sheet and broil for 1-2 minutes until golden and crispy. For next time, use thick-cut bacon and cook it undisturbed on medium heat until the edges darken. The fat should render slowly for maximum crispiness.
Can I make this dish ahead of time?
Yes, this recipe reheats beautifully! Cook everything as directed, then store in an airtight container in the fridge for up to 3 days. To reheat, warm in a skillet over medium heat with a splash of water to keep it moist. The flavors actually deepen overnight, making it perfect for meal prep.
How can I make the onions sweeter?
For extra caramelization, cook the onions 10-12 minutes until deep golden brown. Add ½ teaspoon sugar halfway through cooking, and cover the skillet for the last 2 minutes to trap steam. This intensifies their sweetness while keeping them tender. Red onions also caramelize faster than yellow onions.
Is this dish kid-friendly?
With a few tweaks, yes! Skip the vinegar (or reduce to ½ teaspoon) and use mild bacon (like turkey bacon). Serve with a side of buttered noodles or cornbread to balance the flavors. Kids often love the crispy bacon bits—just remove them before serving if needed.