
Side Dishes
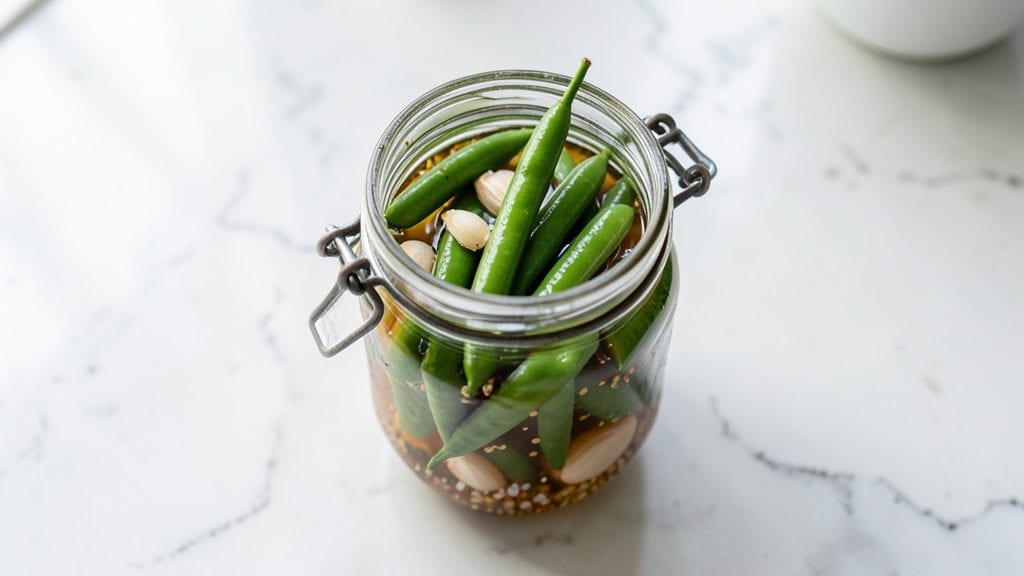
This canned pickled green beans recipe transforms simple garden vegetables into tangy, crunchy bites that stay fresh for months—no refrigeration needed. The secret lies in a precise vinegar-brine balance that preserves color, texture, and that signature bright acidity.
I developed this method after years of experimenting with pantries, and it consistently delivers restaurant-quality results at home.
The process is straightforward but requires attention to detail: sterilizing jars, preparing the exact brine ratio, and ensuring airtight seals. With just five core ingredients—green beans, vinegar, water, salt, and a touch of sugar—you’ll create a pantry staple that elevates any meal.
The vinegar brightens the beans while the sugar rounds out the sharpness, creating a perfect balance.
By the time you’re done, you’ll have jars of vibrant green beans with crisp-tender texture and a tangy bite that pairs beautifully with grilled meats, sandwiches, or salads. The flavor deepens over time, making this an ideal project for meal prep or gifting.
Each jar holds enough for multiple servings, ensuring you always have a quick, flavorful side on hand.
Store the sealed jars in a cool, dark place for up to a year, and enjoy the convenience of having a homemade pickled side ready whenever you need it. This recipe proves that preserving food at home isn’t complicated—just precise and rewarding. Let’s get started on your first batch today.
Ingredients for canned pickled green beans
Five core ingredients plus jars and lids—this pantry project transforms green beans into restaurant-quality crunch.
| Ingredient | Amount | Notes |
|---|---|---|
| Fresh Green Beans 🥦 | 2 lb | Trimmed ends, 4-5 inches long |
| White Vinegar 💧 | 2 cups | 5% acidity preferred |
| Water 💧 | 2 cups | Filtered or distilled |
| Sea Salt 🧂 | ½ cup | Non-iodized, fine grain |
| Granulated Sugar 🍯 | ¼ cup | White or raw cane |
| Garlic Cloves 🧄 | 4 cloves | Smashed, for flavor |
| Black Peppercorns 🌶️ | 1 tbsp | Crushed lightly |
| Bay Leaves 🍃 | 2 whole | Fresh preferred |
| Pint-Sized Mason Jars 🥫 | 4 pieces | With airtight lids |
| Mason Jar Lids and Rings 🔒 | 4 sets | New lids for sealing |
The beans need to be fresh but firm—local farmers markets usually have the best quality in season. Look for vibrant green, crisp beans with no blemishes. Ball or Kerr jars are my go-to for canning, but any clean, airtight pint-sized jars work. The vinegar is non-negotiable for that signature tang—white vinegar with 5% acidity is standard, but apple cider vinegar works too if you prefer a milder flavor. I always buy my sea salt from Morton or Diamond Crystal—the fine grain dissolves perfectly. For the sugar, white granulated is classic, but raw cane adds a subtle depth if you're feeling fancy.
No fresh bay leaves? Dried works at half the amount. Short on garlic? One clove per jar still adds flavor—just skip the smashing. The peppercorns can be omitted entirely if you dislike spice, but they add a nice kick. Running low on vinegar? Lemon juice at 1:1 ratio works in a pinch, though it'll change the flavor profile slightly. The sugar is optional but rounds out the sharpness—skip it if you prefer extra tang. Always use new lids for sealing, even if you've reused jars before.
Sterilize jars and lids by boiling for 10 minutes before filling. Once sealed, store in a cool, dark pantry for up to 1 year. The flavor actually improves over time—perfect for gifting. If you notice any jars bulging or leaking, discard them immediately. For meal prep, grab a jar whenever you're assembling sandwiches or serving grilled meats. The beans keep their crisp texture for months, making this a true pantry staple worth the effort.
Why You'll Love This Recipe
- No-Fuss Pantry Magic: I swear by this recipe because it turns basic ingredients into something special with zero fuss. Just trim the beans, pack them in jars, and pour the vinegar-sugar brine—done. No fancy gadgets, no waiting for hours.
- Tangy Crunch Alert: That first bite? The beans stay crisp, while the vinegar and salt cut through the sweetness in the best way. Honestly, it’s the kind of flavor that makes you reach for more without even thinking.
- Picnic & Potluck Hero: These keep beautifully in jars, so they’re my go-to for picnics, BBQs, or even just a quick side. Serve them cold with sandwiches or toss them warm into pasta—works every time.
- Budget Stretch: Fresh green beans can get pricey, but this recipe lets you use them up without waste. The brine makes them last weeks, and you’re only talking pennies per jar. My wallet thanks me.
Step-by-step instructions for canned pickled green beans
Here's how to make crisp, tangy green beans that taste fresh but keep for months.
Blanch and Pack the Green Beans
Fill a large pot with water and bring to a rolling boil. Add the 2 lb fresh green beans and cook for 3-4 minutes until they're bright green and slightly tender but still crisp. Drain immediately and plunge them into an ice bath to stop the cooking process—this preserves their crunch.
Once cooled, trim the ends if needed and pack the beans tightly into the 4 pint-sized mason jars. Leave about 1 inch of headspace at the top of each jar. You'll want to distribute them evenly so they don't break during processing. I like to pack them vertically to maximize jar space.
Prepare the Brine Solution
In a large bowl, combine the 2 cups white vinegar, 2 cups water, 0.5 cup sea salt, and 0.25 cup granulated sugar. Stir until the salt and sugar dissolve completely—this creates the flavorful brine that will pickle the beans. The mixture should be slightly warm from the dissolved salt.
Add the 4 smashed garlic cloves, 1 tbsp lightly crushed black peppercorns, and 2 whole bay leaves to the brine. Give it one final stir to distribute all the aromatics. Here's the thing—don't skip crushing the peppercorns or smashing the garlic. This releases their oils and flavors, making every bite more vibrant.
Fill the Jars and Seal
Ladle the hot brine into each jar, filling them to within ½ inch of the top. Make sure each bean is completely submerged in the brine—this prevents mold growth and ensures even pickling. Use a non-metallic utensil to press down any beans that float to the surface.
Wipe the rims of the jars with a clean, damp cloth to remove any residue. Then place the new mason jar lids on each jar and screw on the rings until they're fingertip-tight. Don't over-tighten—the lids need room to seal properly as the jars cool. This step is crucial for creating that satisfying "pop" when you open them later.
Process the Jars for Long-Term Storage
Place the sealed jars in a large pot and add enough water to come up about 1 inch above the tops of the jars. Bring to a boil over medium-high heat and process for 10 minutes once boiling. The water should be bubbling gently around the jars during processing.
After processing, carefully remove the jars using tongs and place them on a clean towel. Let them cool completely at room temperature—this allows the lids to seal properly. You'll hear a satisfying "ping" as they seal. Once cooled, check that the lids are sealed by pressing down on the center—they shouldn't pop up. If any don't seal, refrigerate those jars immediately.
Store and Enjoy Your Preserved Beans
Once completely cooled, wipe down the outside of the jars and store them in a cool, dark place. Properly sealed jars will keep for 12-18 months, though I always use mine up within a year—they disappear quickly! The beans will maintain their bright green color and crisp texture, with a perfect balance of tangy, garlicky flavor.
To use, simply open a jar and drain the beans before serving. They're perfect straight from the jar as a snack, or add them to salads, sandwiches, or pasta dishes for a bright, tangy crunch. The brine makes an excellent all-purpose pickle liquid too—just strain out the solids and use it as a marinade or salad dressing base.
Pro Tips For Making Canned Pickled Green Beans
- Boil Beans First: Dump raw beans straight into the brine and they’ll turn mushy—trust me, I’ve done it. Blanch them in boiling water for 3 minutes first, then shock in ice water to stop cooking. This keeps them crisp and bright, just like store-bought but way better.
- Use Distilled Vinegar: Cheap vinegar with additives can leave a weird aftertaste. Stick to distilled white vinegar—it’s clear, sharp, and won’t muddle the flavor. If you’re picky (like I am), even a splash of apple cider vinegar adds depth, but start with 3:1 white to apple ratio.
- Don’t Skimp on Salt: The brine needs to hit 5-6% salt by weight to preserve properly. If you eyeball it, you’ll end up with bland, limp beans. Use a kitchen scale for the water-vinegar mix, or dissolve 1.5 tablespoons of sea salt per pint of liquid—no excuses.
- Hot-Pack the Jars: Cold beans in jars leave air pockets where mold loves to grow. Heat the beans and brine together until steaming, then ladle into hot jars and seal while still warm. This isn’t just about safety—it also makes the beans stay crunchy for months. (Yes, even if you’re impatient like me.)
Flavor customization for these flavors
Tangy vs. Sweet Balance
Adjust the vinegar-to-sugar ratio to control the flavor profile. For extra tang, add ½ cup extra vinegar and reduce sugar to 1 tbsp. For a sweeter, milder taste, increase sugar to ½ cup while keeping vinegar at 2 cups.
I find apple cider vinegar adds subtle fruitiness—swap it for white vinegar if you prefer sharper acidity. 💧
Spice Level Control
Skip the black peppercorns for a mild version, or add 1 tsp red pepper flakes per jar for heat. For a smoky twist, include 1 tsp smoked paprika in the brine.
I love adding ½ tsp mustard seeds for a subtle kick—just toast them lightly in a dry pan first to deepen their flavor.
Herb Variations
Swap bay leaves for dill sprigs (2 per jar) for a dill pickle vibe, or add 1 tsp dried thyme for an earthy note. Fresh rosemary sprigs (1 per jar) bring a piney aroma that pairs beautifully with grilled meats.
For a Mediterranean touch, include ½ tsp dried oregano alongside the garlic.
Garlic Intensity
Use 1 clove per jar for subtle garlic flavor, or 4 smashed cloves (as in the recipe) for bold aroma. For a milder taste, peel and slice the garlic thinly instead of smashing.
I sometimes add 1 tsp garlic powder if I’m short on fresh cloves—it’s a decent backup, though nothing beats real garlic. 🧄
Texture Adjustments
For extra-crisp beans, blanch them for only 2 minutes before packing. For softer beans, increase blanching to 5 minutes. If you prefer crunchier beans after opening, store them in the fridge for up to 2 weeks—the cold slows texture breakdown.
The brine’s acidity naturally preserves crispness, but refrigeration helps.
Flavor Boosters
Add 1 tsp onion powder or ½ tsp celery seed to the brine for depth. A cayenne pepper (pinch per jar) adds heat without overpowering. For umami, include 1 tsp soy sauce in the brine—it’s a secret trick I picked up from Asian-style pickles.
Always taste the brine before filling jars to balance flavors.
Nutrition facts
Frequently asked questions
Can I use frozen green beans instead of fresh?
Fresh green beans work best for this recipe because they hold their shape and texture better during pickling. If you must use frozen, thaw them completely first, then blanch for an extra 1 minute to remove excess moisture. The texture won't be as crisp, but it'll still taste great. For best results, stick with fresh or high-quality canned green beans that haven't been pre-cooked.
How do I know if my jars are properly sealed?
After processing, let the jars cool completely. A properly sealed jar will have the lid concave in the center and make a popping sound when pressed. If the lid flexes up and down when pressed, it didn't seal—refrigerate that jar immediately and use within 1 week. Always use new lids for canning to ensure a good seal.
Can I make this recipe without sugar?
Yes! The sugar simply balances the acidity of the vinegar. For a sugar-free version, omit it entirely or use 1 tbsp honey or maple syrup per jar. The flavor will be sharper, but still delicious. If you're concerned about mold growth, add ½ tsp citric acid to the brine to enhance preservation. The beans will still keep well in the pantry.
What can I do with the leftover brine?
Strain out the solids and use the leftover brine as a marinade for meats, a salad dressing base, or a quick pickle liquid for other vegetables. Store it in the fridge for up to 2 weeks. You can also reduce it on the stove to make a flavorful vinegar reduction for drizzling over dishes. The garlicky, tangy flavor makes it incredibly versatile!
Why did my pickled beans turn mushy?
Over-blanching or under-blanching are the most common causes. For crisp beans, blanch for exactly 3-4 minutes—no longer. Also ensure all beans are fully submerged in the brine during processing. If you notice softness after opening, store the jar in the fridge to slow further texture breakdown. The acidity in the brine should preserve crispness, but proper blanching is key.