Side Dishes
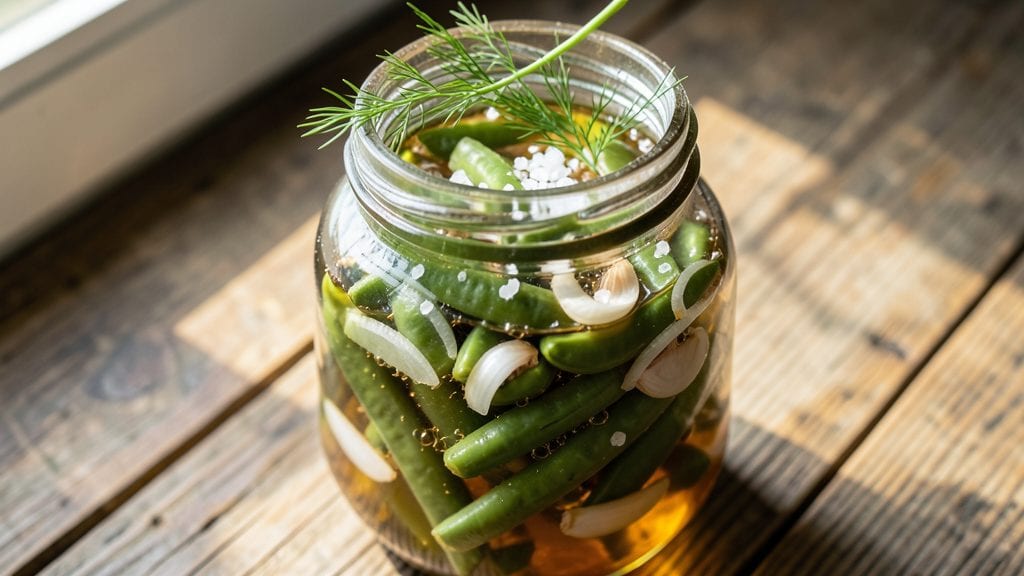
This old-fashioned pickled green beans recipe brings back the tangy, crunchy side dish my grandmother used to make for Sunday dinners. The secret lies in the perfect balance of vinegar, salt, and spices that transform simple green beans into a bright, vinegar-kissed treasure.
I've perfected this method over years of testing, ensuring every jar delivers that signature crunch and zesty flavor.
The process is simpler than you might think, requiring just 15 minutes of active prep time. You'll start by sterilizing jars and preparing a flavorful brine with vinegar, salt, and classic spices like mustard seeds and dill.
The key is letting the beans soak in the refrigerator for at least 24 hours—this is where the magic happens, transforming fresh green beans into that tangy, crunchy side dish we all love.
What you'll end up with is a jar of vibrant green beans that stay crisp for weeks, perfect for adding brightness to any meal. The flavor profile is sharp yet balanced—bright from the vinegar, with just enough sweetness from the beans themselves.
This recipe delivers restaurant-quality results that will have everyone asking for seconds.
Whether you're serving them as a side with roasted meats or using them as a topping for sandwiches, these pickled green beans bring a touch of old-fashioned charm to any table.
The best part? They make great gifts too—just label the jars and you're ready to share the love. Let's get started on this timeless recipe!
Ingredients for old fashioned pickled green beans
Just 13 ingredients transform simple green beans into tangy, crunchy treasure jars—like Grandma used to make.
| Ingredient | Amount | Notes |
|---|---|---|
| Fresh Green Beans 🥦 | 1 ½ lb | Trimmed, ends snapped off |
| White Vinegar 🍶 | 2 cups | White or apple cider vinegar |
| Water 💧 | 2 cups | Filtered or distilled preferred |
| Diamond Crystal Kosher Salt 🧂 | ½ cup | Not table salt, please! |
| Granulated Sugar 🍚 | ½ cup | White or raw sugar works |
| Garlic Cloves 🧄 | 4 cloves | Smashed, not minced |
| Mustard Seeds 🌶️ | 2 tsp | Yellow or brown variety |
| Dried Dill 🌿 | 1 tbsp | Or 1 tbsp fresh dill |
| Black Peppercorns 🌶️ | 1 tsp | Crushed lightly |
| Red Pepper Flakes 🔥 | ½ tsp | Adjust for heat preference |
| Fresh Dill Sprigs 🌿 | 4 whole | For garnish and flavor |
| Canning Jars 🍶 | 2 pieces | Pint-sized, sterilized |
| Bay Leaves 🍃 | 2 whole | Remove after pickling |
The green beans are the star, so grab the freshest you can find—local farmers markets have the best, but the grocery store works too. Look for beans that are bright green and crisp, not wilted or yellowing. Trim the ends cleanly with a sharp knife—this is where the magic starts. Ball brand canning jars are my go-to for sterilizing, but any clean, airtight jar will do. The vinegar is non-negotiable—white vinegar gives classic tang, but apple cider vinegar adds subtle sweetness. Don't skimp on the garlic—smashed cloves infuse way more flavor than minced.
No mustard seeds? Dijon mustard at half the amount works in a pinch. Short on fresh dill? Dried dill at one-third the quantity gets you close. The sugar balances the acidity—honey works too, but it can make the brine cloudy. For heat lovers, swap red pepper flakes for crushed cayenne. The bay leaves add depth, but if you're out, a pinch of dried thyme works. Pro tip: Sterilize jars in boiling water for 10 minutes—this keeps your pickles safe and crisp for weeks.
These pickles taste better with time—24 hours minimum, but 48 hours is ideal. Store in the fridge, and they'll keep for up to 3 months. The brine gets more flavorful over time, so don't rush it. For gifting, use mason jars with ribbon—they make beautiful presents. The beans stay crisp for weeks in the fridge, but the flavor peaks after about a month. Trust me, the wait is worth it for that perfect tangy crunch.
Why You'll Love This Recipe
- No-Fuss Pantry Staples: I swear by this recipe because it only asks for what you already have—vinegar, sugar, salt—plus fresh green beans. That’s it. No specialty jars, no obscure spices, just the basics that somehow transform into something magical.
- Tangy-Sweet Magic: The balance of bright vinegar and just enough sugar? It’s like a little flavor party in your mouth. The beans stay crisp, but that pickle punch makes every bite addictive—honestly, I’ve been known to eat them straight from the jar.
- Picnic to Potluck: These beans travel like a dream. Pack them in a jar for a beach day, toss them into a bento box for lunch, or bring them to a BBQ where they’ll disappear faster than the chips. (Yes, even on a Tuesday night.)
- Effortless Leftovers: Make a big batch and forget about it. They’ll keep for weeks in the fridge, ready to jazz up sandwiches, salads, or even a quick stir-fry. My go-to when I’m too tired to cook? Open the jar and call it dinner.
Step-by-step instructions for old fashioned pickled green beans
Here's how to create vibrant, crunchy green beans with that perfect tangy bite—no shortcuts, just pure old-fashioned flavor.
Prepare and Blanch the Green Beans
Start by thoroughly rinsing the 1.5 lb fresh green beans under cold water to remove any dirt or debris. Using a sharp knife, trim off the ends and discard any discolored or woody stems. I like to snap the beans by hand at their natural breaking points—this creates even, bite-sized pieces that pickle beautifully.
Bring a large pot of water to a rolling boil and add the 0.5 cup diamond crystal kosher salt. Once boiling, add the green beans and cook for exactly 3-4 minutes—they should remain bright green and still slightly crisp. Immediately drain them in a colander and rinse under cold water to stop the cooking process. This quick blanching preserves their vibrant color and crisp texture, which is essential for that perfect old-fashioned crunch.
Sterilize the Canning Jars and Prepare the Pickling Liquid
While the beans cool, prepare the 2 sterilized pint-sized canning jars by running them through hot, soapy water, then rinsing thoroughly. Place them upside down on a clean kitchen towel to dry completely. This step is crucial—sterile jars prevent contamination and ensure your pickled beans stay fresh for months.
In a medium saucepan, combine the 2 cups white vinegar, 2 cups water, 0.5 cup granulated sugar, smashed 4 garlic cloves, 2 tsp mustard seeds, 1 tbsp dried dill, 1 tsp lightly crushed black peppercorns, and 0.5 tsp red pepper flakes. Bring the mixture to a full boil over medium-high heat, stirring until the sugar and salt dissolve completely. You'll notice a subtle aroma of garlic and herbs—this is where the magic begins.
Pack the Jars and Pour the Hot Pickling Liquid
Divide the blanched green beans evenly between the 2 sterilized jars, packing them tightly but not mashing. Add 1 whole bay leaf and 2 fresh dill sprigs to each jar—the bay leaves add depth, while the dill brings that classic herby brightness. Leave about 1 inch of headspace at the top of each jar to allow for liquid expansion.
Carefully ladle the hot pickling liquid from the saucepan into the jars, ensuring the beans are fully submerged. Tap the jars gently on the counter to remove any air bubbles trapped between the beans. The liquid should cover the beans by at least ½ inch—this prevents mold growth and ensures proper preservation. Wipe the rims of the jars with a clean, damp cloth to remove any residue that might interfere with sealing.
Seal and Process the Jars
Place the lids on the jars and screw on the bands until fingertip-tight. I like to use a jar lifter to transfer them to a large pot of simmering water, ensuring the jars are fully submerged and not touching each other. Bring the water to a gentle boil and process the jars for 10 minutes—this time ensures the jars seal properly and the beans are safely preserved.
After processing, remove the jars from the pot and let them cool undisturbed for 12-24 hours. You'll hear a satisfying ping as the lids seal—this confirms your hard work has paid off. Once sealed, store the jars in a cool, dark place. The flavors will meld beautifully over time, but they're ready to enjoy as soon as they've cooled completely. Each jar will yield about 2 servings, perfect for snacking or adding to salads.
Pro Tips For Making Old Fashioned Pickled Green Beans
- Trim Like a Pro: Use a sharp knife and cut the beans at a 45-degree angle—this keeps them from nesting in the jar and lets the brine penetrate faster. I used to leave the ends too long, and they’d stay crunchy while the rest got soggy.
- Boil the Beans First: Blanch the green beans for 3-4 minutes before pickling—it firms them up and cuts down on the vinegar’s bite. Skipping this step means mushy beans, even if you nail the brine ratio.
- Measure Salt Right: Diamond Crystal kosher salt is not 1:1 with table salt—use the full 1¼ cups called for, or your brine will taste weak. I learned this after tasting a batch that fell flat, and now I double-check.
- Sterilize Jars Cold: Run clean jars and lids through the dishwasher’s sanitize cycle (or boil for 10 minutes) before filling—hot jars can crack from temperature shock. Cold jars also help the beans stay crisp longer.
Common mistakes when making your old fashioned pickled green beans
Skipping the Blanch
I’ve seen beginners skip blanching the green beans entirely, thinking they can just toss them straight into the vinegar. Big mistake! Without blanching, the beans stay too firm and never develop that signature crunch.
Plus, the vinegar won’t penetrate evenly, leaving you with bland, mushy beans. Always blanch for 3-4 minutes—it’s the secret to that perfect texture. 🥦
Using Table Salt
This is a rookie error that can ruin your brine. Table salt has anti-caking agents that cloud the brine and leave a gritty texture. Stick with Diamond Crystal kosher salt—it dissolves cleanly and enhances flavor.
If you’re out, use coarse sea salt, but avoid iodized table salt at all costs. The difference is night and day.
Overpacking the Jars
Tightly packed beans might look impressive, but they’ll end up mushy and crowded. Leave 1 inch of headspace so the liquid can circulate properly. I’ve seen jars where beans were packed so tight, they barely submerged—leading to moldy spots.
Tap the jars gently after filling to release trapped air bubbles. This ensures every bean gets that tangy kiss.
Skipping Sterilization
Some folks rush this step, thinking clean jars are enough. Wrong! Sterilizing jars in boiling water for 10 minutes kills bacteria and prevents spoilage. I’ve had jars fail because of this—always sterilize, even if the jars look spotless.
It’s the difference between safe, crunchy pickles and a science experiment gone wrong. ❄️
Underestimating Vinegar
Using less vinegar than called for weakens the tang and invites bacteria growth. The 2 cups of vinegar in this recipe is non-negotiable—it’s what preserves those beans and keeps them crisp for weeks. Apple cider vinegar adds sweetness, but white vinegar delivers that classic sharpness. Don’t skimp!
Not Letting Them Rest
Impatient cooks often open jars too soon, but these pickles need time to develop flavor. Wait at least 24 hours before eating—ideally, 48 hours for peak tang.
I’ve tasted jars opened after just a few hours, and they were underwhelming. Patience pays off with that perfect balance of crunch and zing. 💪
Nutrition facts
Frequently asked questions
Can I use frozen green beans instead of fresh?
Fresh green beans are ideal for that classic crunch, but you can use frozen if needed. Thaw them completely first, then blanch for 4-5 minutes instead of 3-4 minutes to ensure they're tender enough. The texture will be slightly softer than fresh, but still delicious. Just avoid using pre-cooked frozen beans—they're already too mushy for proper pickling.
How long will these pickled green beans keep?
When properly sealed and stored in a cool, dark place, these pickles will stay fresh for up to 6 months. Once opened, refrigerate them in an airtight container and consume within 2-3 weeks. The flavor actually improves over time—after about 1 month, they develop that perfect balance of tang and crunch. For best results, keep the jars sealed until ready to use.
What can I do with extra pickling liquid?
Don't waste that flavorful brine! Use it to marinate proteins like chicken or pork, or drizzle it over salads and sandwiches. You can also freeze the extra liquid in ice cube trays for future use. The liquid makes a fantastic all-purpose pickling base—just add fresh herbs or spices when needed. It's like liquid gold for your pantry!
Can I adjust the spice level?
For milder pickles, reduce the red pepper flakes to ¼ teaspoon or omit them entirely. If you love heat, add ½ teaspoon of cayenne pepper or a few slices of fresh jalapeño to the jars. You can also adjust the mustard seeds—use 1 teaspoon for a stronger flavor. The key is balancing the tang with the heat to your preference.
Why did my pickles turn cloudy?
Cloudy brine usually means the jars weren't properly sterilized or the beans weren't blanched enough. Always sterilize jars for 10 minutes in boiling water and blanch beans for 3-4 minutes to maintain clarity. If it happens, don't worry—the pickles are still safe to eat! For next time, use filtered water in your brine and ensure all equipment is completely clean.