
Main Courses
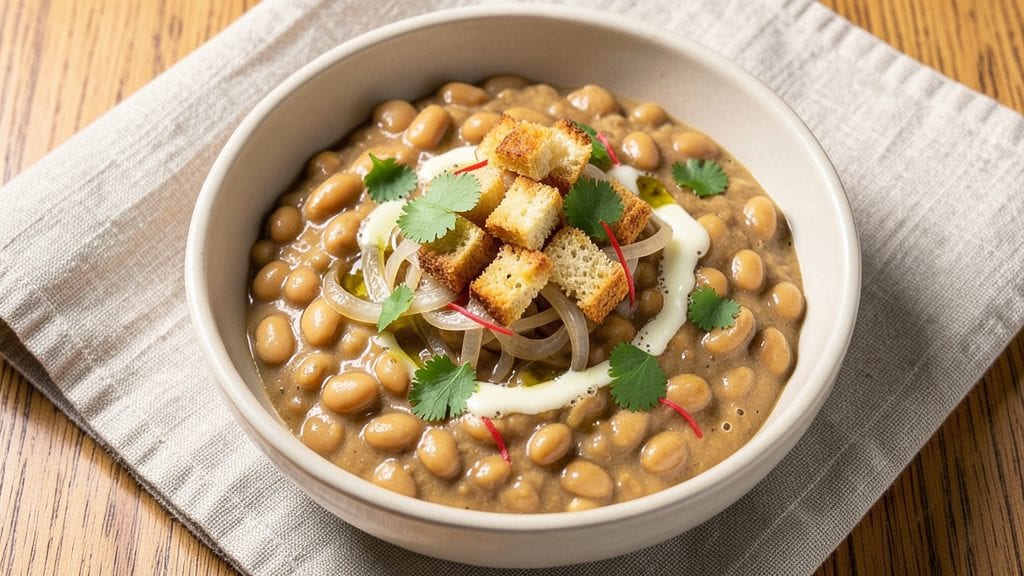
This mayocoba bean recipe transforms one of Latin America's most beloved ingredients into a luxurious side dish with creamy texture and satisfying al dente bite.
After years of perfecting the balance between buttery richness and firm structure—something I first learned from my grandmother’s Sunday roast chicken technique—these beans became a staple in my kitchen. The secret lies in the slow cooking process that develops their natural sweetness while maintaining that coveted bite.
The recipe begins with a simple soak to soften the beans, followed by a foolproof simmering method that preserves their shape and texture. Unlike other bean varieties, mayocoba holds its form beautifully, making them ideal for both hearty main courses and elegant side dishes.
With just a few basic ingredients—beans, garlic, onions, and a touch of butter—you’ll achieve restaurant-quality results that taste like home.
By the time these beans finish cooking, they’ll be tender yet firm, coated in a velvety sauce that’s rich without being greasy. The aroma alone will transform your kitchen into a warm, inviting space, perfect for weeknight dinners or Sunday family gatherings.
Serve them alongside rice, grilled meats, or even as a standalone dish with a sprinkle of fresh cilantro for brightness.
What makes this recipe truly special is its versatility—it works as a side for tacos, a base for soups, or even a filling for stuffed peppers.
The method is simple enough for beginners but refined enough to impress guests, proving that great food doesn’t always require complicated techniques. Let’s get cooking!
Ingredients for mayocoba bean
Transform simple pantry staples into luxurious mayocoba beans with creamy texture and satisfying bite.
| Ingredient | Amount | Notes |
|---|---|---|
| Dried Mayocoba Beans 🌾 | 1 ½ cups | Unsoaked, rinsed thoroughly |
| Yellow Onion 🧅 | 1 whole | Medium, diced into 1/4-inch pieces |
| Garlic Cloves 🧄 | 4 cloves | Peeled, smashed for even cooking |
| Unsalted Butter 🧈 | 4 tbsp | Cold, cubed for even melting |
| Vegetable Broth 💧 | 2 cups | Low-sodium preferred, homemade or quality store-bought |
| Extra-Virgin Olive Oil 🫒 | 2 tbsp | For sautéing onions and garlic |
| Bay Leaves 🍃 | 2 whole | Fresh if available, dried otherwise |
| Fresh Cilantro 🌿 | ¼ cup | Chopped, for garnish and brightness |
| Lemon Juice 🍋 | 1 tbsp | Freshly squeezed, for acidity balance |
| Salt 🧂 | 1 ½ tsp | Adjust to taste, kosher preferred |
| Ground Black Pepper 🌶️ | ½ tsp | Freshly ground for best flavor |
| Cumin Seeds 🌿 | ½ tsp | Toasted lightly for depth of flavor |
| Fresh Thyme Leaves 🌿 | 1 tsp | Or 1/4 tsp dried thyme if unavailable |
The quality of your mayocoba beans is everything. Look for dry, uniformly shaped beans—avoid any with cracks or discoloration. Mexican or Latin markets often carry the best selection, but most grocery stores stock them in the canned bean aisle. If you're using dried beans, soak them overnight in plenty of water with a pinch of baking soda to soften them evenly. The butter here is non-negotiable—European-style unsalted butter like Plugrá or Kerrygold adds the most flavor. For the broth, homemade vegetable broth gives the best depth, but low-sodium store-bought works in a pinch.
No fresh thyme? Dried thyme at one-quarter the amount will work, but the flavor won't be as bright. Running out of cumin seeds? Ground cumin at half the amount is a fine substitute, though toasted seeds add a lovely aroma. For the olive oil, avoid heavily processed brands—look for extra-virgin with a fruity, peppery finish. The lemon juice can be substituted with white wine vinegar if needed, but fresh is always better. If you're short on time, pressure cooking the beans for 20 minutes after soaking cuts the cooking time significantly while preserving texture.
These beans taste even better the next day as flavors meld together. Store leftovers in an airtight container in the fridge for up to 5 days, or freeze for 3 months in a sealed bag. To reheat, add a splash of water or broth and simmer gently—never microwave directly. For serving, sprinkle with fresh cilantro right before eating to keep it vibrant. The beans also freeze beautifully for future meals, making this a perfect make-ahead dish for busy weeks.
Why You'll Love This Recipe
- Just Soak, No Stress: I’ll be real—soaking dried Mayocoba beans overnight isn’t glamorous, but it’s the only step that requires patience. After that? Toss them in simmering broth with butter and garlic, and you’re done. No fancy techniques, no last-minute grocery runs.
- Butter-Garlic Magic: That first bite of creamy beans kissed with browned butter and garlic? It’s the kind of rich, savory flavor that makes you pause mid-bite. The onions caramelize just enough to add depth without overpowering—simple, but ridiculously satisfying.
- Meal Prep MVP: Between us, this is my go-to for busy weeks. Cook a big batch, and you’ve got lunch for days—whether it’s cold in salads, reheated with rice, or even mashed into a quick dip. (Yes, even on a Tuesday night.)
- Pantry Goldmine: Dried beans are my budget secret weapon, and Mayocoba holds up perfectly for leftovers. The texture stays tender, the flavor deepens overnight, and you’re not scrambling to use them up before they spoil. Plus, a pound of dried beans feeds a crowd for next to nothing.
Step-by-step instructions for creamy mayocoba beans
Mastering these beans transforms them into a velvety, buttery dish with perfect texture every time.
Prepare the Beans for Perfect Texture
Rinse the 1.5 cups dried mayocoba beans thoroughly under cold water to remove any debris. Place them in a large bowl and cover with plenty of cold water—at least 4 cups—to ensure they're fully submerged. Let them soak for 8-12 hours at room temperature. This long soak prevents the beans from becoming mushy while ensuring they cook evenly.
After soaking, drain the beans and rinse them again. For the best texture, I like to give them a quick 30-second massage in my hands under cold water—this removes the outer skins that can make the beans gummy. Drain well and set aside until ready to cook. The beans should be plump but still firm to the touch when you're ready to proceed.
Sauté Aromatics for Flavor Foundation
Heat the 2 tablespoons extra-virgin olive oil in a large pot over medium heat. Add the 1 whole yellow onion, diced into ¼-inch pieces, and cook for 5-6 minutes until softened and just beginning to turn golden. Don't let them brown too much—you want flavor without bitterness.
Add the 4 cloves garlic cloves, smashed but not minced, and the 0.5 teaspoon cumin seeds. Cook for another 1-2 minutes until the garlic is fragrant and the cumin seeds begin to sizzle lightly. This step builds the aromatic base that will infuse the beans. If the garlic starts to brown too quickly, reduce the heat slightly to prevent burning.
Cook the Beans Until Creamy
Add the drained beans, 2 cups vegetable broth, 4 tablespoons unsalted butter (cubed), 2 whole bay leaves, 1 teaspoon fresh thyme leaves, 1.5 teaspoons salt, and 0.5 teaspoon ground black pepper to the pot. Bring everything to a gentle boil, then immediately reduce heat to low. Cover the pot and let the beans simmer for 45-50 minutes. Stir occasionally to prevent sticking.
Here's the key: the beans are done when they're tender but still hold their shape—they should have a creamy texture but not fall apart when pressed with a fork. If they're not quite there after 50 minutes, add another ¼ cup water and continue cooking for 10-15 minutes more. The butter will melt into the beans, creating that luxurious, velvety texture we're after.
Finish with Brightness and Balance
Once the beans reach the perfect texture, remove the 2 bay leaves and discard them. Stir in the 1 tablespoon lemon juice and 0.25 cup fresh cilantro, chopped. The acidity brightens the dish, while the cilantro adds freshness that cuts through the richness of the butter. Taste and adjust the seasoning—you might need a pinch more salt or a crack of black pepper to balance the flavors.
Let the beans sit off the heat for 5 minutes before serving. This resting time allows the flavors to meld and the butter to fully incorporate, giving you that silky, creamy consistency promised in the title. Serve immediately with crusty bread or over rice to soak up every last bit of that buttery goodness.
Pro Tips For Making Mayocoba Bean
- SOAK BEANS 12 HOURS MINIMUM: Dried Mayocoba beans are stubborn—rushing the soak leaves them tough. I learned this the hard way after serving mushy, undercooked beans. Use cold water, cover, and let them sit overnight (or at least 12 hours) in the fridge. The longer they soak, the creamier they’ll turn.
- PEEL ONIONS AFTER COOKING: Raw onions burn easily in butter and overpower the dish. Sauté them lightly in butter until soft, then remove and peel them after cooking. This keeps their sweetness intact and prevents a bitter bite that fights with the beans’ natural nuttiness.
- DON’T SKIP THE SIMMER: After adding broth, keep the heat low and let the beans bubble gently. I used to crank the heat to speed things up, but that turns the broth into glue and ruins the texture. A steady simmer for 45–60 minutes (depending on soak time) keeps the beans tender without falling apart.
- USE BUTTER SPARINGLY: Unsalted butter adds richness, but too much makes the dish greasy. Start with 2 tablespoons—enough to coat the onions and garlic—and save extra for finishing. If you’re worried about salt, add a pinch of salt to the broth instead of overdoing the butter.
Flavor customization for these flavors
Smoky Chipotle Twist
For a bold, smoky depth, add 1-2 tablespoons adobo sauce (from canned chipotles) to the sautéed onions and garlic. This works especially well with 1 teaspoon smoked paprika stirred in during the simmering phase.
The heat and smokiness pair beautifully with the beans' natural sweetness, making this a fantastic option for tacos or burrito bowls. 🌶️
Creamy Coconut Variation
Swap out the butter for 4 tablespoons coconut milk (full-fat for richness) and add ½ teaspoon ground turmeric for color. Simmer the beans in the coconut milk for the last 10 minutes of cooking to create a luscious, dairy-free version that still feels indulgent.
Garnish with toasted coconut flakes for extra texture.
Herb-Infused Olive Oil
Take the flavor to new heights by infusing your olive oil before cooking. Heat 2 tablespoons extra-virgin olive oil with 1 sprig rosemary, 1 sprig thyme, and 1 garlic clove (unpeeled) for 5 minutes on low heat.
Strain and use this fragrant oil for sautéing the onions. The herbal notes elevate the dish without overpowering the beans' natural taste. ✨
Spicy Citrus Kick
Brighten the beans with a zesty finish by adding 1 tablespoon lime zest and 1 chopped serrano pepper (seeds removed for mild heat) during the final 5 minutes of cooking.
The citrus cuts through the richness while the chili adds a subtle kick. This variation works wonderfully as a side for grilled fish or shrimp.
Cheesy Mexican Style
Transform these beans into a crowd-pleasing Mexican-inspired dish by stirring in ½ cup shredded Monterey Jack cheese and ¼ cup sour cream during the last 5 minutes of cooking.
Top with crumbled queso fresco and sliced radishes for a vibrant, cheesy side that pairs perfectly with corn tortillas or as a taco filling.
Garlic-Butter Glaze
For a restaurant-worthy finish, make a quick garlic butter glaze by melting 2 tablespoons butter with 2 minced garlic cloves and 1 teaspoon lemon juice in a small pan.
Drizzle this over the finished beans just before serving. The glossy glaze adds a luxurious touch that makes these beans feel like a special occasion dish. 💛
Nutrition facts
Frequently asked questions
What makes mayocoba beans different from other beans?
Mayocoba beans stand out for their creamy texture and ability to hold their shape beautifully when cooked. Unlike black beans or kidney beans, they develop a luxurious, buttery consistency without turning mushy. This makes them perfect for both hearty main dishes and elegant sides. Their mild, slightly nutty flavor also absorbs seasonings wonderfully.
Can I use canned mayocoba beans instead of dried?
Yes, but with adjustments! Canned beans are pre-cooked, so reduce the simmering time to just 15-20 minutes after sautéing aromatics. Drain and rinse them first to remove excess sodium. For best texture, add 2 tablespoons extra butter during the last 5 minutes of cooking to achieve that creamy finish.
How do I know when the beans are perfectly cooked?
The perfect mayocoba beans should be tender yet firm—they should hold their shape when pressed with a fork but still have a slight bite. If they're too soft, they've been overcooked. For visual confirmation, the beans should look plump and glisten slightly from the butter sauce. Taste one—it should be creamy with no graininess.
What are the best ways to serve these creamy beans?
These beans shine as a side dish for grilled meats, fish, or chicken, but they're versatile enough for mains too! Serve them with steamed rice, over tortillas for tacos, or alongside roasted vegetables. For a complete meal, pair with cornbread and a fresh cilantro-lime salad. The creamy texture also makes them perfect for stuffing into bell peppers or tomatoes.
What's the secret to getting that creamy texture without butter?
For a dairy-free version, use 4 tablespoons coconut milk instead of butter and add ½ teaspoon ground turmeric for color. Simmer the beans in the coconut milk for the last 10 minutes of cooking. Alternatively, blend ½ cup of the cooked beans with ¼ cup broth and stir it back in—this creates a natural creaminess while keeping the dish light.