
Sauces & Condiments
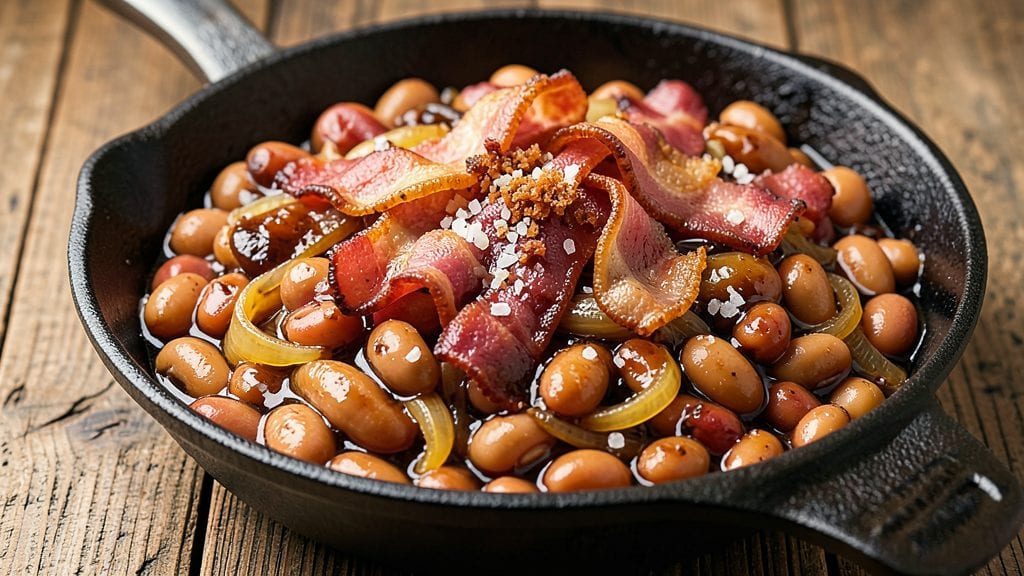
This St James' baked beans recipe delivers the rich, smoky-sweet harmony that makes it a British classic—slow-cooked until tender with molasses and brown sugar. After years of perfecting this dish in my grandmother’s recipe journal, I’ve refined the method to balance deep caramelized flavors without burning the edges.
The key? A long, gentle bake that transforms simple ingredients into something restaurant-worthy.
The foundation starts with haricot beans simmered in a savory broth of bacon, onions, and stock, then sweetened with molasses and brown sugar for that signature depth. Unlike quick versions, this recipe demands patience—1.5 to 2 hours in the oven—to develop layers of flavor that store-bought can’t match.
My grandmother’s note in the margins always read "never rush the beans," and she was right.
By the time it’s done, you’ll have beans that are tender but not mushy, with a glossy, caramelized top and a sauce so rich it clings to every spoonful.
Serve it alongside mashed potatoes or crispy toast for a meal that feels both comforting and special. This isn’t just a side dish—it’s a centerpiece.
For a vegetarian twist, swap the bacon for smoked paprika and mushrooms, but trust me: the original is worth the effort. Leftovers reheat beautifully, making this the ultimate make-ahead dish for gatherings. Let’s get cooking—your taste buds will thank you.
Ingredients for st james baked beans
Sixteen ingredients for a dish that tastes like nostalgia in every bite.
| Ingredient | Amount | Notes |
|---|---|---|
| Haricot Beans (Dried) 🌾 | 1 ½ lbs | Soaked overnight for best texture |
| Thick-Cut Bacon 🥓 | ½ lb | Chopped into small pieces |
| Yellow Onions 🧅 | 1 whole | Medium-sized, finely chopped |
| Molasses 🍯 | ½ cup | Unsulphured for authentic flavor |
| Light Brown Sugar 🍚 | ½ cup | Packed firmly for consistency |
| Beef Stock 🍲 | 2 cups | Homemade or quality store-bought |
| Tomato Paste 🍅 | ¼ cup | Smooth, not chunky |
| Apple Cider Vinegar 🍏 | 2 tbsp | For tangy depth |
| Dried Thyme 🌿 | 1 tsp | Or 1 tbsp fresh thyme leaves |
| Ground Black Pepper 🌶️ | ½ tsp | Freshly cracked for best flavor |
| Kosher Salt 🧂 | 1 ½ tsp | Adjust to taste |
| Mustard Powder 🌶️ | 1 tsp | For subtle heat |
| Bay Leaves 🍃 | 2 whole | Removed before serving |
| Unsalted Butter 🧈 | 2 tbsp | For caramelized top |
The haricot beans are the heart of this recipe—dried, not canned, because nothing beats the texture and depth. Soak them overnight in plenty of water (they’ll triple in size), then drain well before cooking. For bacon, thick-cut from a butcher gives the best flavor, but pre-cooked strips work in a pinch. The molasses and brown sugar? Trader Joe's or Whole Foods have the best quality—avoid the thin, watery kind. My grandmother swore by unsulphured molasses, and I’ve never found a good substitute that captures that authentic depth. The tomato paste should be smooth, not chunky—Barilla or Hunt's are my go-tos.
No beef stock? Chicken stock plus 1 tsp soy sauce works, though purists will notice the difference. Fresh thyme is ideal, but dried at one-third the amount gets you close. The mustard powder adds just enough kick—skip it if you prefer milder flavor. For a vegetarian version, swap the bacon for smoked paprika (1 tsp) and mushrooms (1 cup, chopped). The bay leaves are non-negotiable—they infuse the beans with that subtle, earthy aroma that makes this dish sing. And that butter on top? Don’t skip it—it creates a caramelized crust that’s pure magic.
This dish improves with time—3-4 days in the fridge lets the flavors meld beautifully. Portion into containers for easy reheating. Freezes for up to 3 months, though the texture changes slightly after thawing. For serving, I always recommend crispy toast or mashed potatoes—the contrast makes it even better. Leftovers reheat well in a skillet with a splash of water or stock to revive the sauce. Trust me: the second day is often the best day for these beans.
Why You'll Love This Recipe
- One-Pot Magic: I swear by this recipe because it’s literally one pot—no fussing with multiple pans or dishes. Just toss in the dried haricots, crispy bacon, and onions, then let the molasses and brown sugar work their magic while you sip coffee. Honestly, the cleanup is almost as good as the taste.
- Smoky-Sweet Obsession: That molasses and brown sugar combo? It’s like a slow-dance of caramelized richness with a deep, smoky edge from the bacon. The haricots soak up all the flavor, turning into tender, melty bites that’ll have you licking the plate. (Yes, even on a Tuesday night.)
- Weeknight Workhorse: I make this for lazy Sundays, potlucks, or when my kids’ friends are starving after soccer practice. It’s hearty enough for a main but flexible enough to serve with rice, toast, or even a simple salad. Between us, it’s my go-to when I need something reliable and crowd-pleasing.
- Budget-Friendly Feast: Dried beans and bacon stretch this recipe into a full meal without breaking the bank. A single batch feeds four for dinner and leaves enough for lunch the next day—no sad, wilted leftovers here. Plus, the molasses and sugar are pantry staples, so I’m always covered. Solid.
Step-by-step instructions for St James' baked beans
Here's how to create rich, slow-cooked beans with deep molasses caramel and smoky bacon notes.
Prepare the Beans and Bacon
Start by draining and rinsing the soaked haricot beans thoroughly. Place them in a large Dutch oven with the chopped thick-cut bacon. Cook over medium heat for 8-10 minutes, stirring occasionally, until the bacon fat begins to render and the mixture smells deliciously smoky. This step builds the flavor foundation by crisping the bacon edges while keeping the beans intact.
Remove the bacon with a slotted spoon and set aside, leaving the rendered fat in the pot. This fat will later help caramelize the onions and create a glossy finish on the beans. The beans should now be lightly browned in spots—this indicates they're ready to absorb the rich flavors we're about to develop.
Build the Molasses-Brown Sugar Base
In the same Dutch oven, add the finely chopped yellow onions and cook over medium heat for 5-6 minutes until softened and translucent. Stir in the 0.5 cup molasses and 0.5 cup packed light brown sugar, scraping up any browned bits from the bottom. This creates a thick, glossy base that will coat each bean perfectly.
Cook for 3-4 minutes until the mixture begins to bubble and darken slightly. Here's the thing—don't walk away. You want to see the sugar start to caramelize at the edges while keeping the center of the pot smooth. This balance gives you both depth of flavor and that signature glossy finish. Add the 2 tbsp apple cider vinegar and stir well to balance the sweetness with tangy brightness.
Develop the Sauce and Season
Stir in the 0.25 cup tomato paste, 2 cups beef stock, 1 tsp dried thyme, 0.5 tsp ground black pepper, 1.5 tsp kosher salt, 1 tsp mustard powder, and 2 whole bay leaves. Bring to a gentle simmer over medium-low heat, then add the drained beans back to the pot. The liquid should come about halfway up the beans—if it's too thin, add a splash of water.
Here's where patience pays off: let the mixture simmer uncovered for 1 hour, stirring occasionally. You'll see the sauce gradually thicken and darken as the flavors meld. The beans should begin to soften but still hold their shape. After the initial hour, reduce heat to low and continue simmering for another 2-3 hours, stirring every 30 minutes to prevent sticking. The beans are ready when they're fork-tender with just a hint of resistance.
Finish with Rich Butter and Rest
Remove the bay leaves and stir in the 2 tbsp unsalted butter. This final step creates a luxurious, velvety finish that coats each bean beautifully. Let the beans sit at room temperature for 15-20 minutes before serving. This resting period allows the flavors to fully develop and the sauce to thicken just right.
Serve warm with crusty bread or alongside grilled meats. The beans should be tender yet still hold their shape, with a glossy sauce that balances sweet, smoky, and tangy flavors perfectly. Each bite should deliver that rich molasses depth with just a hint of mustard powder heat and the smokiness of the bacon.
Pro Tips For Making St James Baked Beans
- Soak Beans Overnight: I learned this the hard way—skipping the soak means tough, mealy beans no matter how long you bake them. Toss dried haricots in water with a splash of vinegar (yes, even if you’re impatient like me) and let them sit 12+ hours. The texture difference after baking is night and day.
- Render Bacon Low: Thick-cut bacon needs patience—don’t rush it. Cook on medium-low heat until the fat renders slowly and the edges crisp. Drain all but 2 tablespoons of that fat (the good stuff) to fry onions later. Trust me, the flavor pays off when it’s baked into the beans.
- Caramelize Onions First: After cooking the bacon, don’t just chop the onions and toss them in. Sauté them in the bacon fat until deep golden—about 15 minutes—so they melt into the molasses and sugar instead of sitting as raw chunks. This is the thing that matters most for that rich, sticky sauce.
- Stir Molasses Early: Add the molasses and sugar with the beans, not just at the end. The heat will help them blend smoothly into the liquid, preventing clumps that turn into sad, bitter pockets. Stir well once, then let the oven do the work—resist the urge to keep checking.
Storing and reheating your st james baked beans
Refrigerator Storage
Let your St James' baked beans cool completely before transferring to airtight containers—I use glass Pyrex with snap-on lids for best results.
Store them in the fridge at 40°F or below for up to 4 days, though I’ve found they actually taste better after 2-3 days as the flavors meld even deeper. The sauce thickens slightly overnight, making each spoonful even more luxurious. 💫
Freezer-Friendly Tips
For long-term storage, portion the beans into freezer-safe containers or quart-sized freezer bags, leaving 1 inch of headspace to prevent expansion cracks. They’ll keep for up to 3 months without losing much texture, though the sauce may separate slightly.
To reheat, transfer directly from frozen to a lightly oiled skillet over low heat for 10-15 minutes, stirring occasionally with a splash of water or stock to revive the sauce.
Stovetop Reheating
My preferred method is stovetop because it restores that glossy, caramelized finish the beans deserve. Pour the beans into a heavy-bottomed pot with 2-3 tablespoons of water or beef stock, then heat over medium-low for 10-15 minutes, stirring gently.
If the sauce thickens too much, add a splash more liquid. Taste and adjust seasoning—you might need a pinch of salt or a drizzle of molasses to bring back that perfect balance. 🔥
Microwave Revival
For quick reheats, transfer a portion to a microwave-safe dish, cover loosely with a damp paper towel, and heat on 50% power in 1-minute intervals, stirring between each. This prevents the sauce from drying out.
If the beans look dry, add 1-2 tablespoons of water or stock and let them sit covered for 2 minutes to reabsorb the moisture. The texture won’t be as perfect as stovetop, but it’s a decent shortcut.
Oven Refresh
For a restaurant-quality reheat, preheat your oven to 325°F, transfer the beans to an oven-safe dish, cover with foil, and bake for 20-25 minutes. Uncover for the last 5 minutes to let the sauce caramelize slightly.
This method brings back that deep, smoky-sweet aroma that makes these beans irresistible. Perfect for when you’re serving a crowd and want them to taste homemade. ✨
Serving Leftovers
Leftovers reheat best when served with crusty bread or mashed potatoes—the contrast makes them even more satisfying. If the sauce has thickened too much, thin it slightly with a splash of beef stock or apple cider vinegar before serving.
I like to finish with a sprinkle of fresh parsley or a drizzle of honey for brightness. The beans keep well for 3-4 days in the fridge, so double the batch—you’ll want leftovers! 💛
Nutrition facts
Frequently asked questions
Can I use canned beans instead of dried for this recipe?
While you can substitute canned haricot beans, the texture and flavor won't be the same. Dried beans develop a deeper, nuttier taste when slow-cooked. If you must use canned, drain and rinse them thoroughly, then simmer in the pot for an extra 30-45 minutes to help them absorb the flavors. For best results, stick with dried beans soaked overnight.
Why does the recipe call for molasses AND brown sugar?
The molasses adds that signature deep, smoky-sweetness that defines St James' baked beans, while the brown sugar helps create a glossy finish and balances the acidity from the vinegar. Together, they create a perfect harmony of sweetness with just the right amount of complexity. Think of it like a flavor sandwich—molasses for depth, sugar for shine.
What's the best way to prevent the beans from burning while baking?
Always stir the beans every 30 minutes during the baking process to prevent sticking and burning. For extra insurance, tent the dish loosely with foil after the first hour. The butter added at the end creates a protective layer that helps caramelize beautifully without burning. If you notice browning too quickly, reduce oven temperature by 25°F.
Can I make this recipe vegetarian?
Skip the bacon and replace it with 1 cup chopped mushrooms sautéed until golden, plus 1 tsp smoked paprika for depth. Use vegetable stock instead of beef stock, and add 1 tbsp soy sauce for umami richness. The flavor will be different but still delicious—just more earthy than smoky.
How do I know when the beans are fully cooked?
Your beans are done when they're fork-tender with just a slight resistance in the center (about 1.5-2 hours total cooking time). They should easily mash between your fingers but not fall apart. The sauce should coat the back of a spoon and have a glossy, caramelized appearance. If they're still too firm, bake another 20-30 minutes.