
Beverages
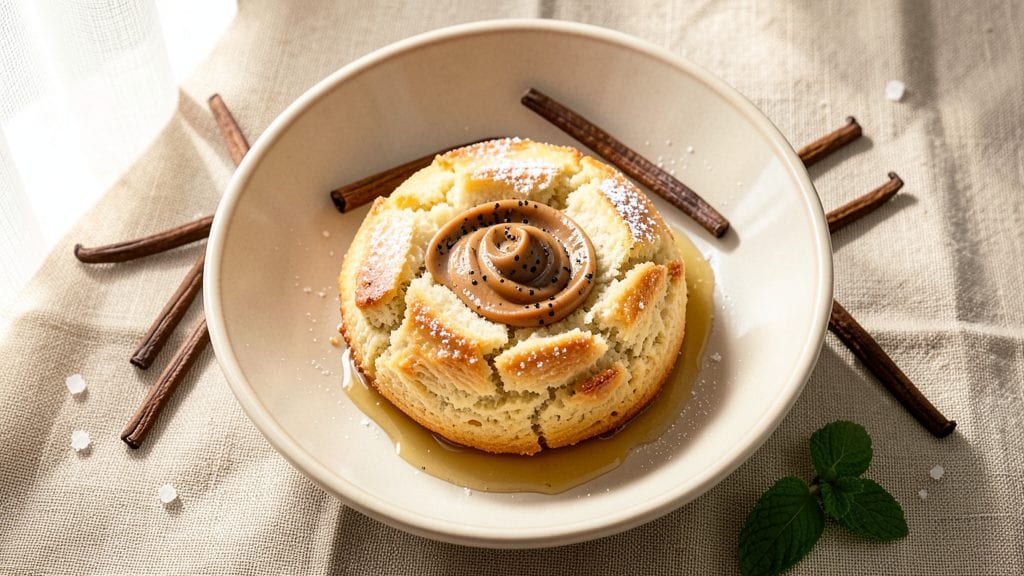
This Starbucks vanilla bean scone copycat recipe lets you bake those iconic buttery, fragrant treats with real vanilla bean seeds at home. The secret lies in precise dough preparation and baking techniques that create those signature layers.
I've tested countless variations to perfect this copycat recipe, ensuring every bite matches the café experience.
What sets these scones apart is the combination of cold butter and a touch of cornstarch for that signature flakiness, along with real vanilla bean paste for authentic flavor. The dough comes together in just 10 minutes, and baking at the right temperature ensures a tender crumb with crisp edges.
This method delivers restaurant-quality results without requiring advanced baking skills.
By the time these scones emerge from the oven, you'll have golden-brown treats with visible flaky layers and that unmistakable vanilla aroma. The texture is perfectly tender yet sturdy enough to hold up to icing or serve plain.
Whether you're treating yourself or serving a crowd, these scones will become your new favorite.
Pair them with coffee or tea for the full Starbucks experience—just like the original, but made with love in your own kitchen. Let's get started with the step-by-step instructions that bring this café classic to life at home.
Ingredients for starbucks vanilla bean scone copycat
Cold butter, real vanilla beans, and cornstarch create that iconic Starbucks scone texture at home.
| Ingredient | Amount | Notes |
|---|---|---|
| All-Purpose Flour 🌾 | 3 cups | Sifted for light texture |
| Granulated Sugar 🍚 | ½ cup | Plus 2 tbsp for sprinkling |
| Baking Powder 🍞 | 1 tbsp | Freshly measured |
| Salt 🧂 | ½ tsp | Fine sea salt preferred |
| Cornstarch 🌽 | 2 tbsp | For signature flakiness |
| Cold Unsalted Butter 🧈 | 1 cup | Cut into 1/2-inch cubes |
| Vanilla Bean Paste 🌿 | 1 ½ tbsp | Real vanilla seeds included |
| Heavy Cream 🥛 | ½ cup | Cold for best texture |
| Vanilla Extract 🍯 | 1 tsp | Pure vanilla extract |
| Vanilla Bean Seeds 🌿 | 1 whole | Scraped from 1 bean |
| Powdered Sugar 🍚 | 1 cup | For glaze (optional) |
| Milk 🥛 | 1 tbsp | For glaze (optional) |
The butter is non-negotiable—it must be cold (like fridge-cold) or those flaky layers disappear. Plugrá brand or Land O'Lakes work well, but any unsalted butter cut into even cubes does the trick. The vanilla bean paste? Walmart or World Market sell good quality, but if you only have extract, scrape seeds from a real bean (or use double the extract). Sift the flour and cornstarch together—this prevents lumps and gives that signature tender crumb. Pro tip: use a food processor for 2 seconds to break up the butter slightly before mixing.
No vanilla bean? Double the vanilla extract and add a pinch of almond extract for depth. Short on cornstarch? Arrowroot powder at the same amount works too. The heavy cream should be cold—this keeps the dough from overworking. If you skip the glaze, brush the warm scones with melted butter instead. For extra flakiness, freeze the dough for 15 minutes before shaping. And if you're feeling fancy, add a sprinkle of turbinado sugar on top before baking for caramelized edges.
These scones keep best at room temperature in an airtight container for 2 days, but honestly they're best fresh. For longer storage, wrap individually in parchment and freeze for up to 3 months. To reheat, warm in a 200°F oven for 5-10 minutes. I always bake a batch on Sunday—they disappear fast. Leftovers? Toss them in a toaster oven for 3-5 minutes to revive crispness.
Why You'll Love This Recipe
- No Fuss Mixing: I swear by this recipe because it’s literally a dump-and-stir situation. Five ingredients, no butter fussing or chilling tricks—just toss the dry stuff in a bowl, cut in the cold butter until it’s pea-sized, then fold in vanilla. That’s it. Honestly, my kids think I’m some kind of baking genius, but I’m just lazy enough to skip the overworked dough.
- Vanilla Bomb Crunch: The secret? Splitting the vanilla bean and using the paste. That little scrape of seeds in the center of each scone? Pure magic. It’s not just sweet—it’s got this warm, floral depth that makes you want to sip coffee just to match it. (Yes, even on a Tuesday night.)
- Breakfast or Snack Hero: These scones work everywhere. Crumble them into yogurt for a protein boost, serve them warm with jam for a lazy weekend brunch, or pack a few in a lunchbox—they stay fresh for days. Between us, I’ve even used them as a dessert base for ice cream. No judgment.
- Budget-Friendly Stash: A single batch costs less than half a Starbucks order, and the leftovers? Chef’s kiss. Freeze them in a bag, and you’ve got a 30-second breakfast for weeks. I’ve got a stash in my freezer right now from last month—still tender, still delicious. That’s what I call a win.
Step-by-step instructions for Starbucks vanilla bean scones copycat recipe
Here's how to recreate Starbucks' signature flaky texture and real vanilla bean flavor at home.
Cut and Mix Cold Butter into Dry Ingredients
Cut the 1 cup cold unsalted butter into ½-inch cubes and place them in a large bowl. Add the 3 cups all-purpose flour, 1 tablespoon baking powder, ½ teaspoon salt, and 2 tablespoons cornstarch. Use a pastry cutter or your fingers to work the butter into the flour until you have pea-sized crumbs with some larger butter pieces remaining. This creates the signature flaky layers—don't overmix or you'll lose that texture.
I like to use my fingers for this step because it's faster than a pastry cutter, but be gentle. You want the butter to stay mostly in chunks so it melts beautifully during baking. If the mixture feels too dry, that's normal—we'll add the wet ingredients next.
Add Wet Ingredients and Vanilla for Rich Flavor
In a separate bowl, whisk together the ½ cup granulated sugar, ½ cup heavy cream, 1.5 tablespoons vanilla bean paste, 1 teaspoon vanilla extract, and 1 whole vanilla bean seeds (scraped from the bean). Pour this mixture into the dry ingredients and gently stir with a wooden spoon until just combined. You'll see some wet spots, but that's okay—don't overmix.
The vanilla bean paste gives that authentic Starbucks flavor, but if you only have extract, don't worry. The combination of both extracts still delivers that warm vanilla aroma. The dough should hold together when pressed but still feel slightly crumbly—this is perfect for flaky scones.
Shape and Cut the Dough for Even Baking
Turn the dough out onto a lightly floured surface and gently pat it into a 1-inch thick circle. This is where precision matters—too thin and they'll bake too quickly; too thick and they won't cook through. Wrap the dough in plastic wrap and chill in the refrigerator for 30 minutes. Chilling firms up the butter so it doesn't melt prematurely in the oven.
After chilling, remove the dough and cut it into 12 equal wedges using a sharp knife or scone cutter. Place them on a parchment-lined baking sheet, leaving 1 inch between each scone. Sprinkle the tops with the reserved 2 tablespoons granulated sugar for that signature sweet crunch.
Bake Until Golden Brown and Crisp
Preheat your oven to 375°F and bake the scones for 15-18 minutes until they're golden brown on top. The edges should look set, but the centers should still feel slightly soft when pressed gently. Overbaking makes scones dry, so watch them closely toward the end.
Real talk: your oven might run hot, so start checking at the 15-minute mark. The moment they pull away from the edges of the pan is when they're done. Let them cool on the baking sheet for 5 minutes before transferring to a wire rack—this prevents them from becoming soggy.
Add Glaze (Optional) for Extra Sweetness
While the scones are still warm, whisk together the 1 cup powdered sugar and 1 tablespoon milk until smooth. Drizzle the glaze over the tops of the scones and let it set for 10 minutes before serving. This step is optional but gives that perfect Starbucks finish—like a little sweet hug on top.
Serve immediately for the best texture, but they'll still taste amazing at room temperature. These scones stay fresh for 2 days at room temperature or 3 days in the fridge. The flaky layers and real vanilla bean flavor make them taste just like Starbucks—without the line!
Pro Tips For Making Starbucks Vanilla Bean Scone Copycat
- Chill the Dough: DESCRIPTION: I learned this the hard way—skipping the 30-minute fridge rest makes scones dense and greasy. Pop that dough in the fridge before cutting, and you’ll get those signature flaky layers Starbucks nails. (Yes, even if you’re impatient like me.)
- Whisk the Vanilla: DESCRIPTION: Starbucks uses real vanilla bean paste, but if you’re scraping seeds from a pod, whisk them into the wet ingredients first. That way, every bite gets that signature swirl of flavor—not just the top layer. Sounds weird, but it works.
- Don’t Overmix: DESCRIPTION: The moment your dough looks shaggy, stop. Overworking it develops gluten, and your scones turn out tough instead of tender. Two or three folds max—just until the flour disappears. Trust the process.
- Bake on Wire Racks: DESCRIPTION: I used to crowd my scones on the baking sheet, and they’d steam instead of brown. Lift them onto wire racks halfway through baking—bottom and top—for even golden crusts and crisp edges. (Your future self will thank you.)
Creative variations of this recipe
Citrus Twist Scones
Brighten up your morning with a zesty variation by adding 1 tablespoon lemon zest and 1 tablespoon orange zest to the wet ingredients. The citrus pairs beautifully with vanilla, creating a refreshing contrast.
I like to use organic lemons and oranges for the best flavor. For extra pop, sprinkle 1 teaspoon turbinado sugar on top before baking—it caramelizes into a sweet-tart crust. 🍋
Brown Sugar Caramelized
Swap the granulated sugar for ½ cup packed light brown sugar in the wet ingredients. The molasses in brown sugar adds depth, while the extra moisture creates a moist, caramelized crumb.
After baking, brush the warm scones with 2 tablespoons melted butter and sprinkle with ¼ cup chopped pecans for texture. This variation tastes like a cross between a scone and a sticky toffee pudding. 🍯
Chocolate-Dipped Luxury
For a decadent twist, add ½ cup chocolate chips (I use Ghirardelli 60% dark) to the dry ingredients. After baking, let the scones cool completely, then dip the bottom half in melted white chocolate and place on parchment paper to set.
The contrast of warm vanilla and cool chocolate is pure indulgence. Store in an airtight container with parchment between layers to keep them fresh. 🍫
Spiced Chai Scones
Infuse the dough with warm spices by adding 1 teaspoon ground cinnamon, ½ teaspoon ground cardamom, and ¼ teaspoon ground ginger to the dry ingredients. For extra aroma, steep 1 chai tea bag in the ½ cup heavy cream before mixing it into the wet ingredients.
The spices create a cozy, aromatic experience perfect for fall mornings. 🌿
Almond Joy Fusion
Combine the flavors of a classic Almond Joy bar by adding ½ cup chopped toasted almonds and ¼ cup shredded coconut to the dough. For a tropical touch, replace the vanilla extract with 1 teaspoon coconut extract (available at specialty grocery stores).
The texture becomes delightfully chewy, with pockets of almond and coconut in every bite. 🥥
Maple-Pecan Breakfast Scones
Create a breakfast-worthy variation by adding ¼ cup chopped pecans and 1 tablespoon maple syrup to the wet ingredients. After baking, brush the warm scones with an extra 1 tablespoon maple syrup and sprinkle with flaky sea salt.
The sweetness of maple pairs perfectly with the buttery vanilla, making these scones a hearty morning treat. 🍁
Nutrition facts
Frequently asked questions
Why do Starbucks vanilla bean scones have those signature flaky layers?
The flaky texture comes from cold butter cut into small cubes and mixed into the dry ingredients. When baked, the butter melts and creates steam pockets between the flour layers. Using cornstarch (instead of all-purpose flour) enhances this effect by adding lightness. Never skip chilling the dough—this keeps the butter firm until it hits the oven!
Can I make these scones without vanilla bean paste?
If you only have vanilla extract, use 2 teaspoons total (instead of 1.5 tbsp paste + 1 tsp extract). For extra depth, add a pinch of almond extract (¼ tsp). The key is scraping seeds from a real vanilla bean if possible—they add tiny specks that mimic Starbucks' look. No vanilla bean? Double the extract and toast the seeds in a dry pan for 30 seconds before adding.
How do I fix scones that turned out dense instead of flaky?
Dense scones usually mean the butter melted too soon. Next time, freeze the dough for 15 minutes before shaping, and use colder butter (fridge-cold, not softened). Also check your baking powder—old leavening can cause flat results. For immediate fixes, slice the scones and toast them in a 350°F oven for 5-8 minutes to revive crispness.
Should I bake these scones right away or let the dough rest longer?
For best results, bake within 4 hours of making the dough, but let it rest in the fridge for at least 30 minutes before cutting. This prevents the butter from spreading too much during baking. If you must delay, wrap tightly and refrigerate up to 24 hours. For extra flakiness, let the shaped scones rest another 15 minutes on the baking sheet before baking.
What's the best way to store and reheat these scones?
Keep them fresh in an airtight container at room temperature for 2 days, or freeze for up to 3 months. To reheat, wrap in a damp paper towel and warm in a 200°F oven for 5 minutes or use a toaster oven for 3-5 minutes. For microwave reheating, cover with a damp towel and heat for 10-15 seconds—this restores crispness without drying them out.