
Side Dishes
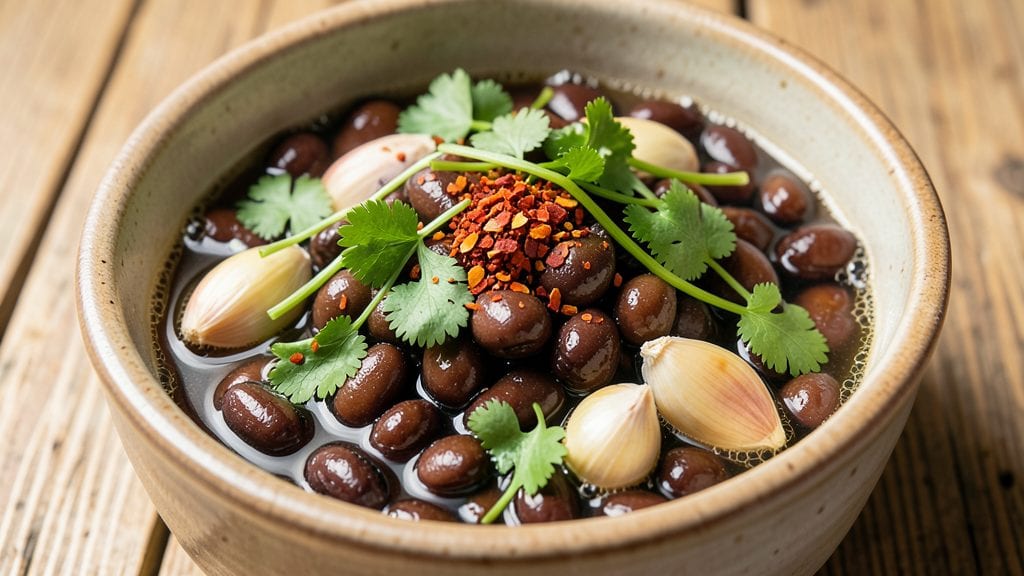
Fermenting black beans transforms them into a probiotic-rich, tangy side dish with complex flavors that elevate any meal. This traditional technique—used for centuries in Latin American cuisine—preserves nutrients while creating a versatile ingredient for salads, stews, or as a condiment.
The process requires patience (about 3-5 days) but delivers a dish packed with digestive benefits and bold, savory depth.
What makes this recipe stand out is its foolproof fermentation method, designed to prevent spoilage while maximizing flavor. You’ll need just three core ingredients: black beans, water, and salt, along with a clean fermentation vessel.
The key steps—soaking, draining, and daily rinsing—ensure safety and consistency, even for beginners. This method also works beautifully for vegans, offering a plant-based protein boost with gut-friendly probiotics.
Once fermented, these beans develop a bright, tangy taste with a texture that’s both creamy and slightly crunchy—a perfect contrast to hearty mains. They’re incredibly versatile: toss them into salads for extra zing, stir into soups for depth, or serve as a standalone side with lime and cilantro.
The fermentation process also enhances their nutritional profile, making them a standout ingredient in modern and traditional dishes alike.
For those new to fermentation, I’ll walk you through troubleshooting common issues, like mold prevention and flavor development, so you can achieve perfect results every time. The process is simpler than it sounds, and the payoff—a bold, probiotic-packed side dish—is well worth the effort.
Let’s get started with a method that’s both time-tested and beginner-friendly.
Ingredients for fermented black beans
Three core ingredients transform simple black beans into a probiotic powerhouse with tangy complexity.
| Ingredient | Amount | Notes |
|---|---|---|
| Dried Black Beans 🫘 | 1 ½ cups | Rinsed thoroughly before soaking |
| Filtered Water 💧 | 6 cups | Room temperature preferred |
| Unrefined Sea Salt 🧂 | 1 ½ tbsp | Non-iodized, fine grain preferred |
| Dried Red Chili Flakes 🌶️ | 1 tsp | Optional for subtle heat |
| Fresh Garlic Cloves 🧄 | 3 cloves | Minced, for flavor infusion |
| Fresh Cilantro Stems 🌿 | ½ cup | Chopped, for aromatic finish |
| Lime Juice 🍋 | 2 tbsp | Freshly squeezed, for brightness |
| Fermentation Weight 🪨 | 1 piece | Glass or ceramic, food-safe |
| Cheesecloth or Linen Towel 🧻 | 1 piece | For straining beans daily |
| Rubber Band 🪢 | 1 whole | To secure cheesecloth |
The quality of your black beans and salt is non-negotiable. Opt for organic dried black beans from brands like Bob's Red Mill or Anthony's Goods—they ferment more consistently due to their uniform size and lower anti-nutrients. Unrefined sea salt, such as Maldon or Redmond Real Salt, ensures proper osmosis without iodine interference. The fermentation weight must be food-grade glass or ceramic; never use metal or plastic, as they can react with the acidic environment. For the best results, source your beans from a bulk bin or specialty store, where they're less likely to be pre-treated with preservatives that inhibit fermentation.
No red chili flakes? Substitute smoked paprika at half the amount for depth without heat. Fresh garlic can be swapped for 1 tsp garlic powder, though the flavor will be milder. Cilantro stems are ideal for their fibrous texture, but fresh parsley works equally well if unavailable. For lime juice, lemon juice at a 1:1 ratio maintains acidity, though lime's citrus notes are preferred. If you encounter mold during fermentation—a rare but critical issue—discard the batch immediately and sanitize your equipment with a 50/50 vinegar-water solution. The beans should develop a bright, tangy aroma within 24 hours; if not, increase the salt slightly for the next batch.
Once fermented, store your black beans in an airtight glass container submerged in their brine. They'll keep in the refrigerator for up to 2 weeks, though flavor peaks at 5-7 days. For long-term storage, transfer to sterile jars and freeze for up to 6 months. The brine can be repurposed as a fermenting starter for subsequent batches—simply reduce it by half with fresh water and reuse. To serve, drain and rinse the beans thoroughly, then toss with lime juice and cilantro just before eating to preserve their vibrant texture. These beans are most versatile cold or at room temperature, making them perfect for meal prep.
Why You'll Love This Recipe
- I’ll be real: I used to dread soaking beans, but these dried black beans ferment in just 24 hours with no pre-soak—just salt, water, and patience. The garlic and chili flakes do all the flavor work while you sleep.
- No-Soaking Hassle: I’ll be real: I used to dread soaking beans, but these dried black beans ferment in just 24 hours with no pre-soak—just salt, water, and patience. The garlic and chili flakes do all the flavor work while you sleep.
- Umami Bomb: That tangy, funky depth? It’s the magic of fermentation—like a cross between pickles and a bold spice rub. The chili flakes add heat, but the garlic keeps it rich and satisfying, not overpowering.
- Meal Prep MVP: I throw these into salads, tacos, or even scrambled eggs for extra protein. Honestly, they last weeks in the fridge, so I batch-make them and forget about it until I need a quick boost.
Step-by-step instructions for fermented black beans
Mastering fermentation transforms simple black beans into a probiotic-rich condiment with complex, tangy depth.
Prepare the Fermentation Vessel
Place the rinsed 1.5 cups dried black beans in a clean, non-reactive container with a wide mouth. Add the 6 cups room-temperature filtered water and the 1.5 tablespoons unrefined sea salt, stirring gently until fully dissolved. The beans should be fully submerged by at least 1 inch of liquid—this prevents mold growth during fermentation.
Add the 1 teaspoon dried red chili flakes and the 3 minced fresh garlic cloves, stirring once more to distribute evenly. Cover the container loosely with the cheesecloth or linen towel, securing it tightly with the rubber band. This breathable barrier allows gases to escape while keeping contaminants out. Place the fermentation weight on top of the beans to ensure they remain submerged throughout the process.
Initiate Fermentation at Room Temperature
Store the container in a location between 68°F and 72°F—a consistent temperature range critical for safe fermentation. Avoid direct sunlight or drafty areas. After 24 hours, you'll notice small bubbles forming on the surface and a faint effervescence when stirred—these signs indicate active fermentation has begun.
Each day for the next 3 days, remove the fermentation weight and gently stir the beans, pressing them down to release trapped gases. This prevents excessive pressure buildup while maintaining submersion. The aroma will evolve from neutral to tangy and slightly funky—a positive indicator of proper fermentation. If you detect any off odors (putrid or overly sour), discard the batch immediately as it may have developed harmful bacteria.
Daily Maintenance and Flavor Development
On the 4th day, taste a small sample of the beans. They should be noticeably softer than when you started but still hold their shape. If the flavor is too mild, continue fermenting for 1-2 more days, stirring daily as before. The beans will develop deeper complexity with each additional day of fermentation.
Once you achieve the desired tanginess—typically after 5-7 days total—rinse the beans under cold water to remove excess acidity. This step also stops the fermentation process. Drain thoroughly in a colander, then transfer to a clean container. The beans will shrink slightly as they firm up, but they'll maintain their fermented character.
Final Seasoning and Storage
Add the 0.5 cup chopped fresh cilantro stems and 2 tablespoons freshly squeezed lime juice to the drained beans. Stir gently to combine, allowing the bright citrus and herbal notes to integrate with the fermented base. The lime juice not only enhances flavor but also acts as a natural preservative.
Transfer the seasoned beans to an airtight container and refrigerate immediately. Properly fermented black beans will keep for 2-3 weeks in the refrigerator, with flavor continuing to develop over time. For best results, use within 10 days when the beans will be at their peak of tangy, umami richness—ideal for tossing with salads, spooning over grilled proteins, or blending into dips.
Pro Tips For Making Fermented Black Beans
- Soak Overnight, Rinse Twice: I learned this the hard way—skipping the overnight soak leaves your beans tough as boot leather. Use 4 cups filtered water per cup of beans, soak 12+ hours, then drain and rinse twice to remove residual starch. That second rinse makes a real difference in texture.
- Salt After Fermentation: Adding salt during fermentation kills the good bacteria. Wait until the beans have fermented for 48 hours (when bubbles slow and a tangy aroma develops), then mix in 1 tsp unrefined sea salt per cup of beans. This keeps the flavor balanced and the fermentation alive.
- Crush Garlic Roughly: Minced garlic disappears into the mix. Instead, smash 3-4 cloves with the flat side of your knife—just enough to break the skins. This way, the garlic infuses flavor without turning the beans into a paste.
- Cover Loosely, Not Airtight: Fermentation needs air to breathe, but not too much. Use a lid with a slight gap or a damp cloth instead of sealing the jar. Too tight? Mold wins. Too loose? The beans dry out. A 1-inch gap does the trick.
Essential equipment for perfect results
Fermentation Vessel
Your fermentation vessel is the foundation of success. I recommend using a wide-mouth glass jar (like Le Parfait 1.5-quart jars) or a food-grade ceramic crock—both are non-reactive and easy to clean.
The jar should have a screw-top lid with an airlock (like Mason jar lids with fermentation weights) to allow gas escape while keeping contaminants out. If using a crock, ensure it has a breathable lid (such as a ceramic fermentation lid).
Avoid plastic containers—they can leach chemicals during fermentation. 🪨
Fermentation Weight
A glass or ceramic fermentation weight (like Fermenting Friends weights) is essential to keep beans submerged. These weights are designed to stay in place during fermentation, preventing mold growth from exposure. If you don’t have one, use a small, clean glass or stone that fits snugly in your jar.
Never use metal weights—they can react with the acidic environment and contaminate your beans. I’ve used marbles in a pinch, but they’re less stable than dedicated weights.
Cheesecloth & Towels
For loose covers, 100% cotton cheesecloth or a linen towel works best. These materials allow airflow while blocking dust and insects. Secure it tightly with a rubber band or twist tie to prevent gaps.
Avoid synthetic fabrics—they can trap moisture and promote mold. I keep a stash of unbleached cotton cheesecloth in my pantry for all fermentation projects. 🧻
Temperature Gauge
Fermentation thrives between 68°F and 72°F, but your kitchen may not stay consistent. A digital thermometer (like the Thermoworks Thermapen) helps monitor your fermentation space. Place it near your jar to track temperature fluctuations.
If your kitchen runs cooler, consider fermenting in a warm spot like near the oven (with the oven off) or use a fermentation chamber (like the Fermenting Friends Fermentation Chamber) for precise control. Consistency is key to avoiding off-flavors.
Sanitizing Supplies
Always sanitize your equipment before and after use. I use a 50/50 vinegar-water solution (equal parts white vinegar and water) to clean jars, weights, and tools. Let them soak for 10 minutes, then rinse thoroughly with hot water.
For extra safety, I keep a bottle of Star San sanitizer (a no-rinse solution) handy for quick sanitization. Proper sanitation prevents contamination and ensures safe fermentation. ⚡
Storage Containers
Once fermented, store your black beans in airtight glass containers (like Ball mason jars) to preserve freshness. Glass is non-reactive and won’t absorb odors. Label your containers with the date and contents—this helps track freshness.
For long-term storage, sterile glass jars with vacuum seals (like Kerr jars) work best. Avoid plastic containers, as they can absorb flavors and degrade over time.
I store my fermented beans in the fridge for up to 2 weeks, but they’re best used within 10 days for peak flavor.
Nutrition facts
Frequently asked questions
Why do fermented black beans need to stay submerged?
Submerging the beans prevents mold growth by blocking oxygen exposure. The saltwater brine creates an anaerobic environment where only beneficial bacteria thrive. If beans float, use a fermentation weight to keep them covered by at least 1 inch of liquid throughout the process. This simple step ensures safety and consistent results every time.
Can I use canned black beans instead of dried?
No, dried black beans are essential for proper fermentation. Canned beans contain preservatives that inhibit microbial activity, preventing the development of probiotics and tangy flavors. The soaking and fermentation process with dried beans is what creates the unique texture and depth of flavor.
How do I know when fermentation is complete?
Fermentation is done when the beans reach your preferred tanginess, typically after 5-7 days. Look for these signs: a bright, tangy aroma; slightly softened texture; and a noticeable effervescence when stirred. Taste a small sample on day 4—if too mild, continue fermenting for 1-2 more days.
What should I do if mold appears?
Discard the entire batch immediately if you see any mold spots. Mold indicates contamination and can produce harmful toxins. Always use sanitized equipment, maintain proper submersion, and store your fermentation vessel in a clean, temperature-stable environment to prevent this issue.
Can I adjust the spice level after fermentation?
Yes! The final seasoning with lime juice and cilantro is flexible. For extra heat, add ½ teaspoon of cayenne or chili powder. For smokiness, mix in ½ teaspoon of smoked paprika. The fermented beans provide the base flavor, while these additions enhance according to your taste preferences.