
Side Dishes
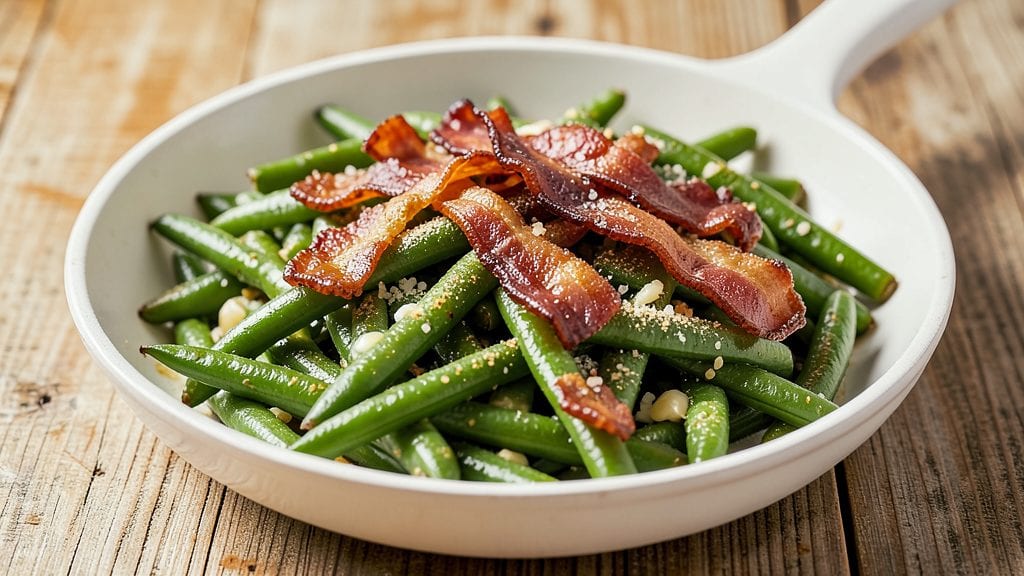
This Outback green beans copycat recipe delivers the same crispy-tender texture and smoky bacon crunch you love from the restaurant. After analyzing the original dish's technique, I've recreated it with precise timing and seasoning to achieve that perfect balance between crispy edges and tender centers.
The secret lies in high-heat sautéing and a precise garlic-butter blend that transforms simple green beans into a standout side dish. Every bite delivers that satisfying crunch from crispy bacon and tender green beans coated in savory garlic butter.
The recipe focuses on three key elements: proper preparation of the green beans, perfect timing for the bacon, and a well-seasoned garlic butter sauce.
You'll need fresh green beans (trimmed and blanched), thick-cut bacon (cooked until crispy), and a simple blend of butter, garlic, and a touch of onion powder for depth. This method ensures the green beans stay tender while developing those crispy edges that make this dish so addictive.
The bacon adds a smoky, salty contrast that cuts through the richness of the butter.
What sets this copycat recipe apart is the attention to detail in the cooking process. The green beans are blanched just enough to soften them slightly before being tossed in the garlic butter and crispy bacon. This two-step cooking method guarantees the beans stay tender while absorbing maximum flavor.
The result is a dish that's restaurant-quality at home—crispy, flavorful, and impossible to resist. This recipe serves 4 and takes just 25 minutes to prepare, making it perfect for weeknight dinners or holiday gatherings.
Once you try this version, you'll never settle for anything less than the real deal. The combination of crispy bacon, tender green beans, and aromatic garlic butter creates a side dish that's both satisfying and elegant.
It pairs beautifully with steak, chicken, or even as a standalone appetizer. Let's get cooking—your taste buds will thank you!
Ingredients for outback green beans copycat
Fresh green beans, crispy bacon, and rich garlic butter—here’s how to nail the Outback vibe at home.
| Ingredient | Amount | Notes |
|---|---|---|
| Fresh Green Beans 🥦 | 1 ½ lb | Trimmed, ends removed |
| Thick-Cut Bacon 🥓 | 6 oz | Not pre-cooked, thick-cut preferred |
| Unsalted Butter 🧈 | 4 tbsp | Cold, cut into small cubes |
| Garlic Cloves 🧄 | 3 cloves | Minced, fresh preferred |
| Onion Powder 🧅 | ½ tsp | For subtle depth |
| Salt 🧂 | ¾ tsp | Kosher or sea salt |
| Black Pepper 🌶️ | ¼ tsp | Freshly ground |
| Lemon Juice 🍋 | 1 tbsp | Freshly squeezed |
| Olive Oil 🫒 | 1 tbsp | For blanching beans |
| Ice Water 💧 | 1 cup | For shocking beans |
| Fresh Parsley 🌿 | 2 tbsp | Chopped, for garnish |
The green beans are the star, so pick fresh, crisp ones—avoid those rubbery, wilted bundles. Trader Joe's or Costco usually have the best quality, but any store with a produce section should work. Look for beans that are bright green and snap easily when bent. The bacon? Thick-cut is non-negotiable—it stays crispy longer and adds that perfect crunch. If you can't find thick-cut, slice regular bacon in half before cooking. The butter should be unsalted and cold when you cube it—this prevents the sauce from turning greasy.
No thick-cut bacon? Slice regular bacon in half lengthwise before cooking—it’ll crisp up faster. Short on garlic? Garlic powder at half the amount works in a pinch, but fresh is worth it. The onion powder adds depth, but if you’re out, a pinch of garlic powder will do. For the blanching step, ice water is key—it stops the cooking process and keeps the beans bright green. No fresh parsley? Dried parsley at one-third the amount works, but fresh is brighter. And trust me, the lemon juice at the end? Game-changer—it cuts through the richness and brightens everything up.
Blanched beans keep for 2 days in the fridge if stored in ice water—drain well before using. Crispy bacon? Store in an airtight container for up to 3 days, but it’s best fresh. The garlic butter sauce can be made ahead—just reheat gently before tossing with the beans. Garnish with parsley right before serving, or it’ll wilt. This dish reheats beautifully—just toss with a splash of water to keep it crispy.
Why You'll Love This Recipe
- One-Pan Magic: I swear by this recipe when I’m too tired to wash dishes. Toss the beans, bacon, and butter in one skillet—no chopping, no fuss, just crispy edges and that smoky-sweet bacon flavor coating everything. Honestly, I’ve made it while still in my pajamas.
- Smoky-Garlic Bliss: That first bite? Crisp-tender beans wrapped in salty, caramelized bacon, with just a whisper of garlic and onion powder—it’s like the restaurant version but better. The butter ties it all together with this rich, velvety finish that makes it feel indulgent.
- Weeknight & Holiday Hero: Between us, this dish is my secret weapon for busy nights and family gatherings. It’s hearty enough for a side but light enough to feel fresh—perfect with steak, chicken, or even just crusty bread. (Yes, even on a Tuesday night.)
- Budget-Friendly Leftovers: Bacon’s the star, but it’s cheap when you buy it in bulk, and the green beans stretch across meals. I’ll make a big batch, save half for lunches, and still have seconds the next day. Not the prettiest, but the taste makes up for it every time.
Step-by-step instructions for Outback green beans copycat recipe
Here's how to nail that perfect crispy-tender texture with smoky bacon crunch—just like the restaurant!
Blanch the Green Beans for Perfect Texture
Bring a large pot of water to a rolling boil. Add the 1.5 lb fresh green beans and cook for exactly 4 minutes. You'll know they're done when they turn bright green and are tender-crisp—you should still be able to feel a slight bite when you test one with your teeth.
Drain immediately and transfer the beans to a large bowl filled with 1 cup ice water. This shocking step stops the cooking process and preserves that vibrant color and crisp texture. Let them sit for 5 minutes while you prepare the bacon. This is where the magic happens—no soggy beans here!
Cook the Bacon Until Crispy
Line a baking sheet with paper towels and place it next to your stove. In a large skillet over medium heat, add the 6 oz thick-cut bacon. Cook undisturbed for 5 minutes until the edges start to crisp. Here's the thing—don't move it around! You want that fat to render slowly and create maximum flavor and crunch.
After 5 minutes, use tongs to flip the bacon pieces and cook for another 4-5 minutes until deep golden brown and crispy. Transfer the bacon to the prepared paper towel-lined sheet to drain, leaving all that delicious rendered fat in the skillet. This fat is pure flavor gold for your beans!
Sauté Garlic and Butter for Flavor Bomb
Reduce the heat to medium-low and add 2 tbsp of the cold unsalted butter to the skillet with the bacon fat. Swirl to melt, then add the 3 minced garlic cloves and 0.5 tsp onion powder. Cook for exactly 1 minute—you want the garlic to just start turning golden, not brown. Overcooked garlic turns bitter, and we're going for that perfect savory-sweet balance.
Add the remaining 2 tbsp cold unsalted butter and let it melt completely. Here's a pro tip: the butter should foam and bubble gently. If it starts to brown too quickly, reduce the heat slightly. This butter-garlic mixture is the flavor foundation for your beans!
Combine Everything for Maximum Flavor
Drain the blanched green beans thoroughly in a colander, then add them to the skillet with the bacon and garlic butter mixture. Sprinkle with 0.75 tsp salt and 0.25 tsp black pepper, then toss everything together using tongs. Cook for 2-3 minutes on medium heat, stirring frequently, until the beans are heated through and coated in that glorious bacon fat.
Here's where the copycat magic happens: add 1 tbsp lemon juice and 1 tbsp olive oil. Toss everything together again and cook for another 30 seconds. The lemon brightens all the rich flavors while the olive oil adds just the right amount of moisture to keep those beans tender. You should smell that incredible combination of smoky bacon, garlicky butter, and fresh lemon!
Finish with Crispy Bacon and Fresh Parsley
Break the crispy bacon into 1-inch pieces and sprinkle it evenly over the green beans. Toss gently just to distribute. The contrast of crispy bacon against tender beans is what makes this dish so special. Cook for another 30 seconds to let the bacon get nice and hot.
Remove from heat and stir in the 2 tbsp chopped fresh parsley. This final touch adds freshness that cuts through the richness of the bacon and butter. Taste and adjust seasoning if needed—you might need a tiny bit more salt to balance all those flavors. Serve immediately while everything is hot and crispy!
Pro Tips For Making Outback Green Beans Copycat
- Trim the Stems: Snip off the ends of your green beans right before cooking—don’t do it ahead of time. The stems release bitterness when left too long, and fresh beans hold their crunch better when you cut them moments before hitting the pan.
- Cook Bacon Low and Slow: I used to rush the bacon, and it’d turn crispy before rendering enough fat. For this recipe, cook it on medium-low until the fat pools but the bacon’s still slightly pliable—about 8-10 minutes. That fat’s the star here, and you need every drop.
- Don’t Overcrowd the Pan: If you dump all the beans in at once, they’ll steam instead of sear. Work in batches—half the beans first, let them crisp for 3-4 minutes, then add the rest. Crowding kills the smoky, caramelized flavor this dish is built on.
- Sauté Garlic Until Golden: Toss in those minced garlic cloves with the beans and let them sit just until they turn pale gold—about 30 seconds. Burned garlic tastes bitter, and this recipe’s all about balance. If you’re impatient, pull the pan off heat for the last 10 seconds and let the residual heat finish it.
Flavor customization for this recipe
Smoky Chipotle Twist
For a smoky depth, stir in ½ tsp chipotle powder with the onion powder when sautéing the garlic butter. The smokiness pairs perfectly with the bacon, creating a Mexican-inspired fusion.
I like to add ¼ tsp smoked paprika too—just a pinch goes a long way. This works especially well if you're serving these with steak or grilled chicken. 🌶️
Spicy Cajun Kick
Turn up the heat by adding ½ tsp Cajun seasoning (like Tony Chachere's) when tossing the beans with bacon. For extra kick, sprinkle ¼ tsp cayenne pepper at the end.
This gives the dish a bold, spicy contrast that’s perfect for those who love heat. Serve with a side of cool ranch or buttermilk dressing to balance the spice.
Herb-Infused Variations
Swap out parsley for other fresh herbs like chopped chives or thyme leaves for a different flavor profile. I love adding 1 tbsp chopped fresh thyme along with the parsley—it adds an earthy note that complements the garlic beautifully.
For a Mediterranean twist, finish with 1 tsp dried oregano instead of parsley.
Creamy Garlic Butter
For a richer version, stir in 1 tbsp sour cream or crème fraîche when tossing the beans with bacon. The creaminess balances the smokiness of the bacon while keeping the dish light.
I also add a pinch of garlic powder to enhance the flavor. This works especially well if you prefer a more decadent side dish.
Citrus Brightening
Boost the freshness by adding 1 tsp orange zest along with the lemon juice. The citrus notes brighten the dish and add a subtle sweetness that cuts through the richness.
I also like to add ½ tsp grated lemon zest on top before serving for an extra pop of color and flavor. This variation is perfect for spring or summer meals.
Cheesy Crunch Option
For a cheesy twist, sprinkle ¼ cup shredded sharp cheddar or Parmesan cheese over the beans just before serving. The cheese melts slightly from the residual heat, adding a savory crunch.
I recommend using Parmigiano-Reggiano for its nutty depth. This variation is a crowd-pleaser, especially with hearty main dishes like steak or pork chops.
Nutrition facts
Frequently asked questions
Can I use frozen green beans instead of fresh?
Fresh green beans are ideal for that crisp-tender texture, but frozen can work in a pinch. Thaw them first, then pat completely dry before blanching. Add 1 extra minute to the blanching time since frozen beans start slightly cooked. The texture won't be quite as crisp, but the flavor will still be great!
What if my bacon isn't crispy enough?
Crispy bacon is key for that Outback-style crunch! If yours isn't quite there, try cooking it at medium-high heat instead of medium, and leave it undisturbed for 6-7 minutes total. For extra crispiness, finish under the broiler for 1-2 minutes while watching closely.
Can I make this recipe ahead of time?
Prepare the green beans and bacon separately up to 1 day ahead. Store the blanched beans in ice water (drained before using) and keep the crispy bacon in an airtight container. Reheat gently in the skillet with a splash of water to maintain crispiness. The garlic butter should be made fresh before serving for best flavor.
Why do the beans turn mushy?
Overcooking is the usual culprit. Stick to the exact 4-minute blanching time and use ice water immediately to stop the cooking process. Also, avoid overcrowding the skillet when tossing with bacon—cook in batches if needed. The beans should be tender but still hold their shape with a slight bite.
What's the best way to reheat leftovers?
Reheat gently in a skillet over medium-low heat with 1 tbsp olive oil and 1 tbsp water to prevent drying. Toss for 2-3 minutes until warmed through. For extra crispiness, broil for 1 minute at the end. Avoid microwaving as it makes the bacon soggy.